 1 month ago
23
1 month ago
23
Recipe Highlights
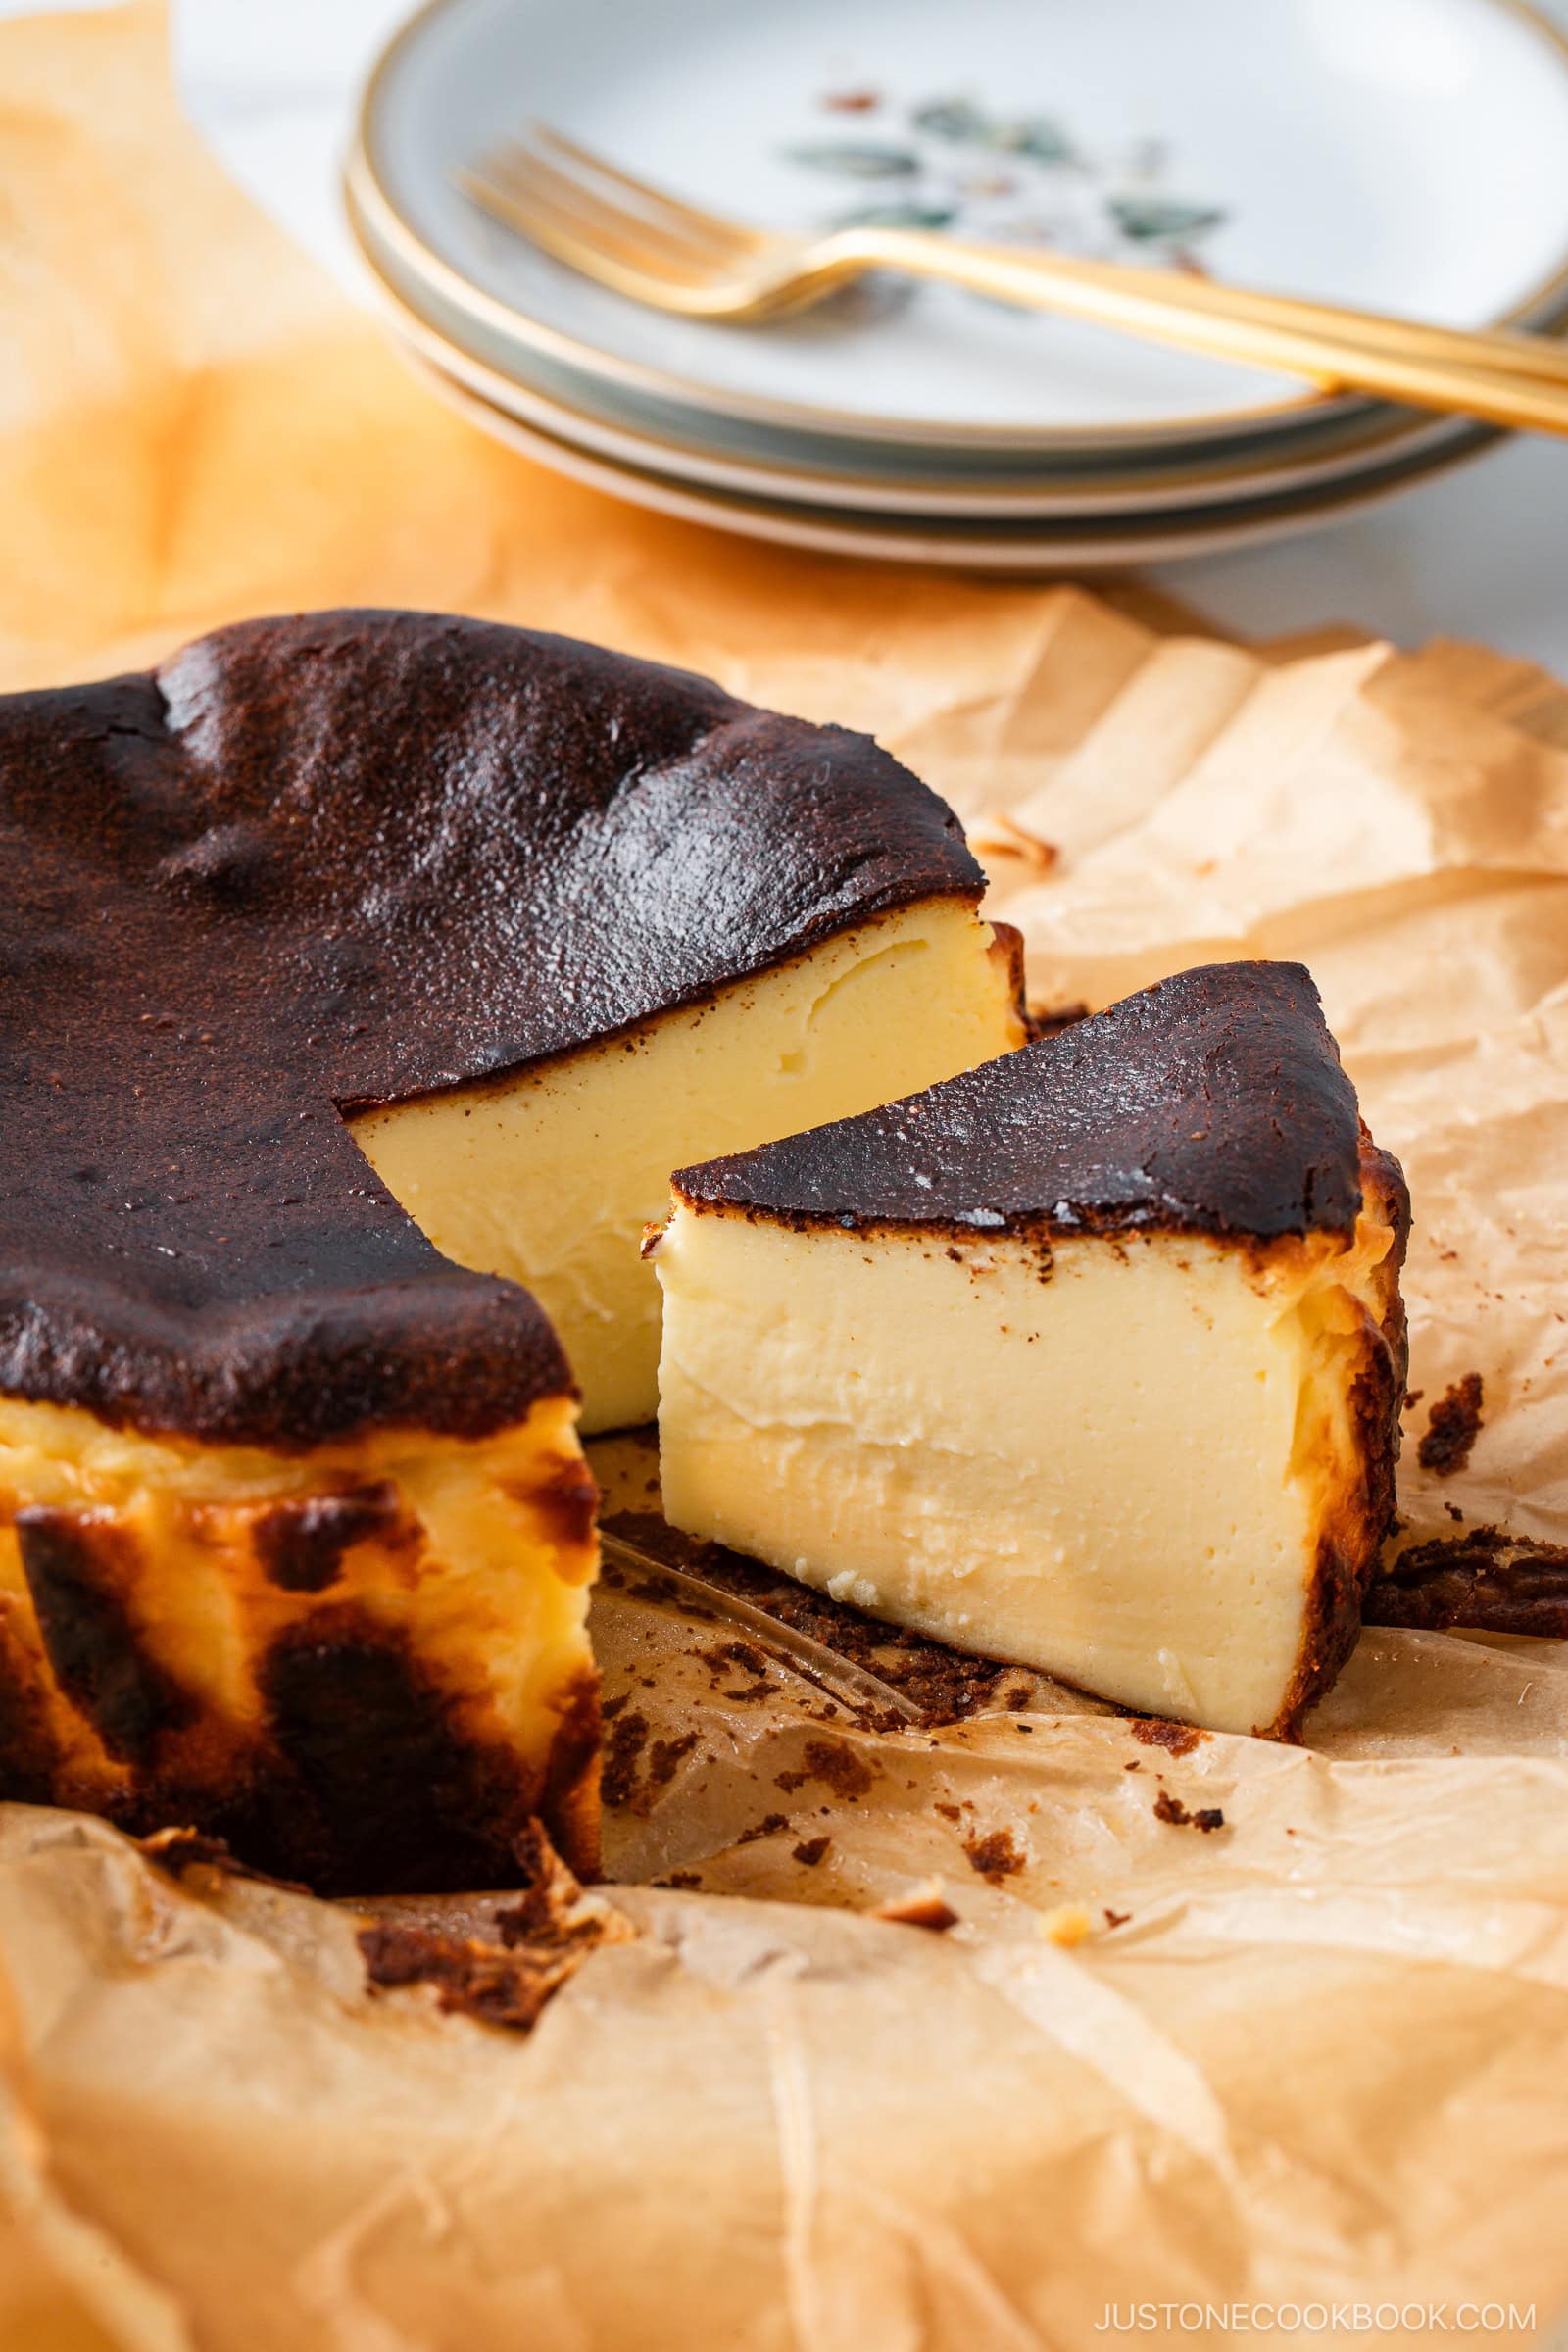
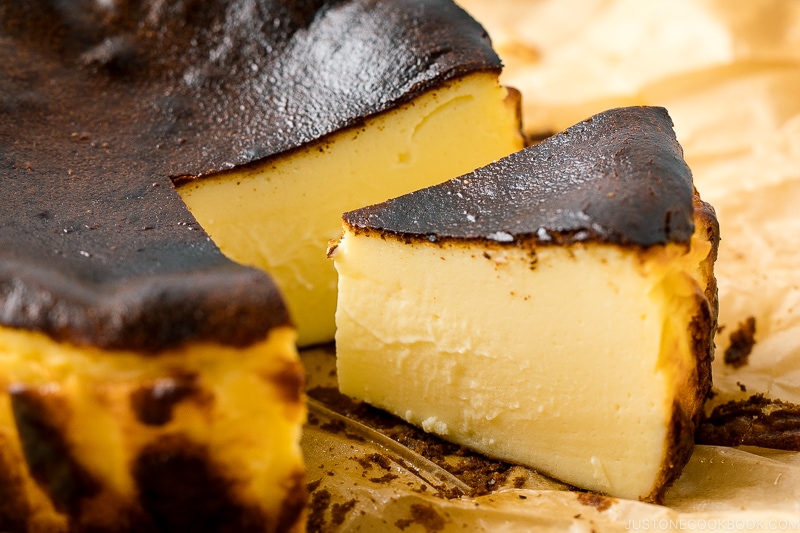
This Basque Cheesecake may look bold and dramatic, but it’s one of the easiest cheesecakes you can bake at home. With no crust and simple ingredients, it relies on high heat to create its signature dark top while keeping the center creamy and custardy. After testing many versions, I found the balance that delivers a deeply caramelized exterior with a dreamy, smooth center.
- fuss-free – no crust, no water bath
- creamy center with a rich, caramelized exterior
- beginner-friendly recipe with simple ingredients
If you love cheesecakes, try my Japanese Cheesecake, Matcha Basque Cheesecake, and Baked Cheese Tarts recipes next!
Table of Contents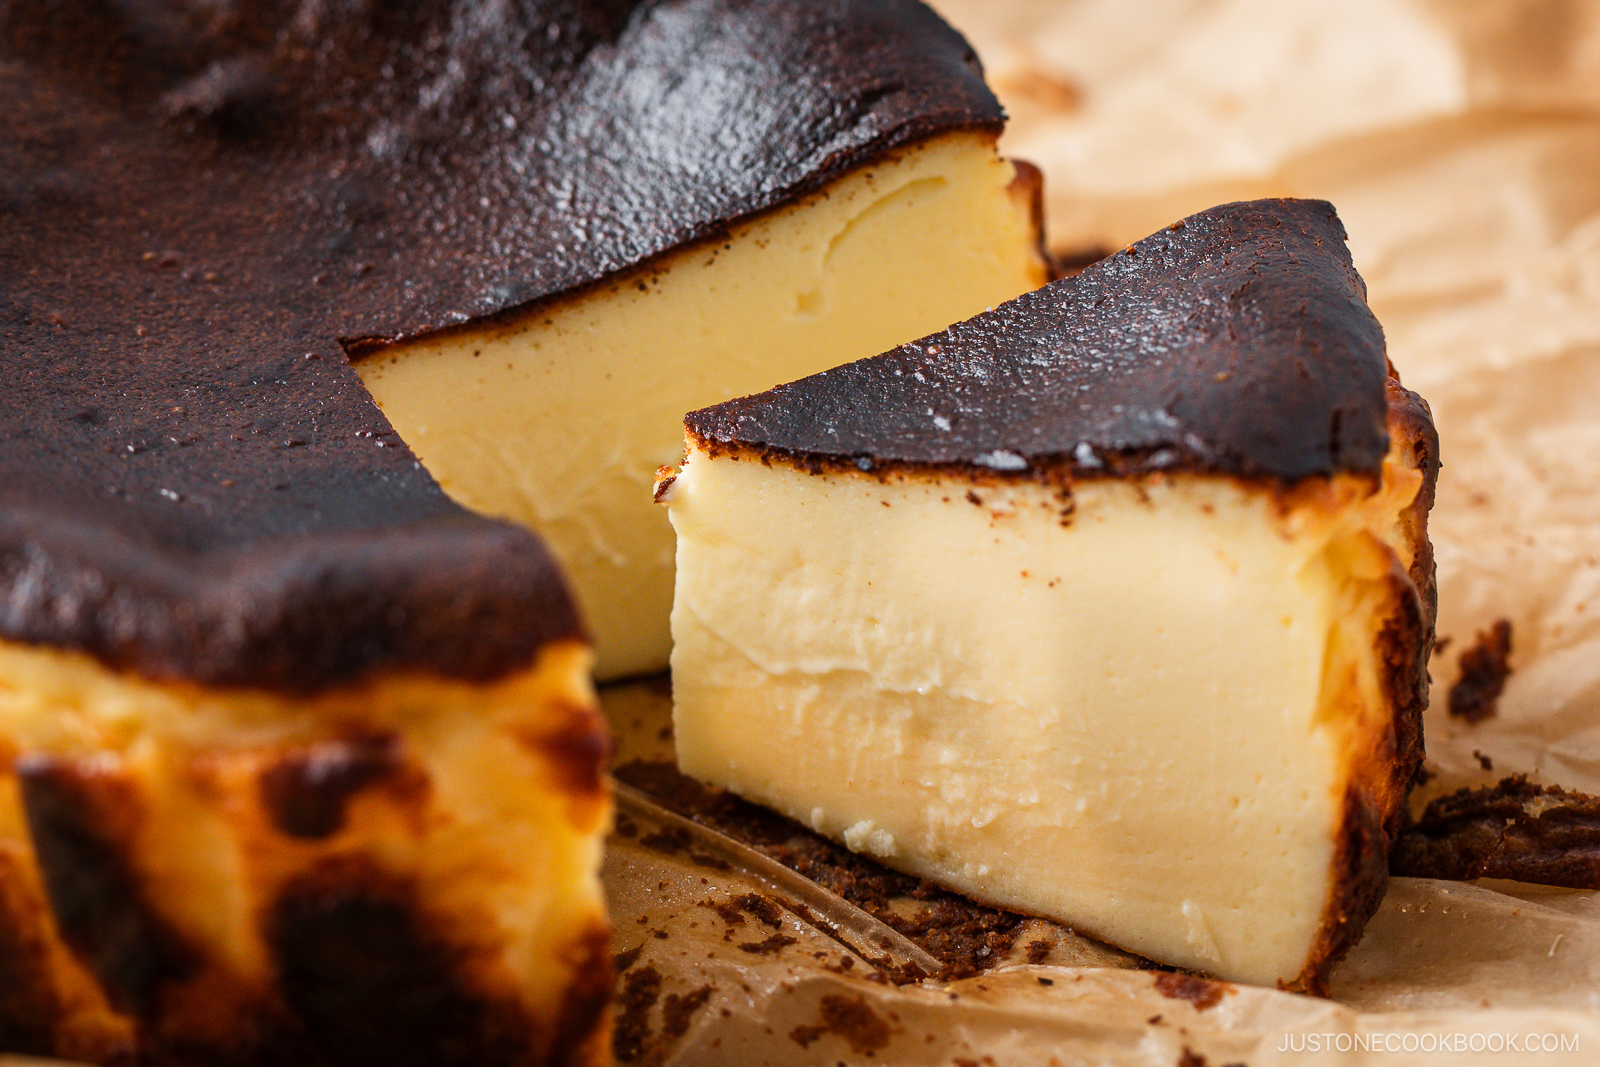
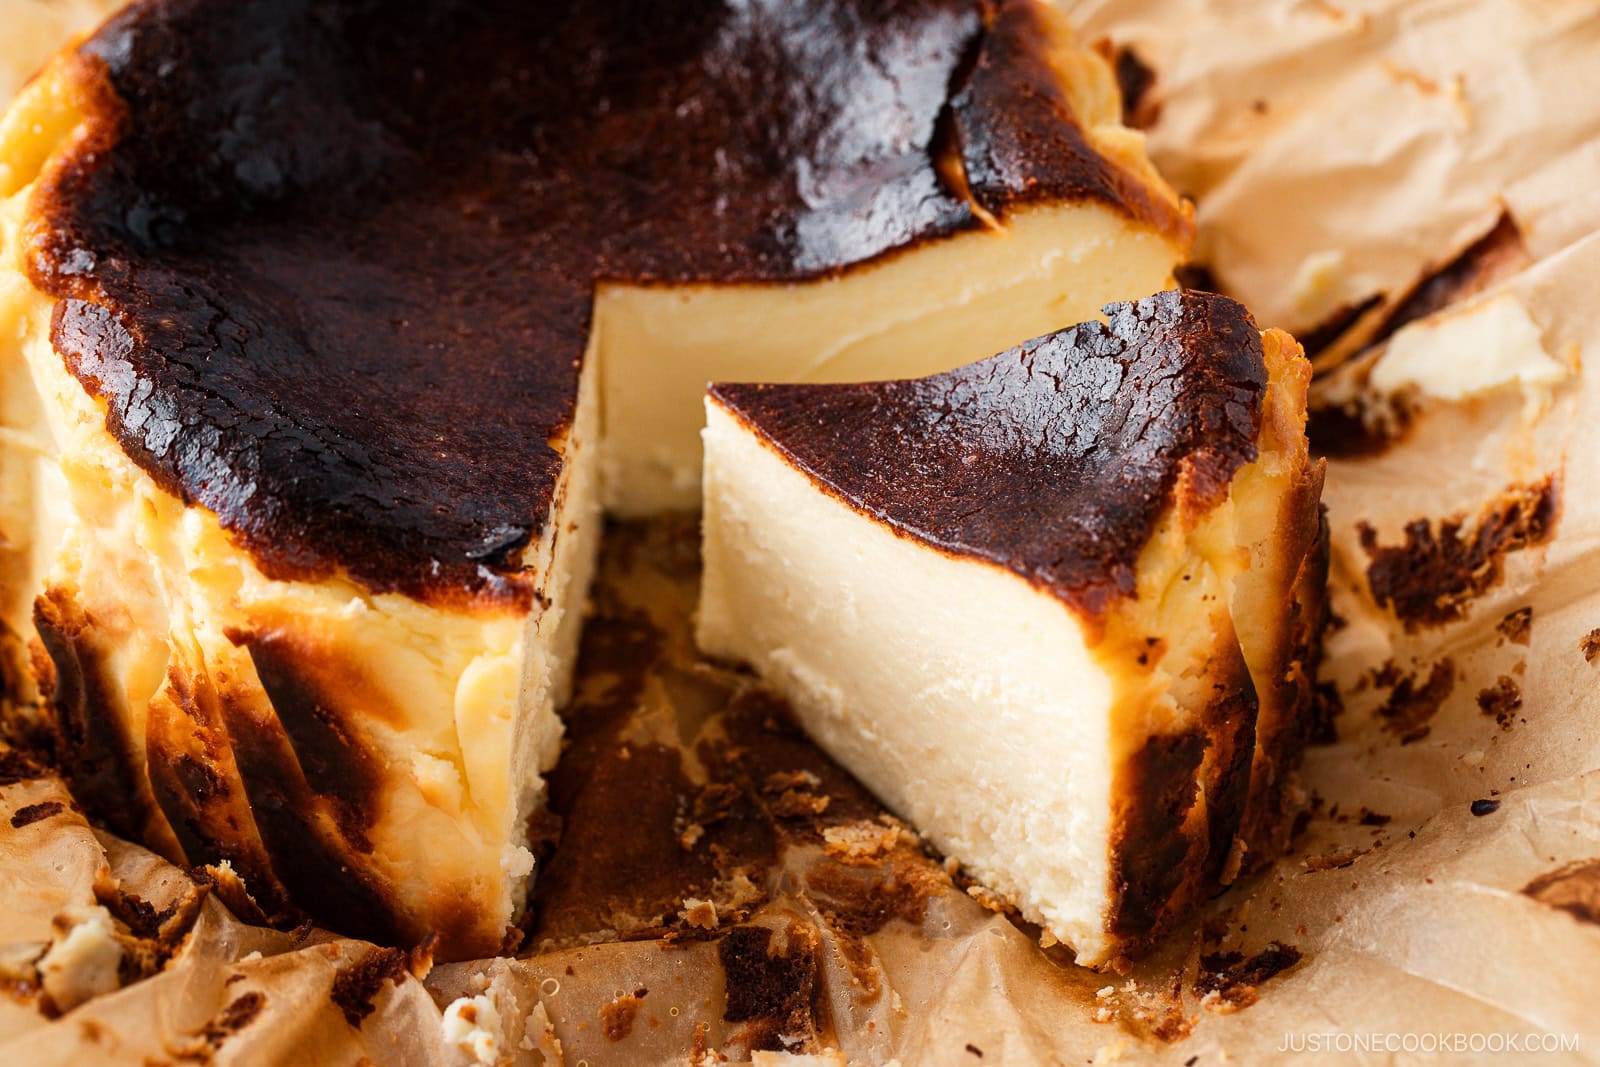
What is Basque Cheesecake?
Basque cheesecake, also called tarta de queso, originated in the Basque region of Spain. Created in 1990 at La Viña in San Sebastián, it’s known for its dark, caramelized top, crustless shape, and creamy interior.
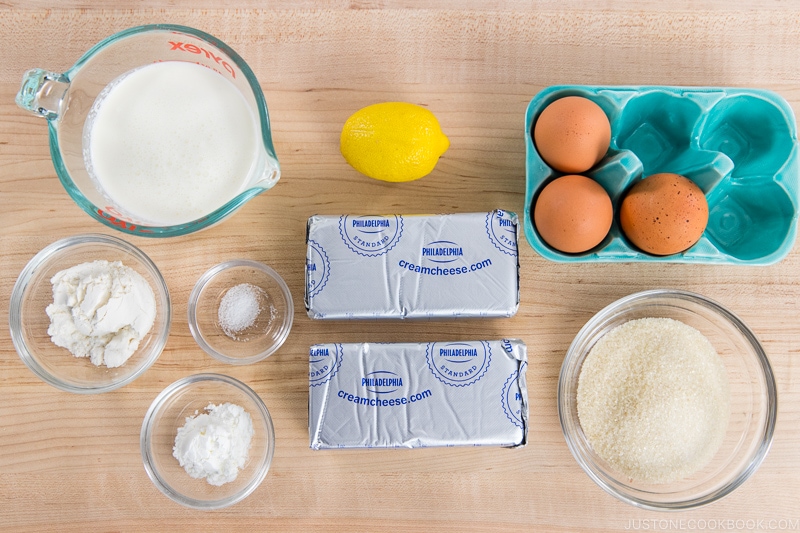
Ingredients for Basque Cheesecake
You’ll need a 3-inch deep 6-inch round cake pan with removable bottom, which is perfect for 6 people.
- cream cheese – use Philadelphia blocks, NOT the whipped or reduced-fat type
- large eggs
- heavy whipping cream – 36–38% fat
- granulated sugar
- cake flour
- lemon juice
- kosher salt
- vanilla extract
Find the printable recipe with measurements below.
Jump to RecipeHow to Make Basque Cheesecake
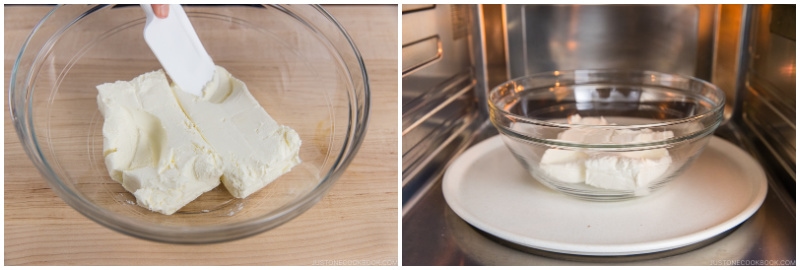
- Preheat the oven for at least 30 minutes so it’s fully hot. Bring the cream cheese, eggs, and heavy cream to room temperature for easy mixing. Line a deep 6-inch round cake pan or springform pan completely with sheets of parchment paper, folding the excess down over rim.
- Blend the cream cheese and sugar. Warm up the cream cheese in the microwave a little bit and mix well with sugar until smooth.

- Make the batter. Whisk the eggs in a separate bowl, then gradually drizzle them in and blend until combined. Add the remaining ingredients in order, mixing well before adding the next. Press out any lumps early while the mixture is still thick.
- Bake. Pour the batter into the prepared pan set on a rimmed baking sheet and bake at high heat for 30–35 minutes, until the top is deeply browned and the center still jiggles when gently shaken.
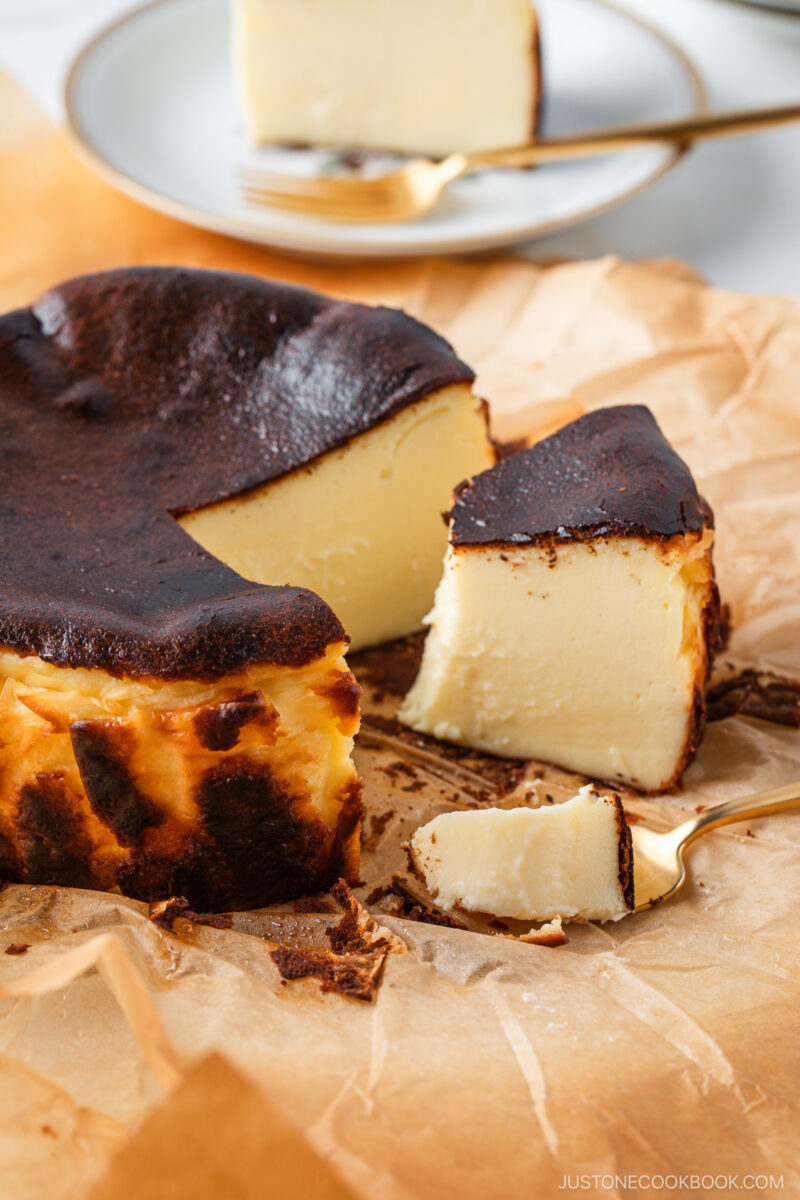
- Cool and serve. Let the cheesecake cool completely at room temperature so it can set naturally as it sinks. Serve at room temperature for a custardy texture, or chill in the fridge and slice for a firmer cheesecake.

Nami’s Recipe Tips
These detailed tips will help you make Basque cheesecake perfectly every time.
For Prepping:
- Preheat thoroughly. It’s important to heat the oven for at least 30 minutes. A very hot oven is essential to properly caramelize the top.
- Use convection bake (oven with fan) to achieve a glossy brown top. For a regular oven, try setting the rack high where it’s hotter; just don’t let the parchment paper touch the top heating element.
- Use room-temperature ingredients. They’ll blend easily for a smooth batter and uniform texture. If your cream cheese is cold and firm, microwave it at 50% power in 15-second bursts until it’s soft and smashes easily (~45 seconds).
- Line the cake pan with parchment paper. Don’t skip this! Double line it to ensure full coverage (unless your paper is wide/large). Trim or fold down the excess paper if it’s too close to the top of the oven.
For Batter & Mixing:
- Smooth the batter early. Press and rub the cream cheese with a silicone spatula while the batter is still thick. Scrape down the bowl and spatula often—lumps are much harder to fix once the batter becomes liquid.
- Add ingredients gradually. Blend each ingredient completely before adding the next.
- Use cake flour. It has less gluten than all-purpose (plain) flour, which helps keep the cake tender rather than slightly firm. I also add cornstarch for a lighter texture.
- Balance the flavor. Traditionally, Basque cheesecake is made without lemon and salt, but I add both—lemon juice brightens the cake, and salt enhances the overall flavor. I don’t add vanilla, as in the traditional recipe, but you can include it if you prefer.
- Remove air bubbles. Before baking, tap the cake pan filled with the batter on the counter a few times and run a skewer in the batter to pop any air pockets.
For Baking:
- Adapt to your oven. It’s a fact: Every oven is different. Even if you follow my recipe to a T, you may not get the exact same texture. Use your judgment and watch closely as you bake.
- Keep the heat in. Put the cake pan in the oven quickly and avoid opening the door while baking—you don’t want to lose heat.
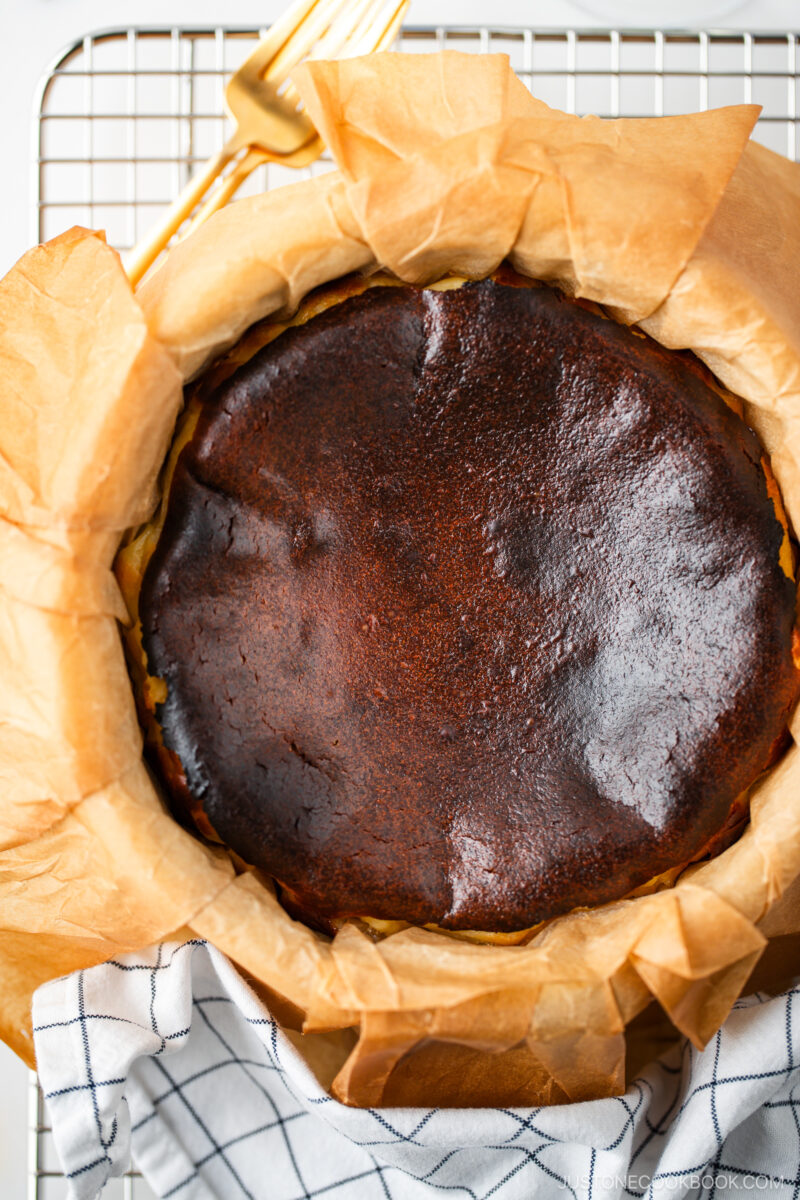
- Watch for doneness. The cake is done when the top is deeply browned and the center still jiggles.
- Do not overbake. Never bake longer than 30–35 minutes, even if the top hasn’t fully darkened. Overbaking curdles the filling, and it cannot be fixed.

For Cooling & Serving:
- Let the cake cool on a wire rack. As it cools, it will sink slightly and continues to set from the residual heat. Once it reaches room temperature, refrigerate it. Don’t chill the cake while it’s still warm, as this can affect other foods in the fridge.
- Choose your texture—custardy or firm. I like to take it out of the fridge about 30 minutes before serving. Serve at room temperature for a soft, custardy filling, or chilled for a firmer texture.
- Warm your knife each time you slice. I like to fill a tall mug cup with boiling water, dunk the blade, then quickly dry it with a towel. Slice in one smooth motion and pull the knife straight out for clean cuts.
- Warm a cold slice if desired. Microwaving it for a few seconds brings out the cream cheese flavor, and it’s very delicious!
Variations and Customizations
Looking to change things up? Try these easy and tasty ideas!
- Creamier center. Bake on the shorter end of the time range and chill overnight.
- Firmer texture. Bake slightly longer and chill for several hours before serving.
- Gluten-free option. Substitute the cake flour with rice flour.
- Serve with berries, fruit compote, or chocolate. Traditionally, the cheesecake is served plain, and that’s my favorite way—but toppings are always optional.
What to Serve with Basque Cheesecake
This Basque burnt cheesecake works year-round and shines with simple beverages.
- With coffee – It’s delicious with an espresso or Japanese Iced Coffee.
- With matcha – Serve creamy and cozy Matcha Latte to balance the richness nicely.
- With black tea – Japan’s favorite Royal Milk Tea is delicious served hot or cold!
- With hojicha – For a low-caffeine beverage that’s nutty and toasty, try Hojicha Latte.

Storage and Reheating Tips
To store: Once the Basque cheesecake has cooled to room temperature, store it in an airtight container and refrigerate for up to 3 days.
To reheat: This cheesecake is best enjoyed chilled or at room temperature. If chilled, let it stand at room temp for 30 minutes to 2 hours before serving.
FAQs
Can I make this Basque cheesecake recipe ahead of time?
Yes. Basque cheesecake is an excellent make-ahead dessert. You can bake it one day in advance, let it cool completely, and refrigerate it. Chilling also helps the texture set and makes slicing cleaner, especially if you prefer a firmer center.
Why isn’t my Basque cheesecake browning on top?
This usually means the oven was not hot enough. Preheat for 30 minutes (or longer) and use the convection setting if you have one. Baking on a higher rack can also help, but avoid opening the oven door since heat loss affects browning.
The deep color comes from caramelization and browning reactions, which rely on sugar. Make sure you did not reduce the sugar significantly.
A wider pan spreads the batter thinner, which can affect how the top browns.
My Basque cheesecake is browning too fast.
Every oven is different, so you may need to adjust the oven temperature. Even if you follow the recipe exactly, the color and texture can vary. Watch the cake closely as it bakes.
If the top is browning too quickly, lower the oven temperature. It’s often better to sacrifice a bit of color than to risk overbaking. Use your judgement and adjust as you go.
Why is the center still gooey after chilling?
If the center stays raw even after chilling, the cheesecake needed slightly more baking time. Every oven behaves differently, so small adjustments are normal. A jiggly center when warm is expected, but it should set more once chilled.
Can I use a larger cake pan?
Yes, but please scale the recipe as a wider pan spreads the batter thinner, which can affect how the top browns.
Multiply the recipe by 1.5 for a 7-inch pan or by 2 for an 8-inch pan, both at least 3 inches deep. Baking time will increase depending on your oven.
I’d love to hear how yours turned out! 💛 Please leave a star rating and comment below to share your experience. Your feedback not only supports Just One Cookbook but also helps other home cooks discover recipes they can trust.
- 1 lb cream cheese (226 g x 2 blocks for 1 6-inch cake; I used Philadelphia brand; at room temperature)
- 3 large eggs (50 g each w/o shell) (at room temperature)
- 1 cup heavy (whipping) cream (at room temperature)
- 2 Tbsp cake flour (or use all-purpose flour; use rice flour for gluten-free; measure using the “fluff and sprinkle“ method and level it off)
- 2 tsp cornstarch (or use potato starch or cake flour)
- 1 Tbsp lemon juice
- ½ cup sugar
- ⅛ tsp Diamond Crystal kosher salt
Before You Start…
Please note that this cake requires 2–3 hours of cooling time. You can serve it either at room temperature or chilled in the refrigerator for an additional 4 hours.
Gather all the ingredients.
To Preheat the Oven
Preheat a convection oven (with fan) to 450ºF (230ºC) for at least 30 minutes. If you don’t have convection, preheat a conventional oven to 475ºF (245ºC). If your oven doesn’t heat up very well, preheat it at the hottest temperature (mine is 550ºF/290ºC) for 30–60 minutes, then turn it down to 475ºF (245ºC) when it's time to bake.
Oven rack: I used my convection oven's middle rack, as it's ideal position for the fan to circulate the air. If you use a conventional oven, move the rack slightly higher as the temperature toward the top is hotter. Keep in mind that a 3-inch deep cake pan needs extra space for rising.
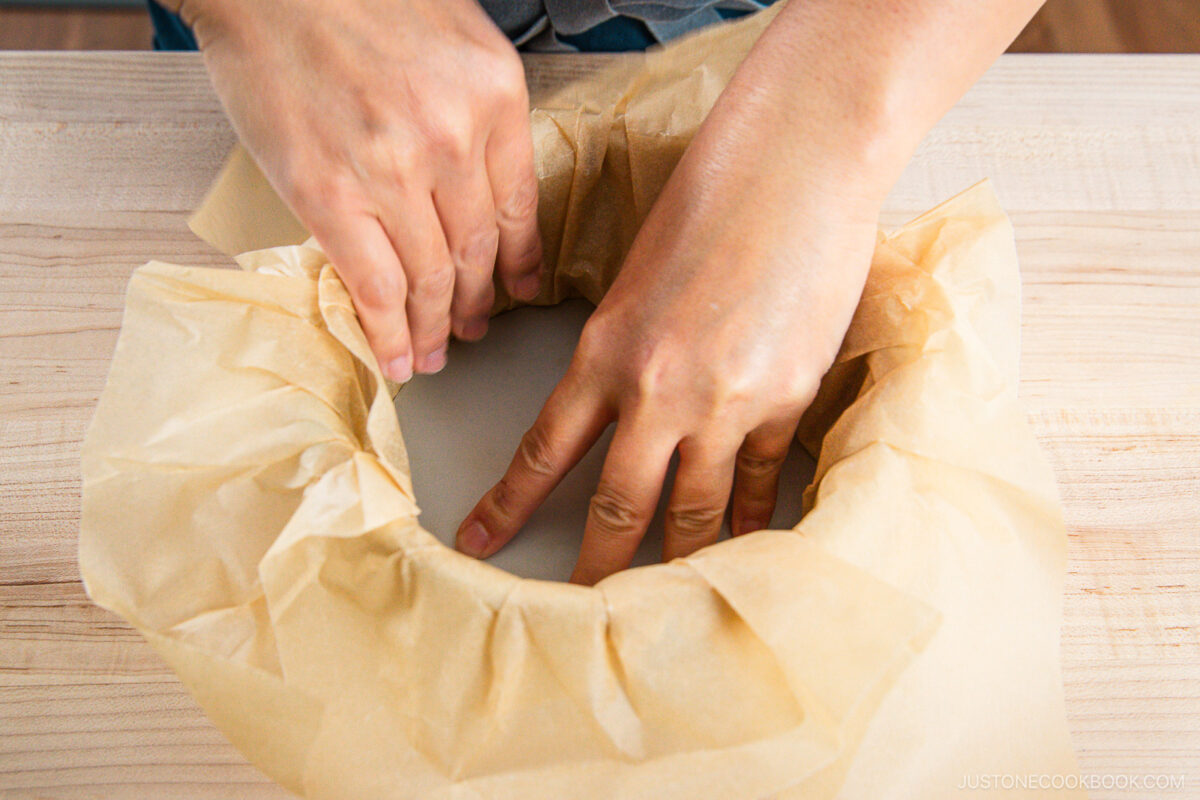
To Line the Cake Pan
Gather one 6-inch (15-cm) round cake pan with removable bottom. Prepare two rectangular sheets of parchment paper long enough to hang over the sides of the pan by 2 inches (5 cm). Place them crisscross to make sure they cover all inside surfaces of the pan. (Or use one sheet if your paper is extra wide.) Fold each sheet in half, then again into quarters, like a paper napkin.
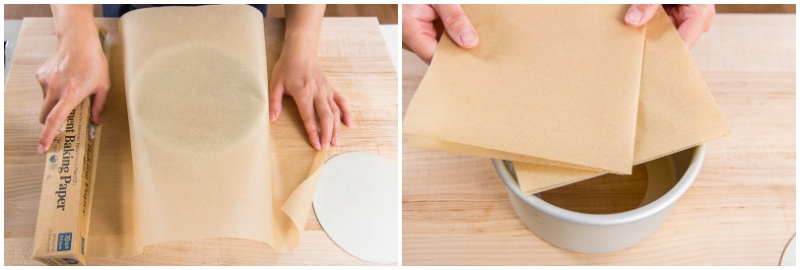
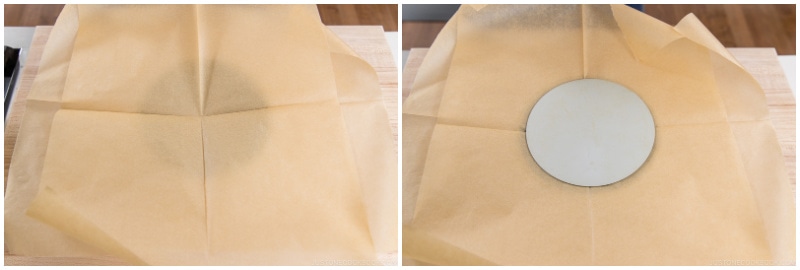
Unfold the sheets and place them crisscross as before. Find the center point where the creases intersect. Center the parchment sheets over the cake pan ring, then center the removable bottom on top.
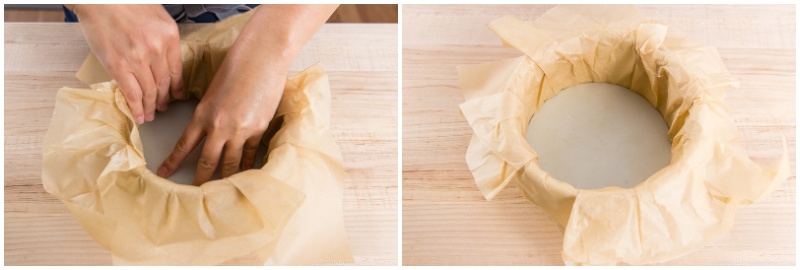
Press them down into the cake pan, using the removable bottom to crease the paper into the pan and against the insides for a snug fit. Press and crease the paper edges down around the outside of the cake pan, too.
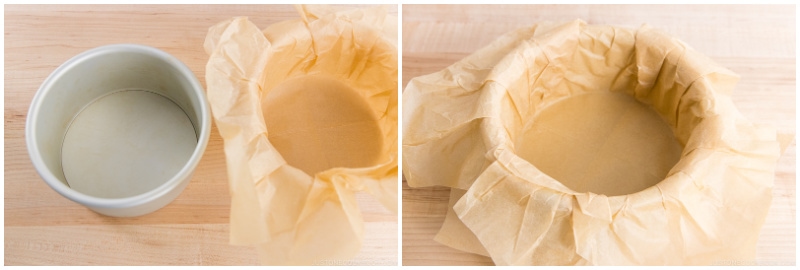
Gently take out the removable bottom and parchment sheets, now molded to the shape of the pan. Place the removable bottom back into the cake pan (as it should be). Then, fit the molded paper into the pan and press it down to fit snugly. (If you‘re doubling the recipe, repeat with a second cake pan.)
To Make the Batter
Place 1 lb cream cheese in a large bowl. Make sure the cream cheese is at room temperature.
Nami's Tip: If the cream cheese is cold and firm, microwave it at half power (50%) in 15-second increments until it‘s room temperature (about for 45 seconds).
★ Hand Mixing Method
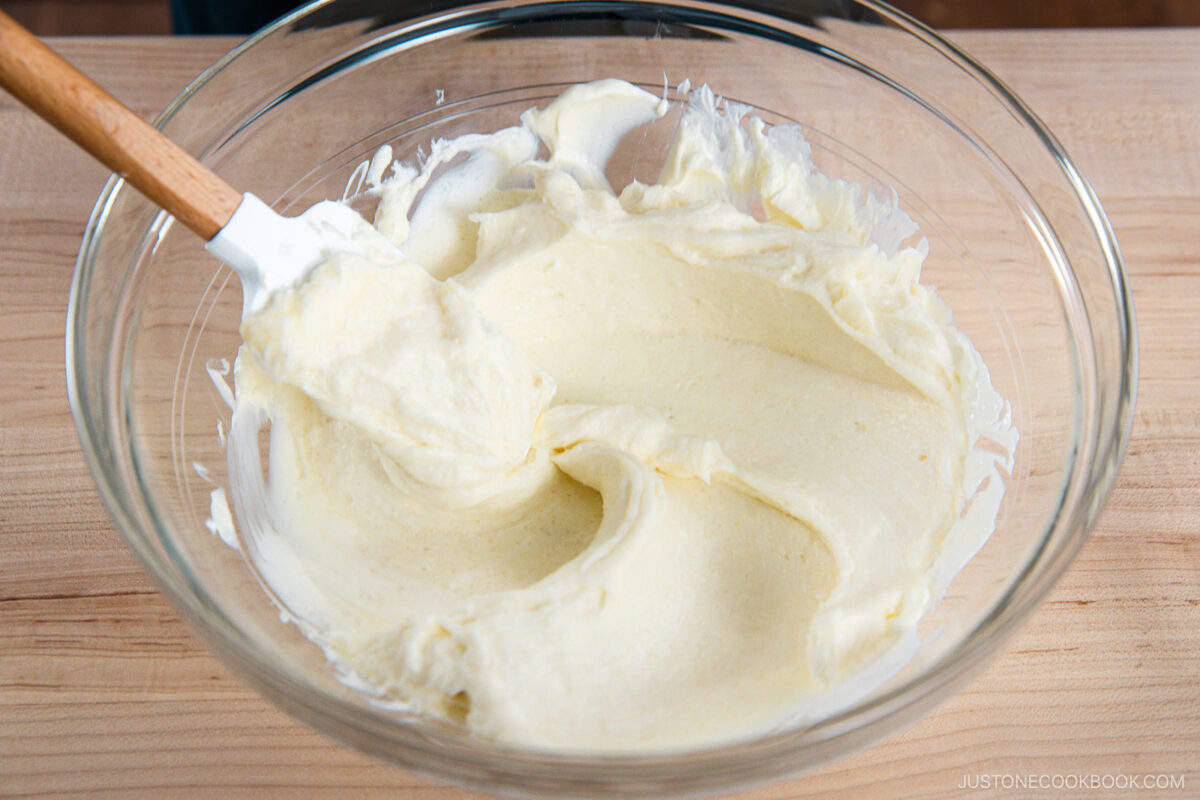
Press down on the cream cheese with a silicone spatula to soften it. Then, add ½ cup sugar. (For the blender method, scroll down to the next section.)
Nami's Tip: A silicone spatula makes the batter is super smooth with fewer air bubbles.
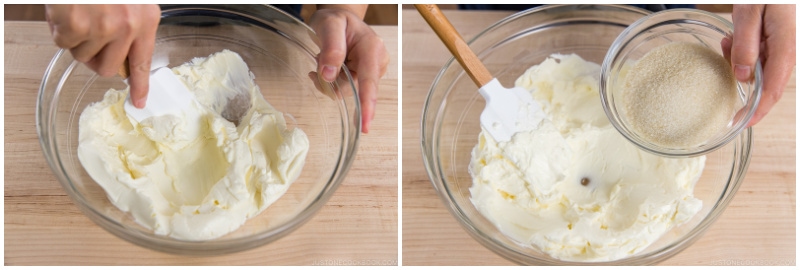
Rub the mixture with the silicone spatula against the sides of the bowl to combine. The cream cheese will become fluffy and smooth as the sugar granules dissolve.
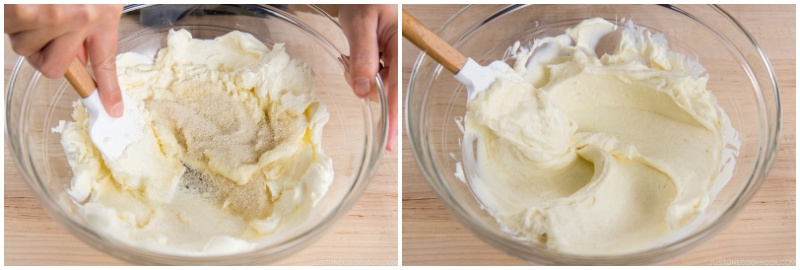
Frequently scrape the bowl and spatula to incorporate the ingredients well and prevent lumps.
Nami's Tip: Get rid of lumps early, as it's harder to do when the batter is more liquid.
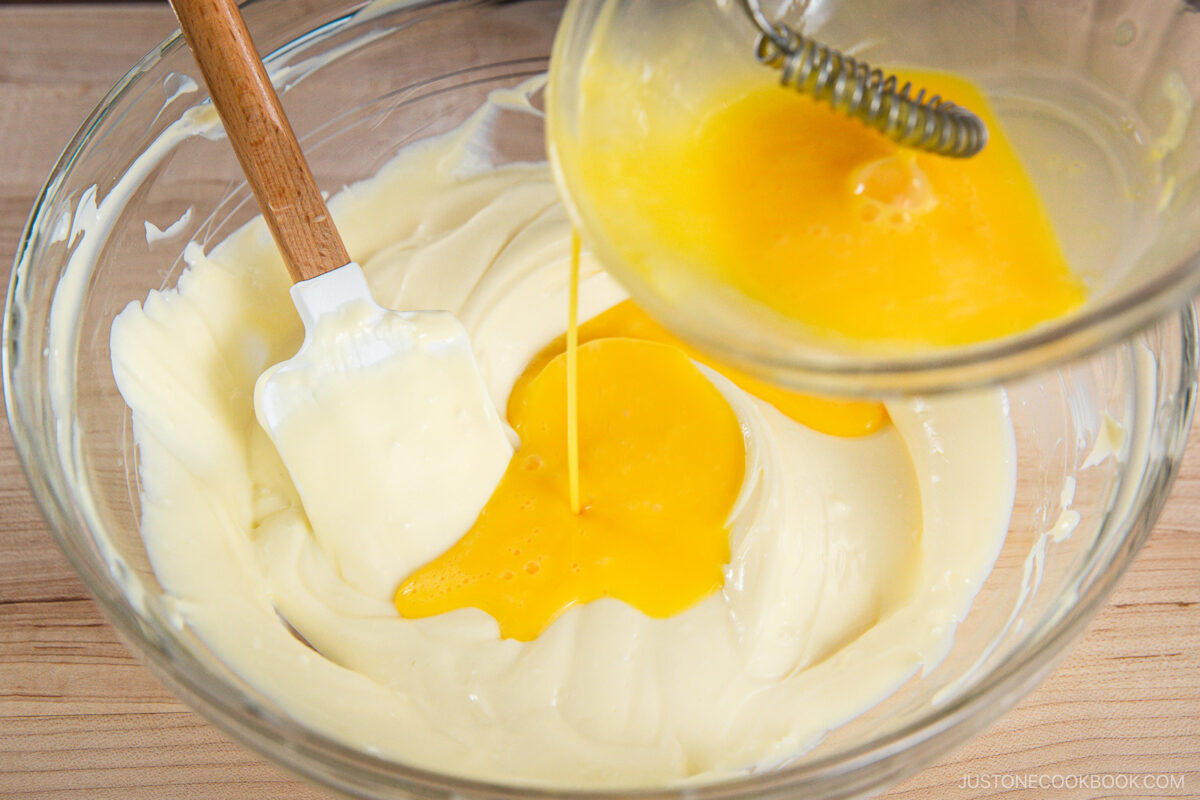
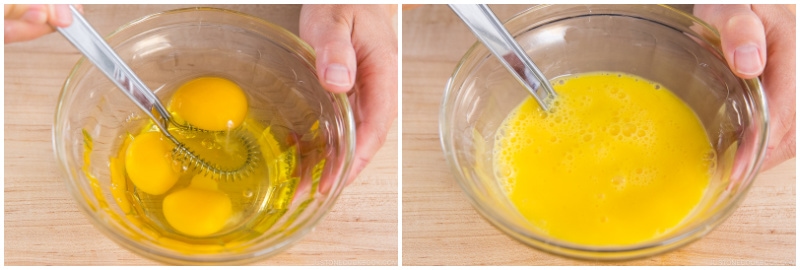
Crack 3 large eggs (50 g each w/o shell) in another bowl and whisk well.
Nami's Tip: Whisking in a separate bowl is extremely helpful for blending, instead of cracking eggs one at a time into the cream cheese.
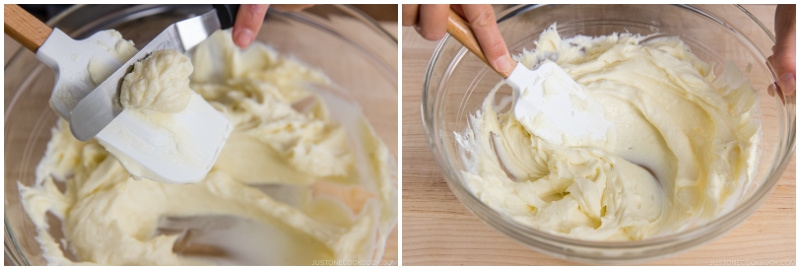
Slowly and gradually add the beaten eggs to the cream cheese mixture, one-third at a time. Make sure the batter is smooth and with no lumps before adding more egg.
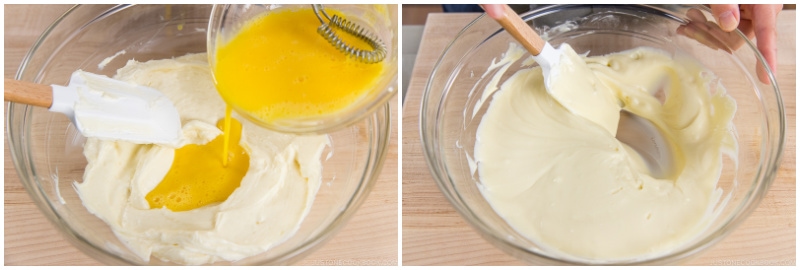
After each addition, blend the eggs with the cream cheese THOROUGHLY and COMPLETELY.
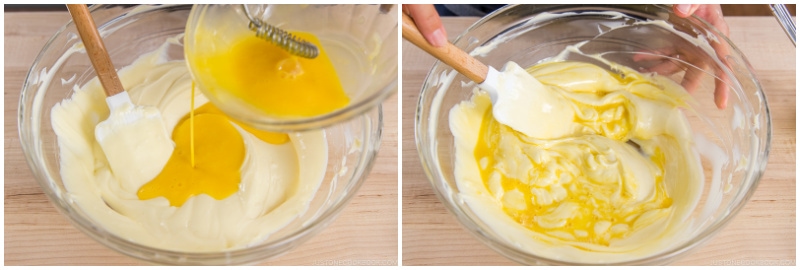
Add the rest of the egg and blend well.
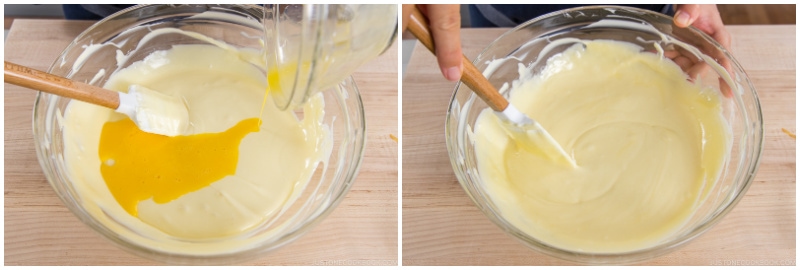
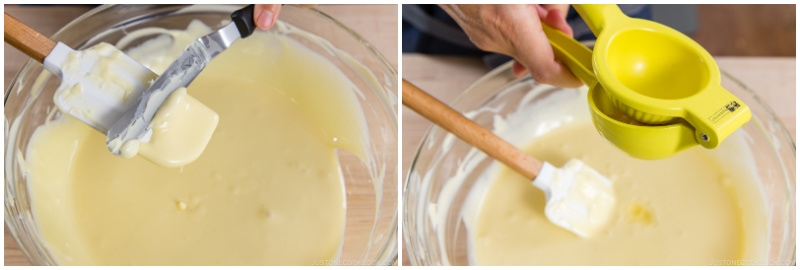
Occasionally scrape off the batter from the bowl and the spatula. This will help prevent lumps in the batter. Then, add 1 Tbsp lemon juice and mix thoroughly.
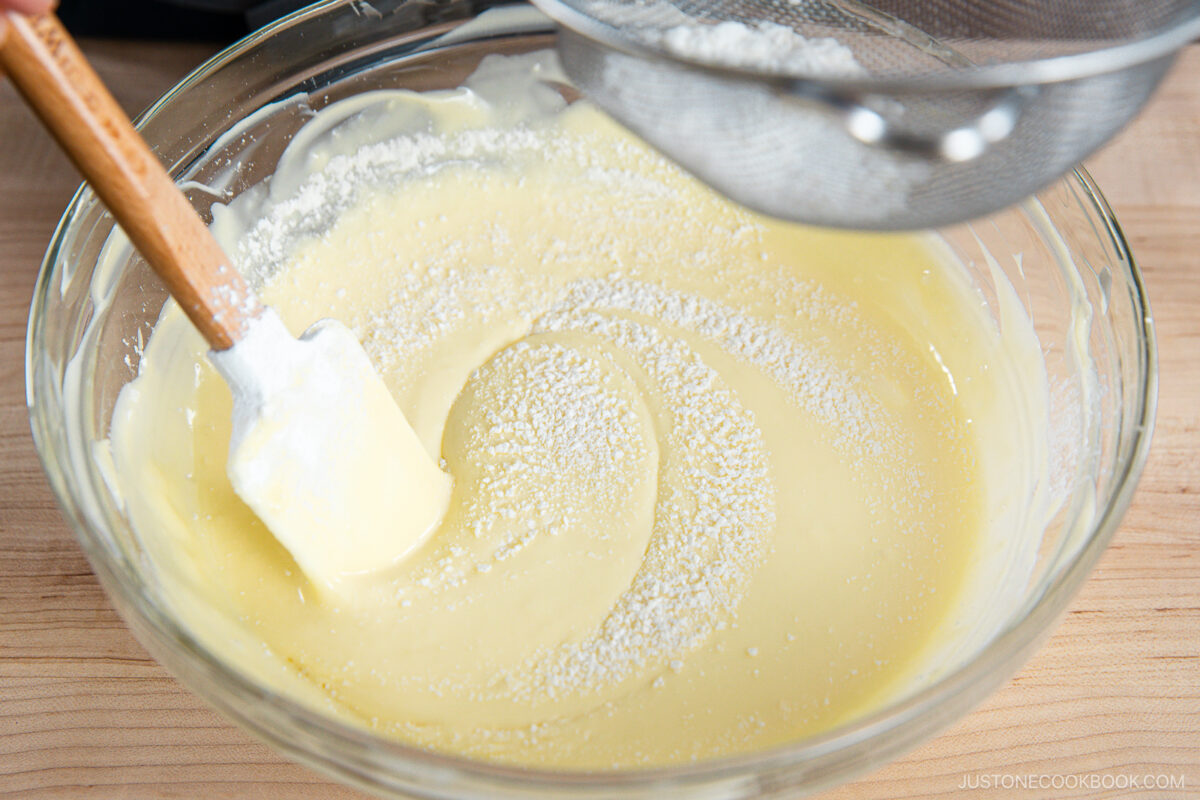
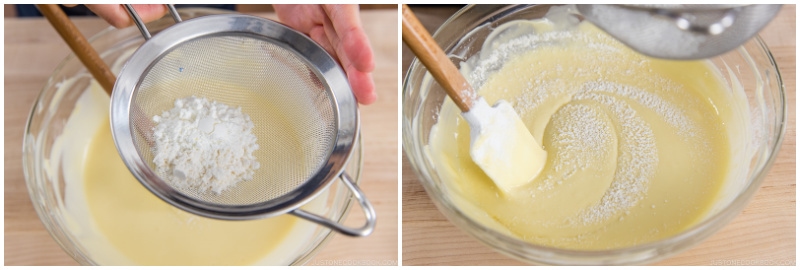
Next, add 2 Tbsp cake flour and 2 tsp cornstarch to a sieve. Sift a little bit of the flour and cornstarch into the cream cheese mixture while you stir with a spatula. Incorporate the ingredients well before adding more. Keep sifting and blending until you‘ve added all the flour mixture. Take your time doing this. You don’t want any lumps.
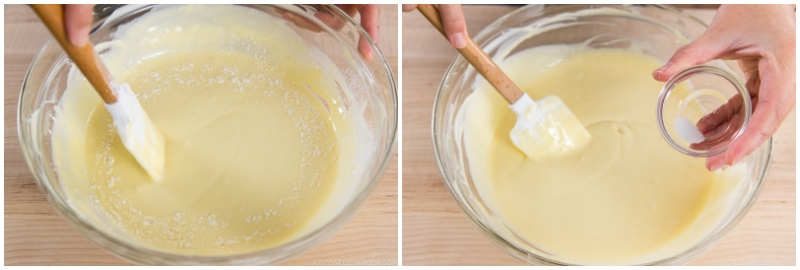
Add ⅛ tsp Diamond Crystal kosher salt and blend together. Make sure there are no lumps at this stage (before adding the heavy cream–more liquid).
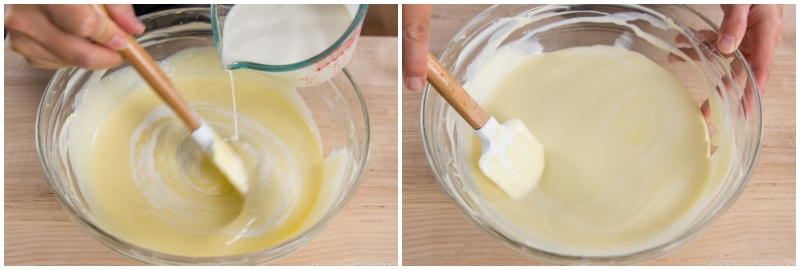
Gradually add 1 cup heavy (whipping) cream while you stir. Mix until it’s all combined.
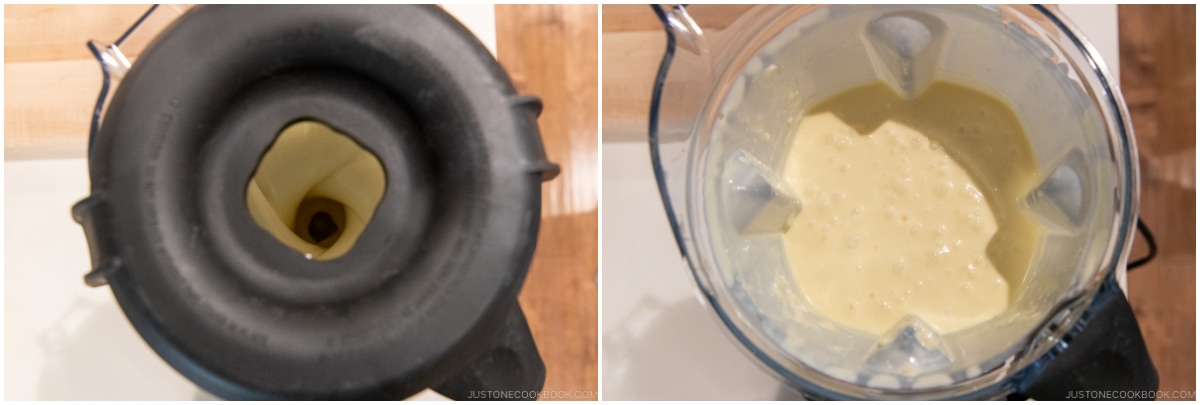
★ Blender Method
Put all the ingredients for the cake batter in a blender (I use my Vitamix): 1 lb cream cheese, ½ cup sugar, 3 large eggs (50 g each w/o shell), 1 Tbsp lemon juice, 2 Tbsp cake flour, 2 tsp cornstarch, ⅛ tsp Diamond Crystal kosher salt, and 1 cup heavy (whipping) cream. Blend until very smooth, about 2 minutes. Then, let this mixture rest for 15 minutes to let the air bubbles in the batter settle, or else the cake may crack.
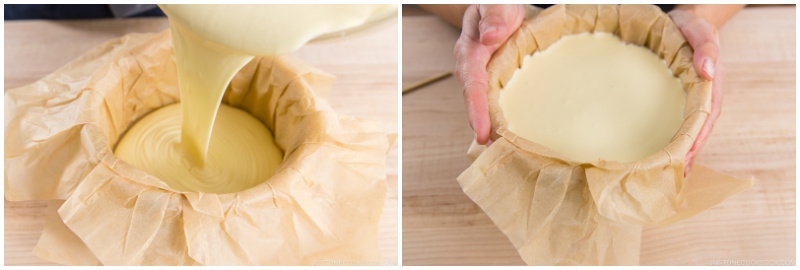
To Pour the Batter into the Pan
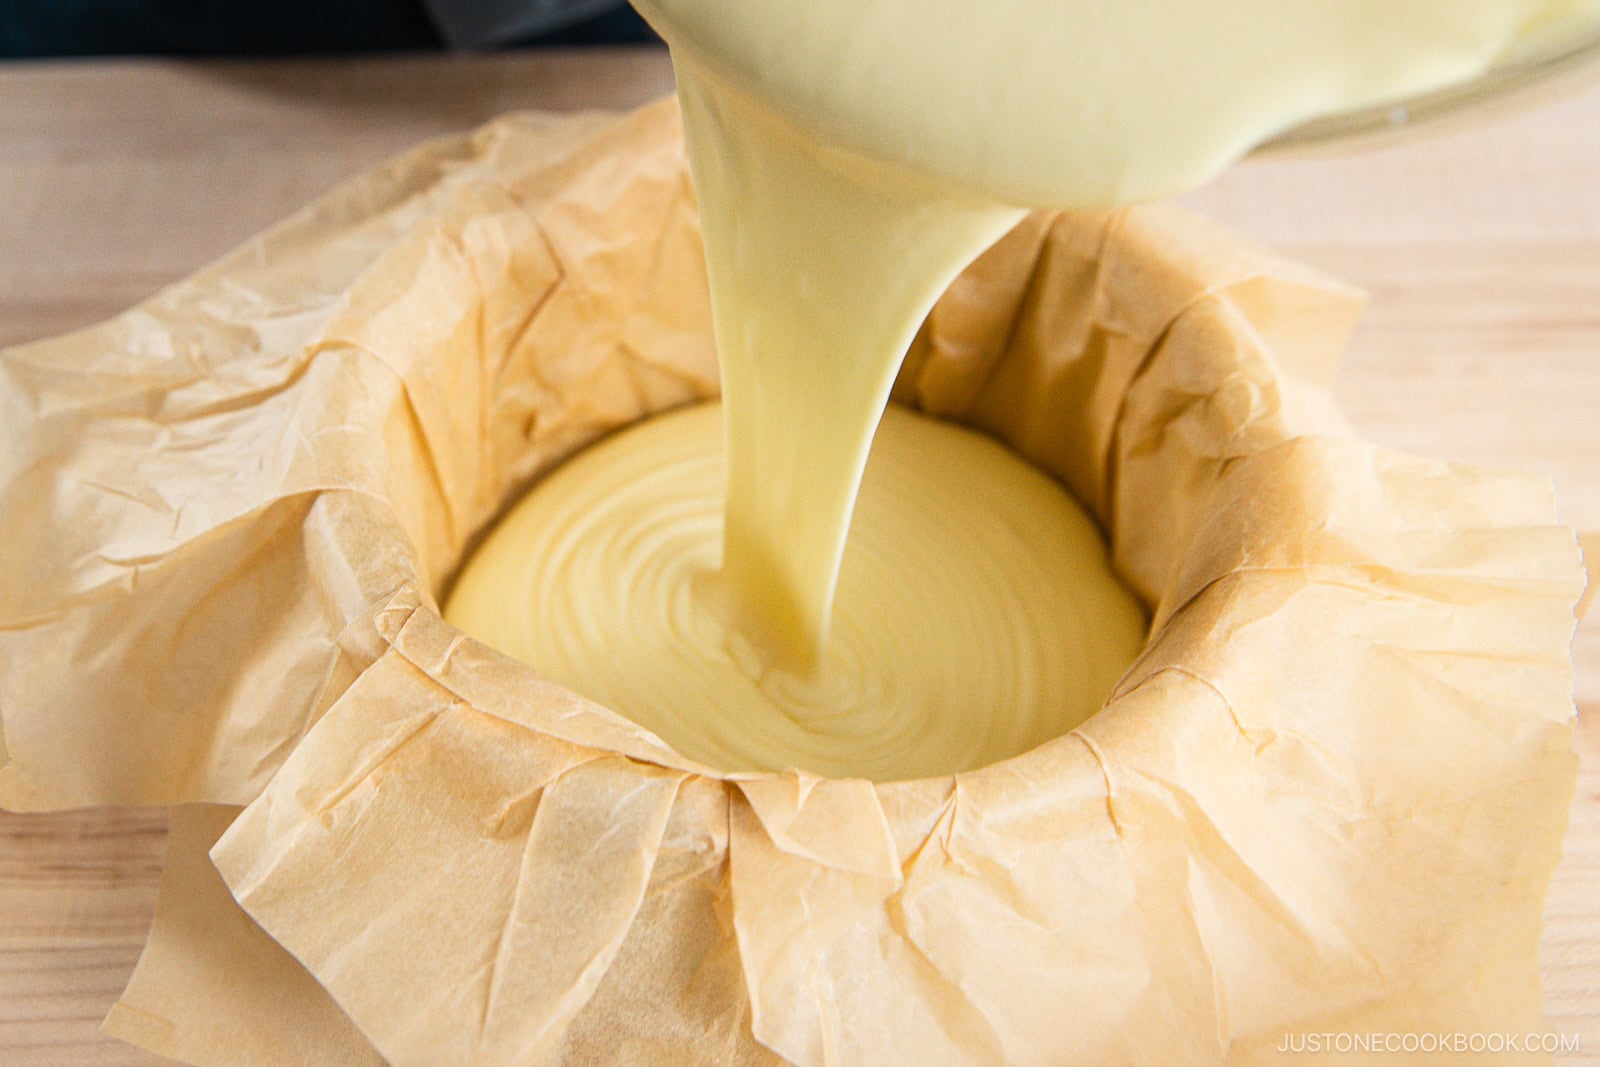
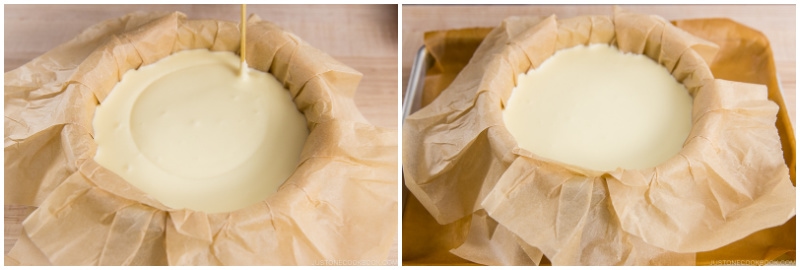
Pour the cake batter into the prepared pan in one go (avoid stop-and-go) so you don‘t create any air pockets. Tap the cake pan on the countertop a few times to eliminate air pockets.
Pop any visible air bubbles with a bamboo skewer (or toothpick), then run the skewer through the batter to remove more bubbles. Place the cake pan on a baking sheet, just in case the cheesecake overflows during baking. Mine never did, but I still use a baking sheet to transfer the cake pan to and from the oven.
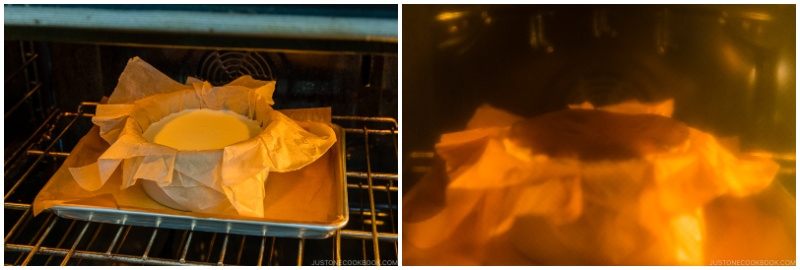
To Bake
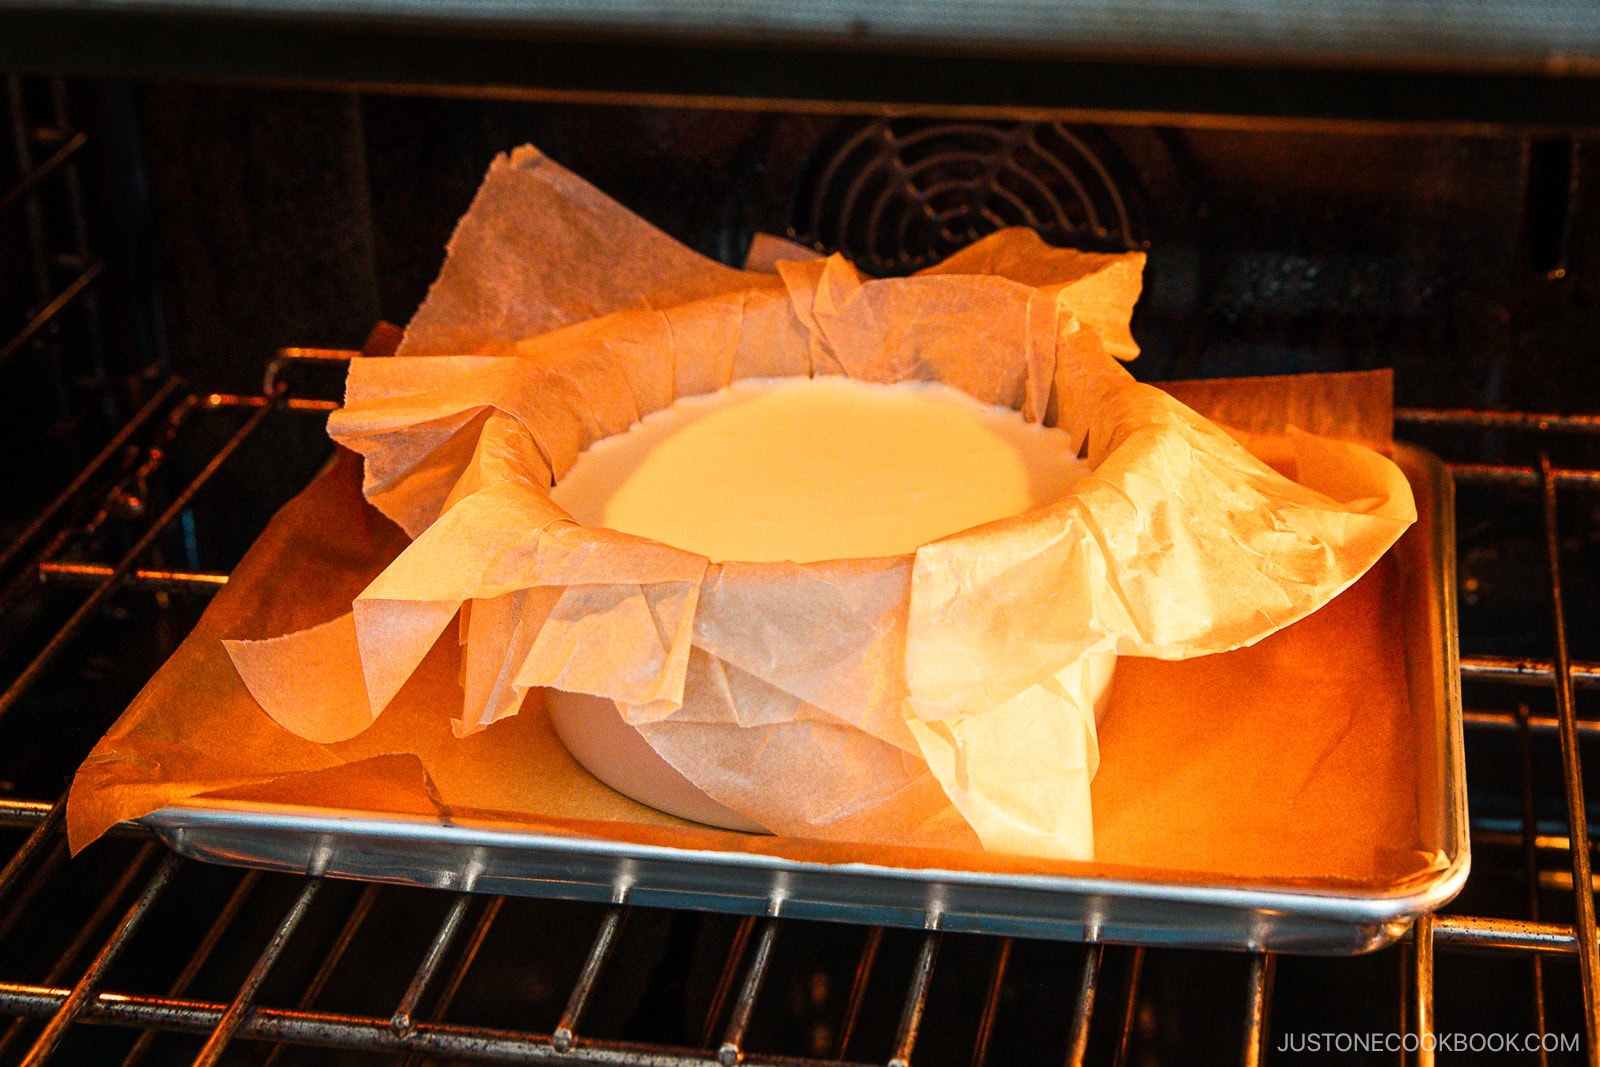
Transfer the baking sheet with cake pan into the preheated oven; do it quickly so you don't let much heat escape. Bake at 450ºF (230ºC) for a convection oven or 475ºF (245ºC) for a conventional oven until the top is dark amber/brown and the center is still very jiggly, about 30–35 minutes. Do not open the oven door while baking and lose heat. The top of my cake starts browning at the 30-minute mark, then gets dark brown within 5 minutes. Please keep an eye on your cheesecake, because every oven is different.
Nami's Tips: If you love a “gooey“ or “oozy“ texture, then bake for less time, but you must chill your cake well before serving to firm it up. NEVER extend the bake time, even if the top hasn‘t turned dark, because you will overbake the cake. The filling will curdle and you can‘t fix it. If the top doesn‘t darken in 30–35 minutes, you will probably need to adjust the oven temperature (or oven rack or preheating time) next time.
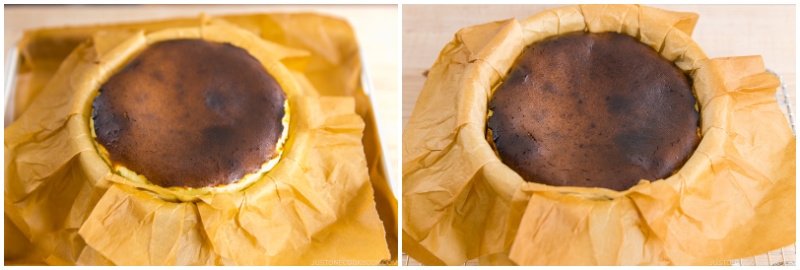
To Cool
Take out the cake when the surface is a dark, burnt color. The middle of the cake should wobble when you gently shake the pan. Let the cheesecake cool in the pan on a wire rack until it reaches room temperature, about 2–3 hours. Make sure the air can circulate under the cake pan; don’t put it on the countertop directly. You can place it on top of your gas range burner grate, if it‘s not in use.
To Chill
You can serve the cake either chilled or at room temperature (which we like, too). To chill it for a firmer texture, cover the room-temperature cake in the pan with a tea towel (don‘t use plastic, as condensation may drip onto the cake), and place in the refrigerator for 4 hours.
To Serve
Remove the cheesecake from the cake pan and carefully peel back the parchment paper. If you have chilled the cake, let it stand at room temperature for at least 30 minutes or up to 2 hours before serving.
To Store
You can store the cheesecake in the refrigerator for up to 3 days.
Serving: 6inch cake, Calories: 3043kcal, Carbohydrates: 141g, Protein: 52g, Fat: 258g, Saturated Fat: 147g, Trans Fat: 1g, Cholesterol: 1383mg, Sodium: 1901mg, Potassium: 1043mg, Fiber: 1g, Sugar: 116g, Vitamin A: 10402IU, Vitamin C: 7mg, Calcium: 687mg, Iron: 5mg
Did you make this recipe?
Tag @justonecookbook on Instagram so we can see your delicious creation!
Editor’s Note: This post was originally published on December 17, 2020, and republished on December 18, 2025 with more helpful information.


 English (US) ·