 3 days ago
10
3 days ago
10
This site runs ads and generates income from affiliate links. Read my disclosure policy.
Get juicy, smoky, char-grilled chicken breasts every time with this simple, foolproof grilling method. Perfect for summer cookouts and meal prep!
Know Before You Scroll

Servings: 4
Prep: 10 minutes
Cook: 12 minutes
Total Time: 1 hour 22 minutes
Water, kosher salt, sugar, garlic cloves, peppercorns, bay leaves, boneless skinless chicken breasts, olive oil, salt, pepper, optional herbs or spices like thyme, rosemary, or paprika.
Juicy, smoky, slightly salty chicken with crispy charred edges and subtle hits of garlic and herbs. Summer grilling vibes all the way.
Easy. This one’s super beginner-friendly—as long as you don’t skip the brine!
Large bowl, plastic wrap or lid, paper towels, tongs, meat thermometer, grill (charcoal or gas).
Use a meat thermometer and pull the chicken at 160°F—it’ll hit 165°F as it rests. No guesswork, no dry chicken.
Skip homemade brine and use a store-bought chicken brine mix if you’re in a hurry—just watch the salt levels.
No fresh garlic? Use 1/2 teaspoon garlic powder in the brine. No peppercorns? A few cracks of black pepper work too!
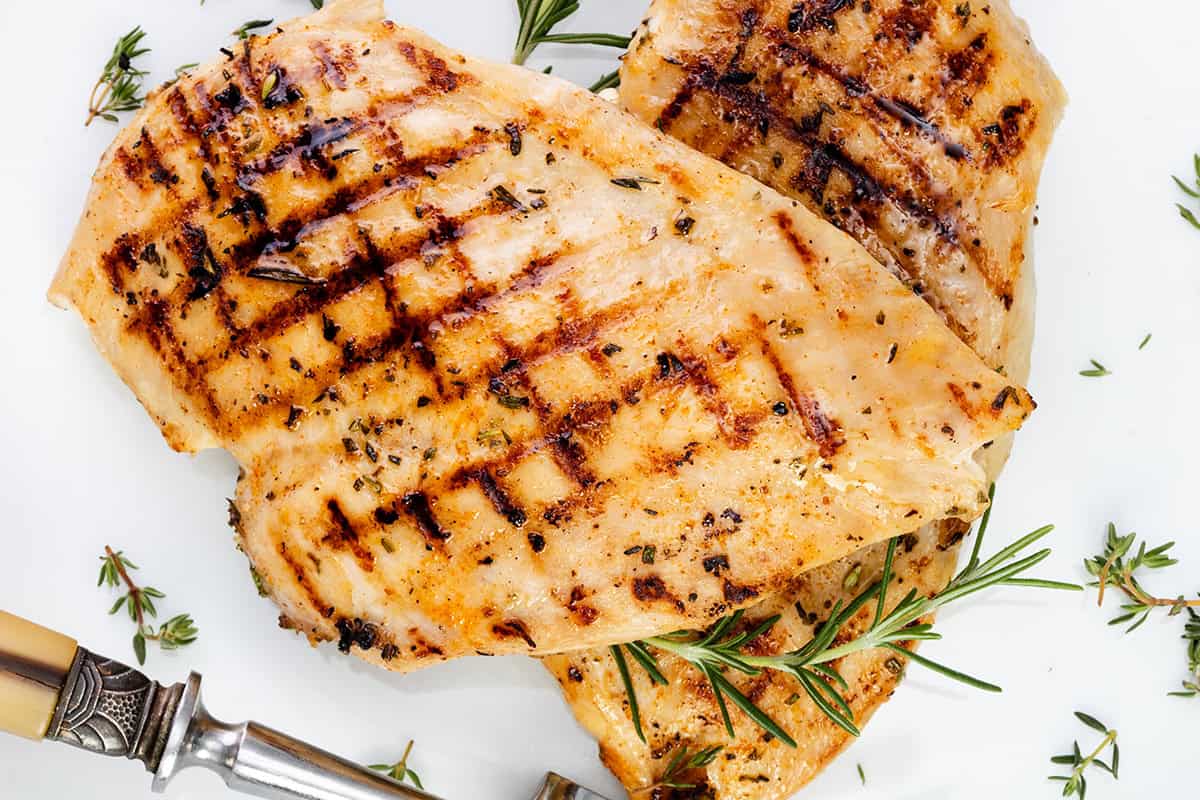
The Juiciest Char-Grilled Chicken Breasts
I’ll be honest, grilled chicken breasts have never been a favorite of mine because its so often dry and lacks flavor. When I developed this recipe I wanted that perfect char-grilled chicken breast: juicy inside, smoky outside, simple enough for a weeknight but solid enough to show off at a cookout. I tried skipping the brine (nope, too dry), marinated overnight (weird texture), even wrapped them in foil (don’t ask). What finally worked? A quick brine with kosher salt, sugar, garlic, and a tiny bit of baking soda. The baking soda was the game-changer—it keeps the chicken tender and juicy every time. Add in high-heat grilling for that golden char, and now I’ve got a go-to summer chicken recipe I actually get excited about.
Ingredient Notes

Table salt is not a good choice for this recipe. it can easily over-salt your chicken if you’re not careful. I always go for coarse kosher salt because it dissolves well and seasons more gently than table salt.
Sea salt works, too — just use slightly less. If you’re using table salt, reduce the amount by about a third.
Plain white granulated sugar is perfect. It balances the salt and helps with caramelization during grilling.
Light brown sugar works if you want a slightly deeper flavor.
This may sound odd, but a little baking soda in the brine helps tenderize the chicken. Trust me, it’s worth it.
Skip it if you don’t have any — it’s optional but helpful.
Baking aisle, right near the flour and sugar.
Go for evenly sized, boneless, skinless chicken breasts to ensure they cook at the same rate.
Chicken thighs work too — just adjust grilling time since they’re thicker and fattier.
I love adding a sprinkle of smoked paprika or some fresh rosemary for extra depth.
Use whatever you love — Italian seasoning, garlic powder, or even lemon zest all work beautifully.
You can find the full, printable recipe at the top of this post, but you can read the detailed instructions with photos for each step below.
Step By Step Instructions
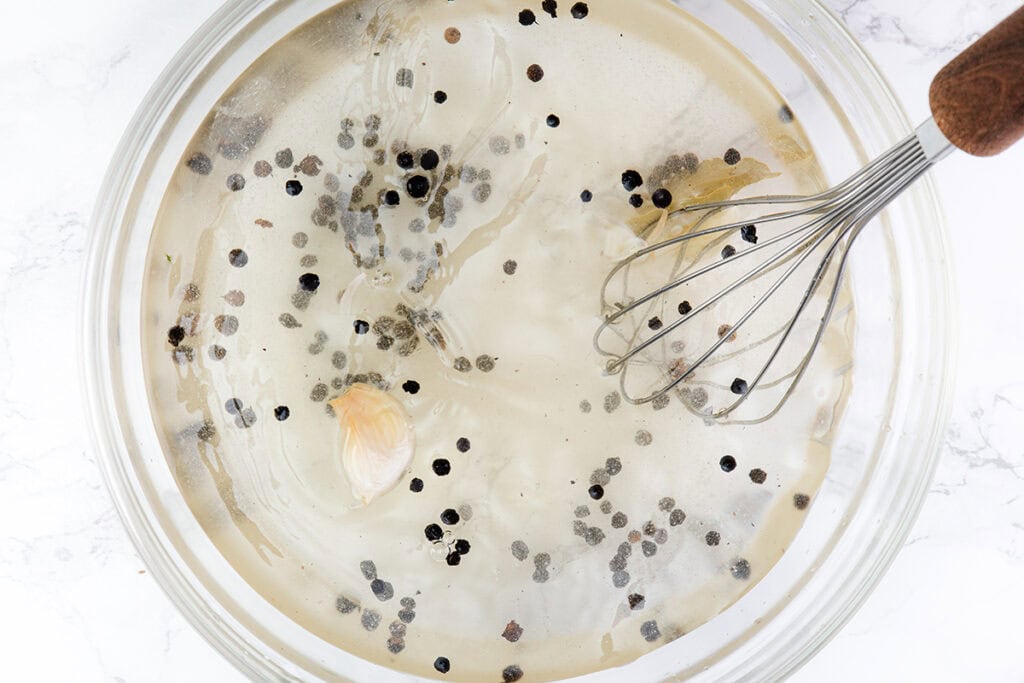
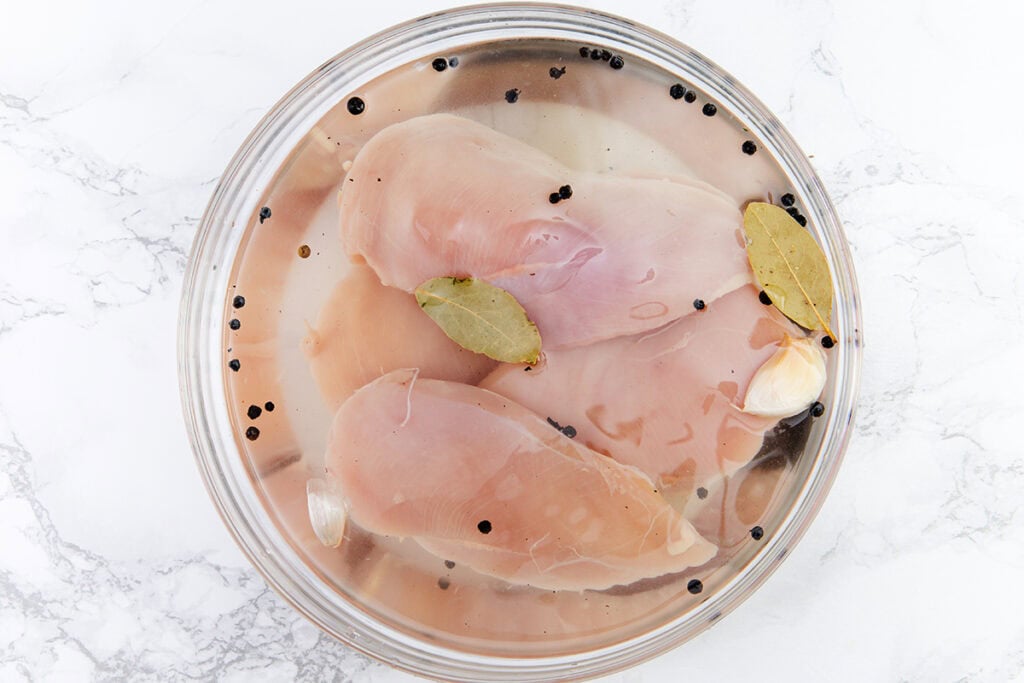
Make the Brine
Let’s start with the brine — this is where all the juicy magic happens. In a large bowl, pour in 4 cups of cold water, then add 1/4 cup kosher salt, 1/4 cup sugar, 1 teaspoon baking soda, 2 smashed garlic cloves, 1 tablespoon of whole peppercorns, and 2 bay leaves. Give it a good stir until the salt and sugar are totally dissolved.
Brine the Chicken
Now, grab 4 boneless, skinless chicken breasts and submerge them in that flavorful brine. Cover and pop it in the fridge for at least 1 hour — or up to 6 hours if you’re planning ahead. Just don’t go longer or it’ll get too salty.
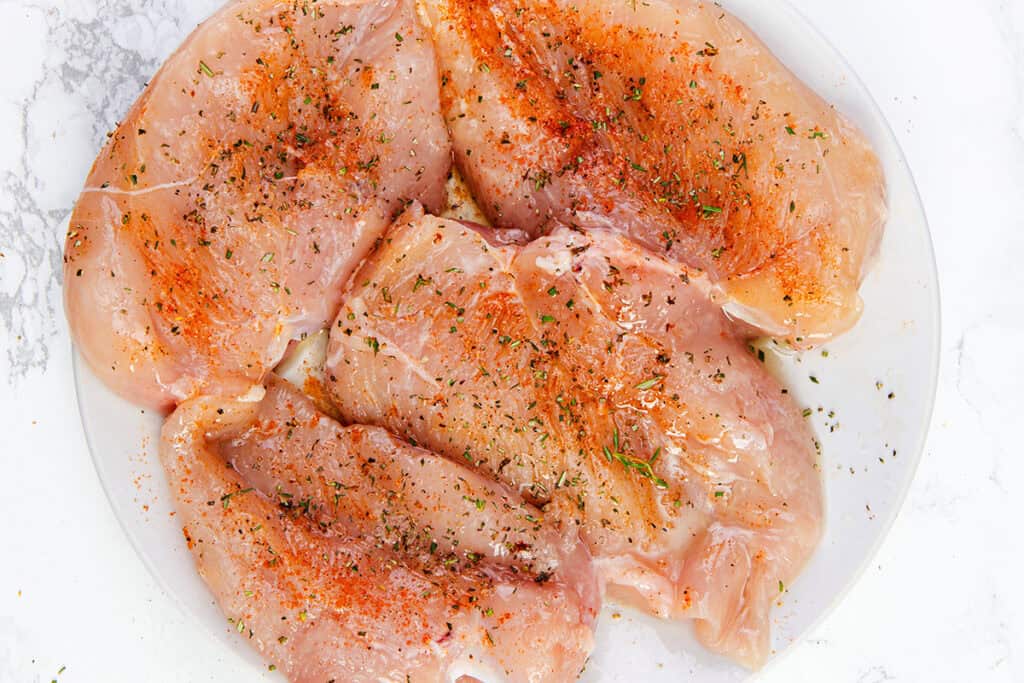
Prep the Chicken
Take the chicken out of the brine, pat it dry with paper towels, and toss the brine — we’re done with that. Drizzle the chicken with 2 tablespoons of olive oil, and sprinkle with salt, pepper, and any herbs or spices you love. I’m feeling a little paprika today!
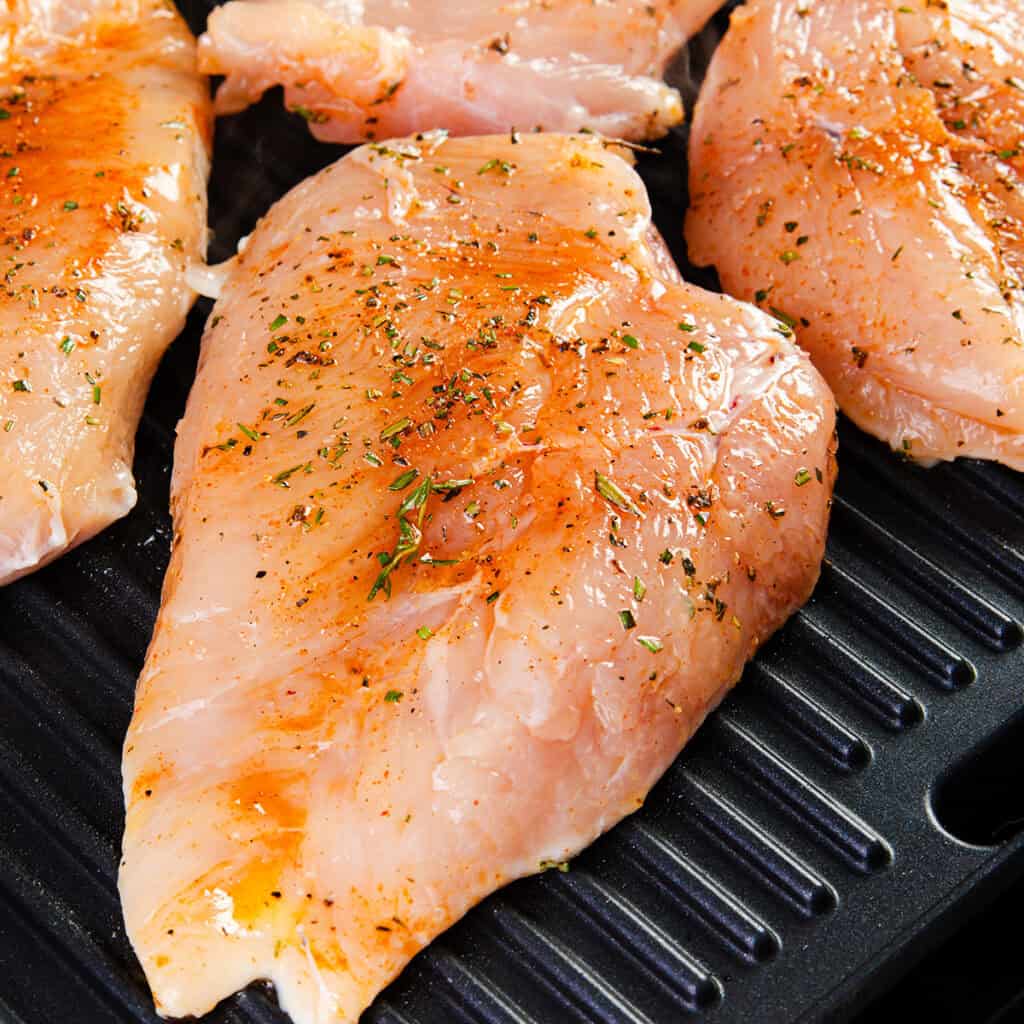
Fire Up the Grill
When you’re almost ready to grill, get your grill nice and hot — around 400 to 450°F. You want that heat high to get those gorgeous charred grill marks.
Using a grill pan? Crank the heat up to medium-high and let it preheat for a few minutes until it’s almost smoking — that’s how you’ll get those beautiful sear lines and that grilled flavor, even indoors.
Once the gill is heated, Place the chicken on the grill.
Grill to Perfection
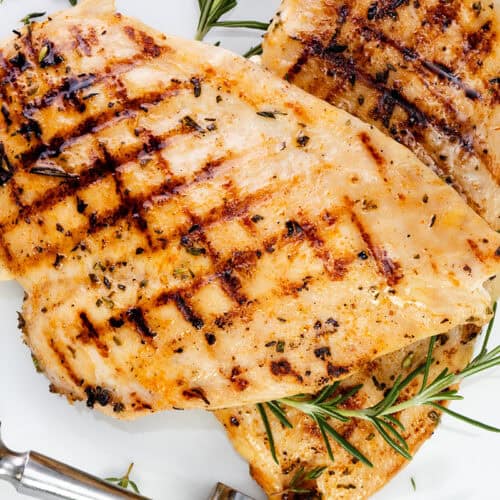
Grill the chicken for about 6 to 7 minutes per side. You’re looking for that golden char on the outside and a juicy inside. Check for 165°F on a meat thermometer to be sure it’s perfectly cooked.
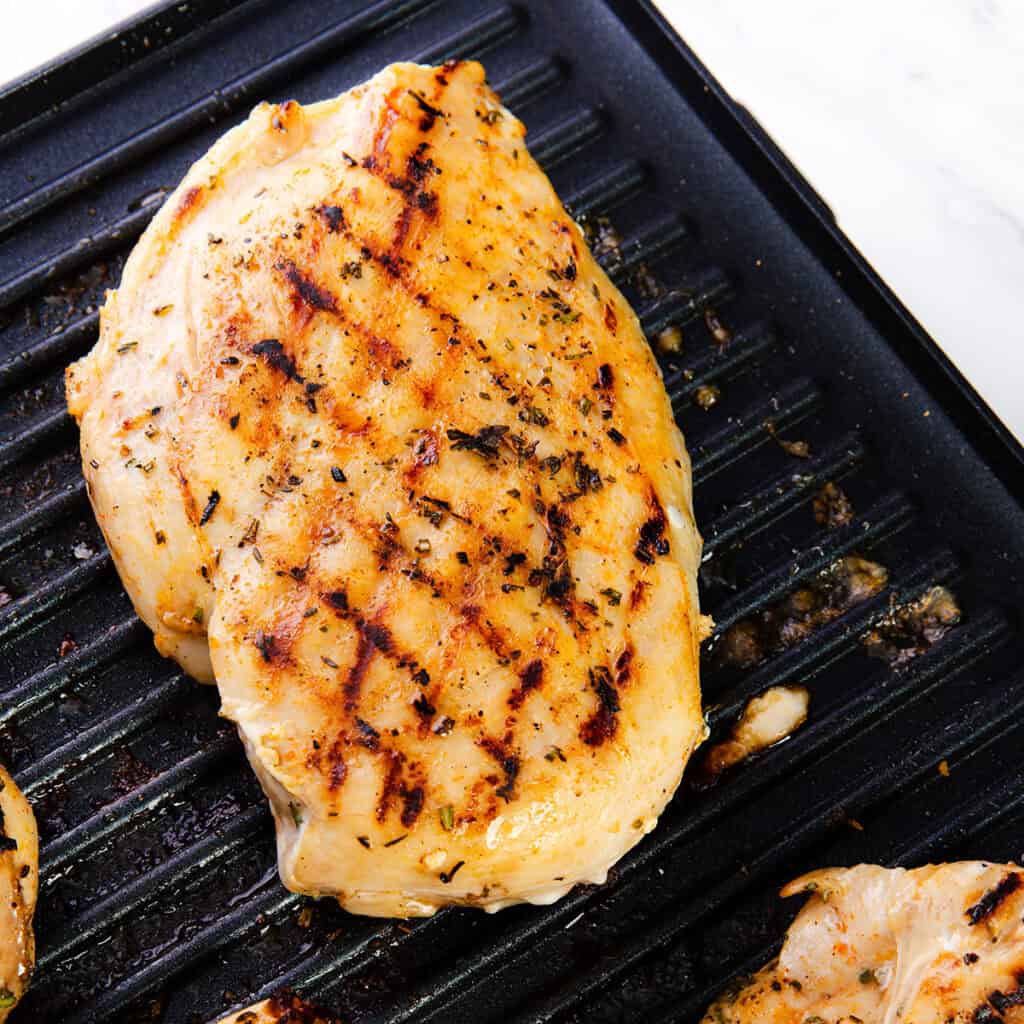
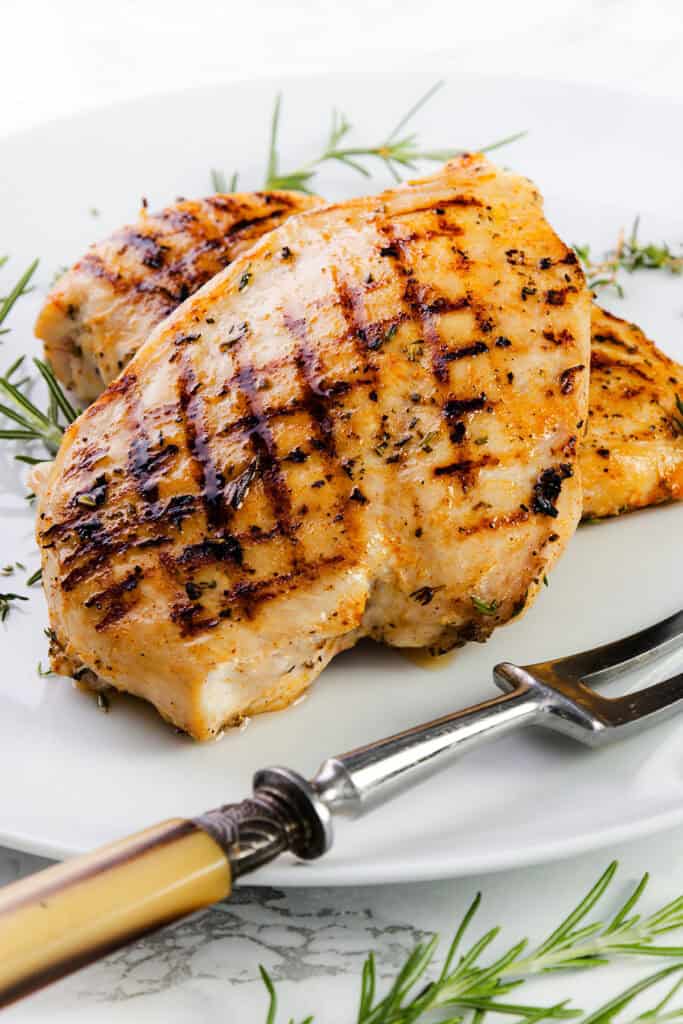
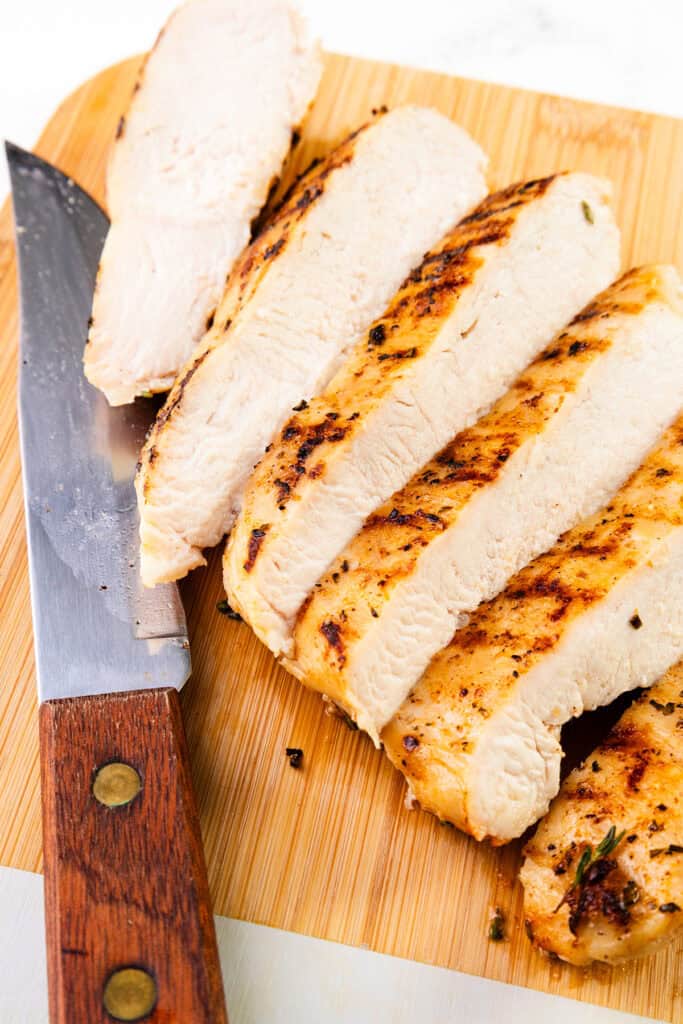
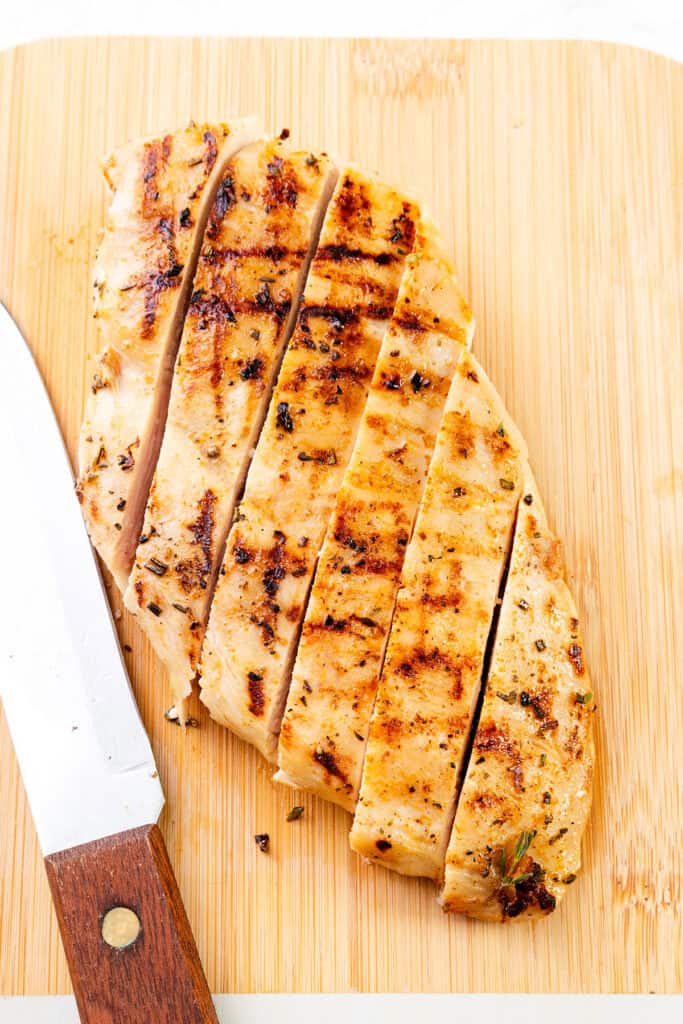
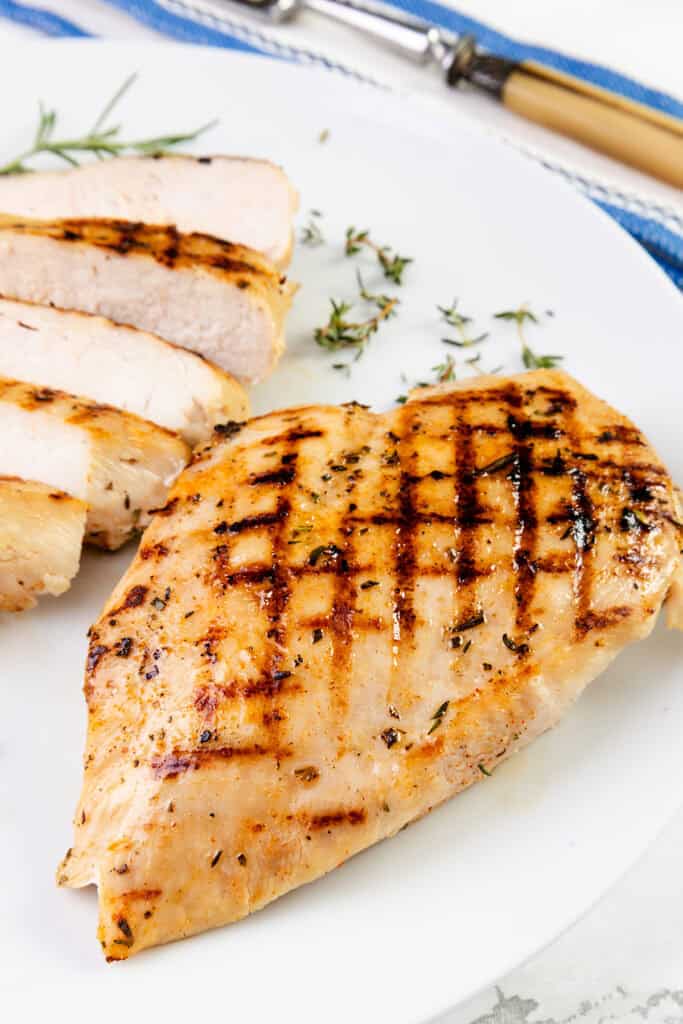
Rest and Slice
Let the grilled chicken breasts rest for a few minutes off the heat so those juices stay right where we want them — inside the chicken. Then slice it up, serve it however you like, and wow, that smoky flavor is everything.
Prep Time: 10 minutes
Cook Time: 12 minutes
Brine: 1 hour
Total Time: 1 hour 22 minutes
Serves 4
For the Brine:
- ▢ 4 cups water
- ▢ ¼ cup kosher salt
- ▢ ¼ cup sugar (or brown sugar)
- ▢ 1 teaspoon baking soda
- ▢ 2 garlic cloves (smashed)
- ▢ 1 tablespoon peppercorns
- ▢ 2 bay leaves
For the Chicken:
- ▢ 4 chicken breasts (boneless & skinless )
- ▢ 2 tablespoons light olive oil
- ▢ Salt and pepper (to taste)
Prepare the Brine:
First, in a large bowl, mix the water, kosher salt, sugar, garlic cloves, peppercorns, and bay leaves. Stir until the salt and sugar are completely dissolved. This mixture is your brine.
Brine the Chicken:
Place the chicken breasts in the brine, making sure they are completely submerged. Cover the bowl and refrigerate for at least 1 hour, but not more than 6 hours. Brining for too long can make the chicken too salty.
Preheat Your Grill:
While the chicken is brining, prepare your grill. You want it hot for char-grilling, so aim for a temperature around 400-450°F (204-232°C). If you’re using a charcoal grill, make sure the coals are white-hot and spread evenly.
Prepare the Chicken:
After brining, remove the chicken breasts from the brine and pat them dry with paper towels. Discard the brine. Coat the chicken lightly with olive oil and season with salt and pepper. If you’re using additional herbs or spices, now is the time to add them.
Grill the Chicken:
Place the chicken breasts on the grill. Cook for about 6-7 minutes on each side, or until the internal temperature reaches 165°F (74°C). The high heat will give the chicken a nice char on the outside while keeping it moist on the inside.
Rest and Serve:
Once cooked, let the chicken rest for a few minutes before slicing. This allows the juices to redistribute, making sure your chicken is moist and flavorful.
Erren’s TopTips
Whether you’re new to the grill or just looking to level up your chicken game, these pro tips will help you get that juicy, smoky perfection every single time:
Brine Timing Matters
Stick to 1–6 hours of brine time. More than that and your chicken might taste overly salty and a little rubbery. Set a timer so you don’t forget!
Pat Dry = Better Sear
Don’t skip this step! Patting the chicken dry after brining helps it sear beautifully on the grill instead of steaming. Dry chicken = better browning.
Use a Meat Thermometer
If you’re not already using one, get yourself a digital meat thermometer. Aim for 165°F in the thickest part — it’s the key to juicy, safe chicken.
Flip Just Once
Avoid flipping the chicken over and over. Let it cook undisturbed on one side for 6–7 minutes, then flip once. This gives you gorgeous grill marks and locks in the juices.
Rest Before Slicing
It’s tempting to dive right in, but give the chicken 5 minutes to rest. That pause keeps the juices from running all over your cutting board — they stay inside, where they belong.
Don’t Re-Season Too Soon
If you’re adding dry spices after brining, wait until after you’ve dried the chicken. Wet chicken + spices = weird texture and uneven coverage.
Storage & Freezing Instructions
Keep that juicy grilled chicken fresh with these easy storage tips:
Fridge Storage
Let the chicken cool completely, then store it in an airtight container in the fridge. It’ll stay fresh and tasty for up to 4 days. It’s perfect for salads, wraps, or sandwiches all week.
Freezing Instructions
Wrap each cooled chicken breast tightly in plastic wrap or foil, then store in a freezer-safe bag or container. Freeze for up to 2 months.
Pro Tip: Slice before freezing if you plan to use it in grain bowls or tacos — it thaws way faster!
Reheating Tips
To keep it from drying out, reheat gently. Try the microwave at 50% power with a splash of broth or water, or warm in a skillet on low heat, covered, until heated through.
Calories: 376 | Carbohydrates: 15g | Protein: 48g | Fat: 13g | Saturated Fat: 2g | Polyunsaturated Fat: 2g | Monounsaturated Fat: 7g | Trans Fat: 0.03g | Cholesterol: 145mg | Sodium: 7622mg | Potassium: 877mg | Fiber: 1g | Sugar: 13g | Vitamin A: 85IU | Vitamin C: 3mg | Calcium: 37mg | Iron: 1mg
FAQs
Can I use chicken thighs instead of breasts?
Absolutely! Chicken thighs are a great swap and tend to stay super juicy. Just increase the grilling time by a few minutes since they’re thicker and fattier.
What if I don’t have a grill?
No problem! Use a grill pan on the stovetop — just preheat it over medium-high heat until it’s really hot. You’ll still get those beautiful sear lines and great flavor.
Do I have to use the brine?
Technically, no — but I highly recommend it. The brine adds flavor and helps the chicken stay moist on the grill. It’s the not-so-secret weapon for restaurant-quality chicken at home.
Can I brine it overnight?
It’s best not to. More than 6 hours in the brine can break down the proteins too much and make the texture a bit mushy. Stick to the 1–6 hour window for best results.
How do I keep chicken from sticking to the grill?
Preheat your grill and oil the grates lightly right before you place the chicken down. Also, don’t move the chicken too soon — if it’s sticking, it’s not ready to flip yet.


 English (US) ·