 1 day ago
7
1 day ago
7
Recipe Highlights
Whenever I’m craving a simple Japanese mochi snack, I reach for plain dried rice cakes that I keep in my pantry year-round. I’ll share how to grill kiri mochi with a quick toast on the stovetop or in the oven to make yakimochi. You’ll love how they brown and puff up beautifully to enjoy however you like.
- Crispy outside, chewy inside. The soft center puffs to create a truly satisfying snack.
- Quick and beginner-friendly. Just grill and flip. No prep or special tools needed.
- Uses shelf-stable pantry mochi. Kiri mochi keeps for months, so you can enjoy yakimochi anytime.
If you enjoy Japanese mochi in soup, try my Zenzai (Sweet Red Bean Soup), Udon Noodle Soup with Toasted Mochi, and Ozoni (Japanese New Year Mochi Soup) recipes next!
Table of Contents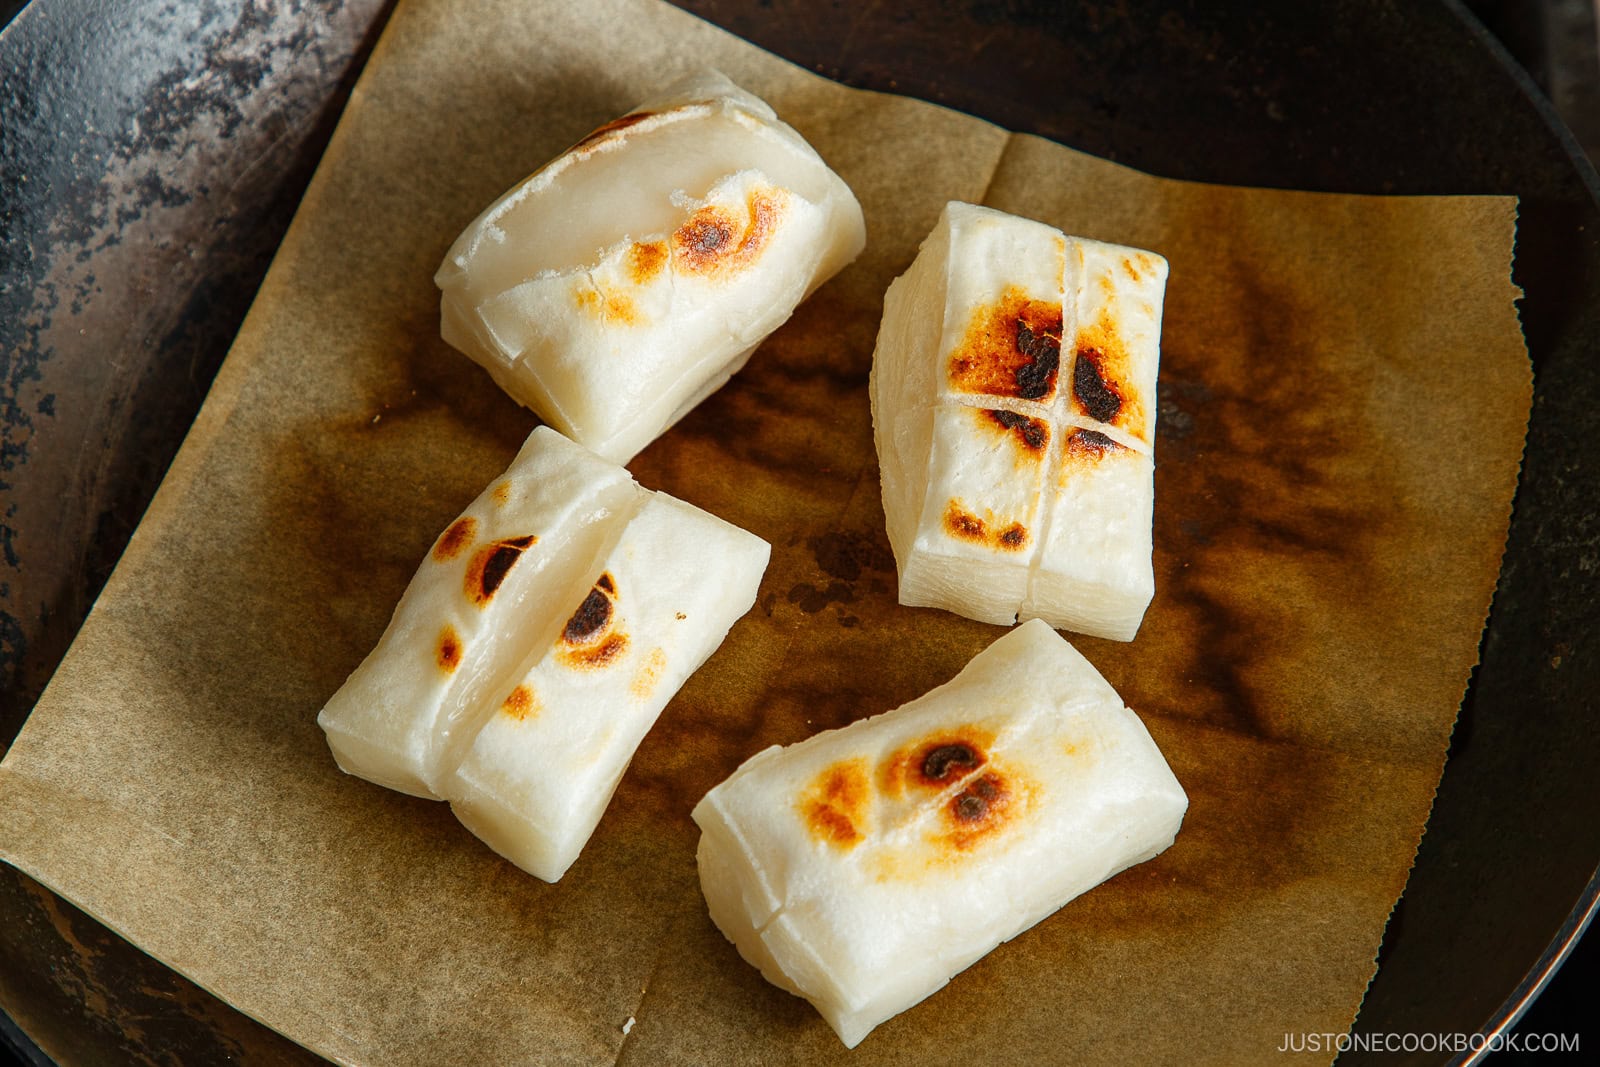
What is Yakimochi?
Yakimochi is pan- or oven-grilled Japanese glutinous rice cakes made from dried, shelf-stable kirimochi (切り餅). These plain mochi blocks take just a few minutes to cook, turning golden and crisp on the outside while staying soft and chewy inside. Yakimochi is perfect seasoned with sweet and savory flavors or tossed into soups.
Ingredients for Yakimochi (How To Grill Kiri Mochi)
- Japanese mochi rice cake (kiri mochi)
Find the printable recipe with measurements below.
Jump to RecipeHow to Make Yakimochi (How To Grill Kiri Mochi)
- Broil or toast: Place the dried kiri mochi directly on an oven-safe wire rack. Cook in the oven or toaster oven until the mochi turns golden brown. Turn over the mochi as needed so both sides toast evenly.
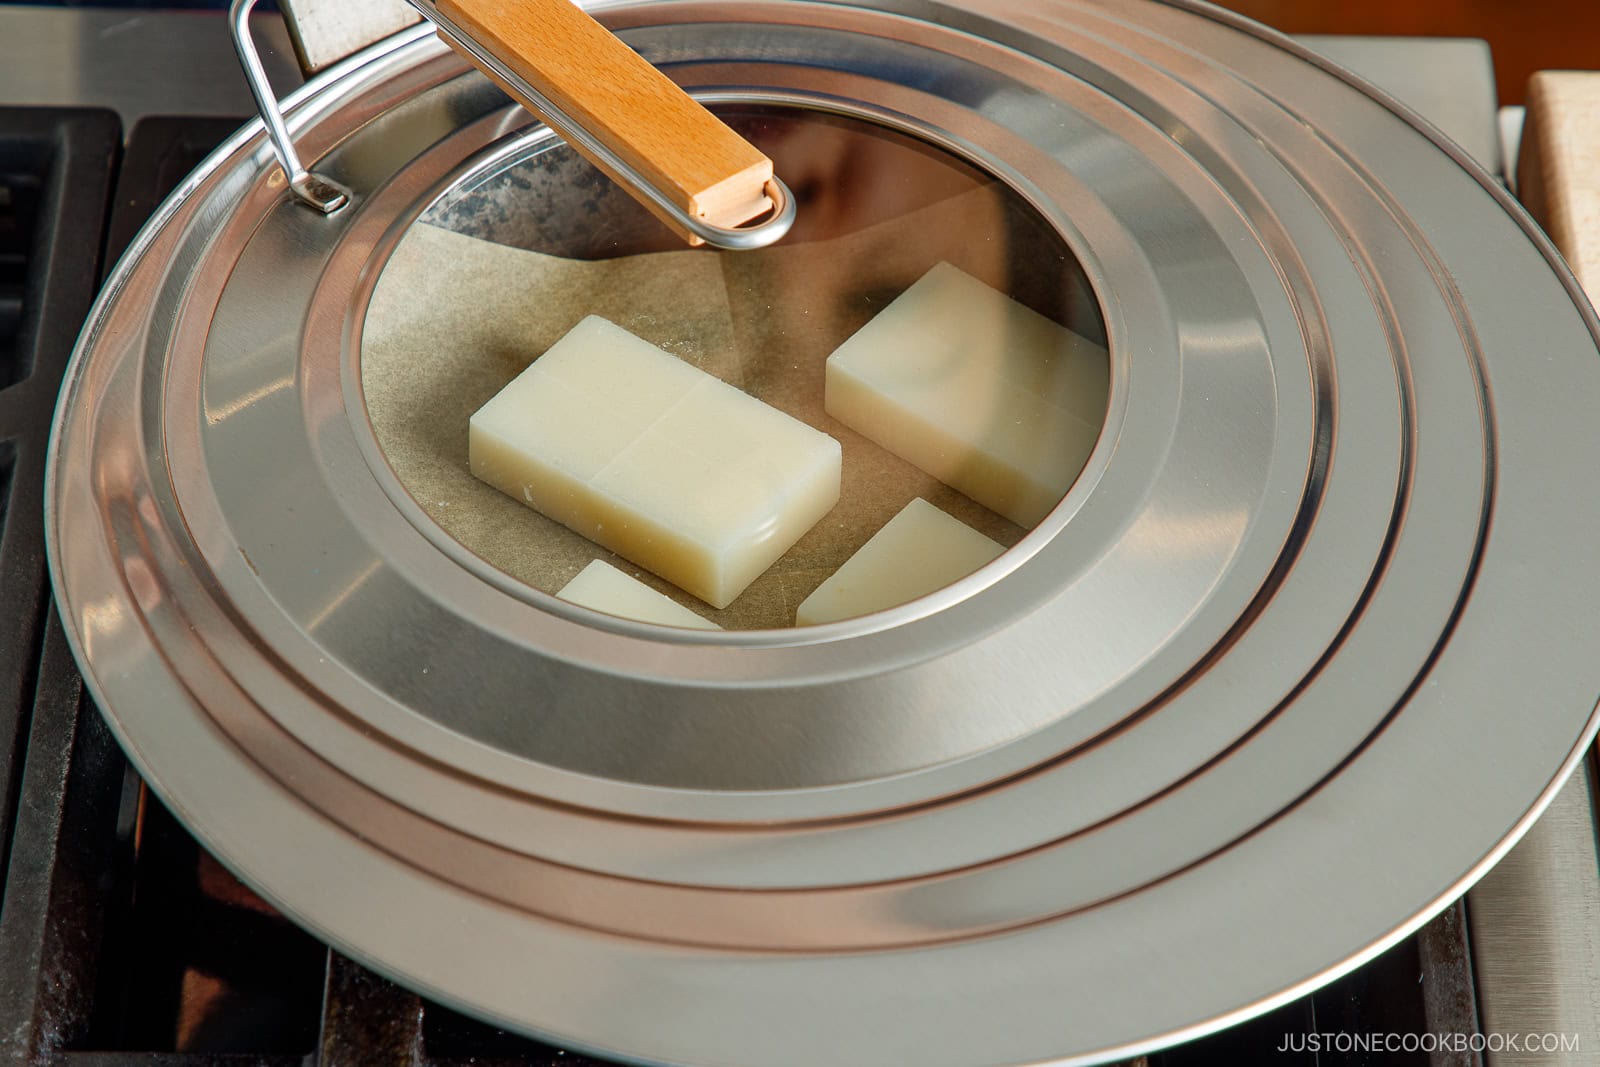
- Pan-grill: Place the dried kiri mochi directly on a dry frying pan lined with parchment paper. Cook over medium low heat for the stovetop method. (Optional: Cover with a lid to
help it puff up faster.) Turn over the mochi as needed so both sides toast evenly and turn golden brown in spots.
- Serve immediately. Remove the mochi once it puffs up and the inside is soft. Try different toppings and seasonings to enjoy—see the next section for ideas.
How to Serve Yakimochi
Once grilled, yakimochi is delicious in soups and desserts. Try serving it these ways for a snack any time of day:
- Soy sauce (+ sugar) – Coat with soy sauce with optional sugar.
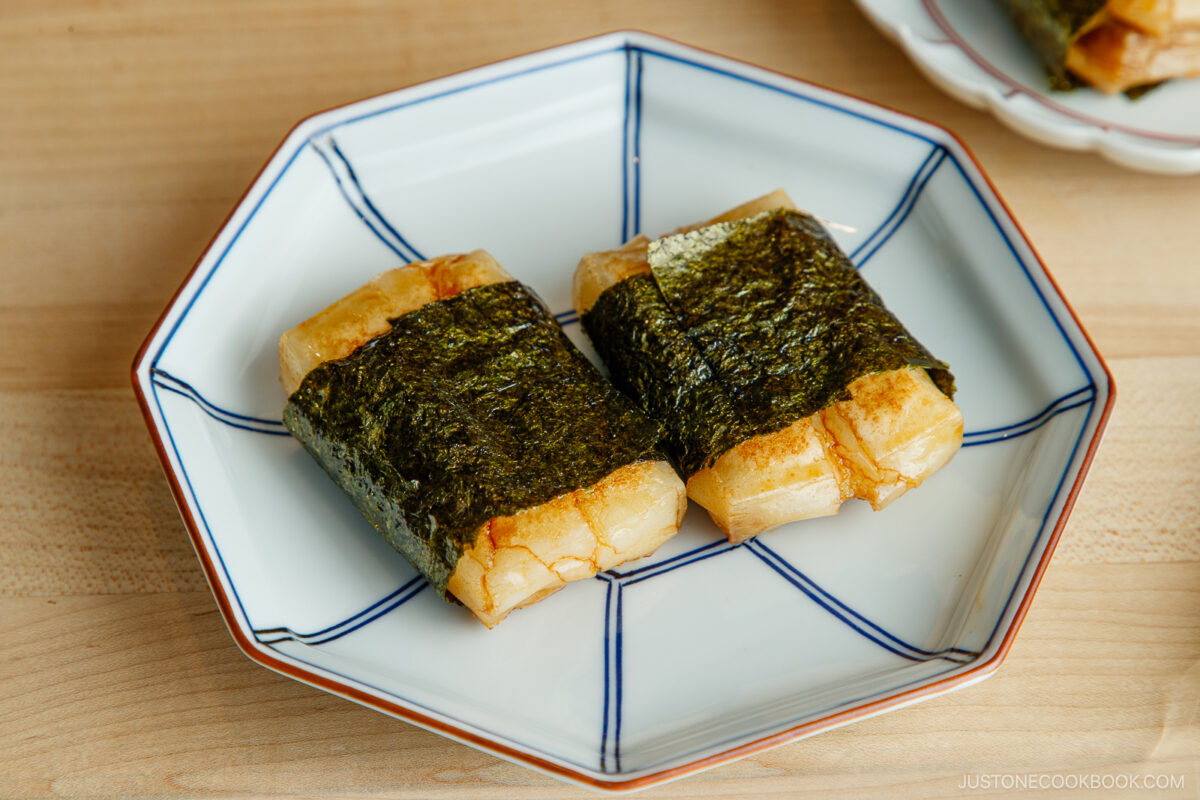
- Soy sauce + nori seaweed – Coat with sweet soy sauce and wrap in nori seaweed. My family also loves adding a slice cheese in between for a savory twist for Isobeyaki Mochi.
- Soy sauce + grated daikon – Top with lightly drained grated daikon, then drizzle with soy sauce.
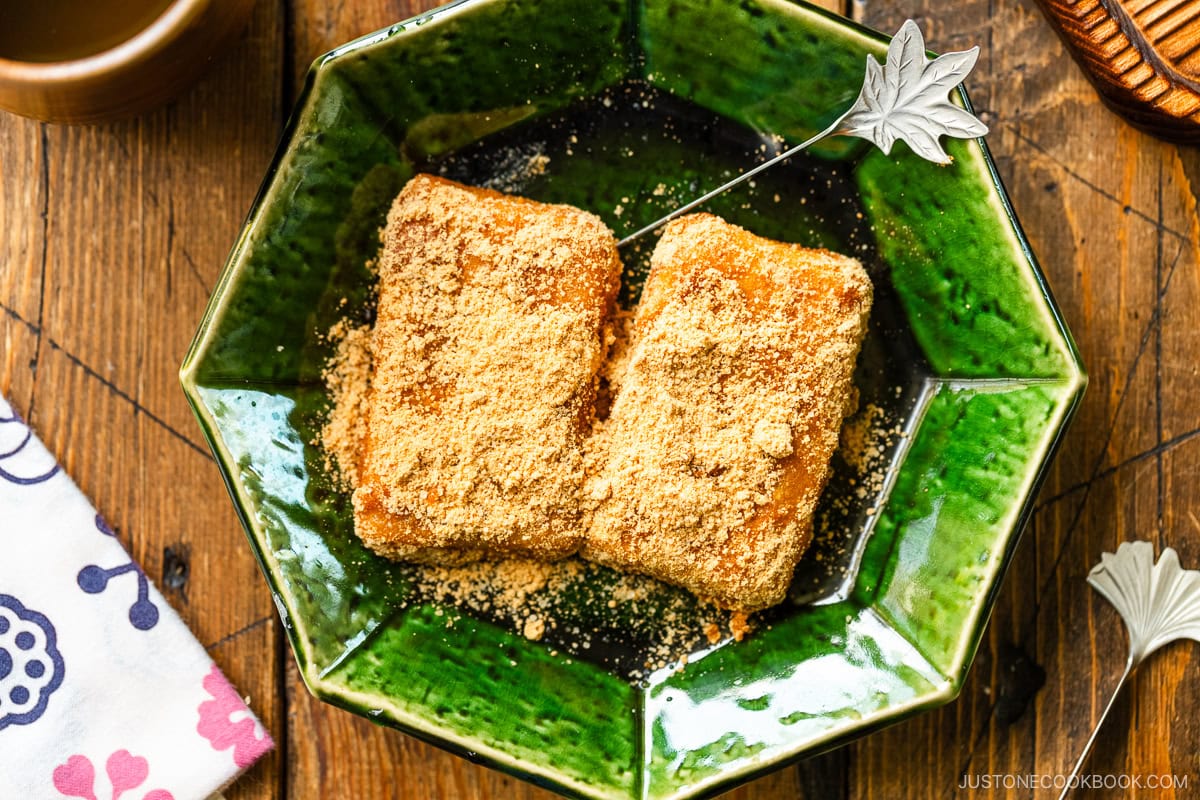
- Kinako – Smash it, dip briefly in hot water, then coat with sweetened roasted soybean flour to make Kinako Mochi.
- Anko Mochi – Gently smash the puffed mochi with your hand and stuff with a scoop of sweet red bean paste. See how in my recipe How to Enjoy Mochi.
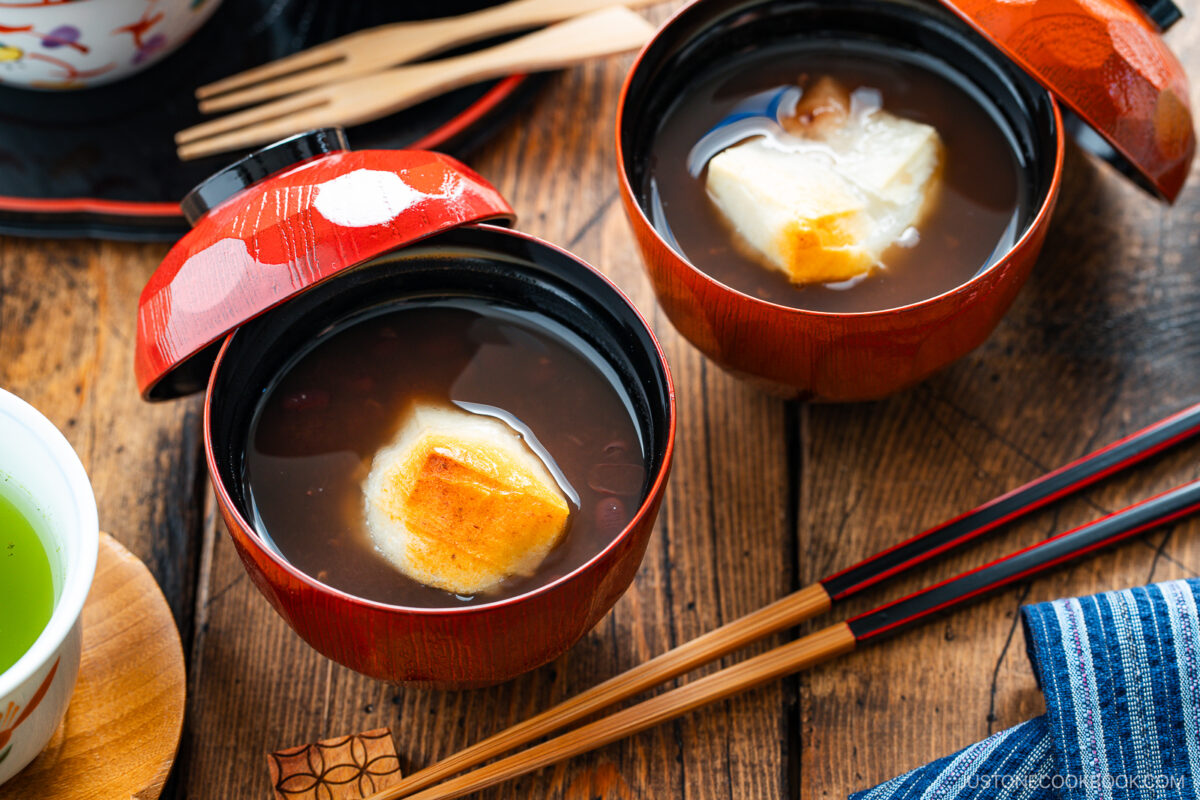
- Zenzai – Toast small pieces and add to warm sweet red bean soup for a cozy wintertime dessert.
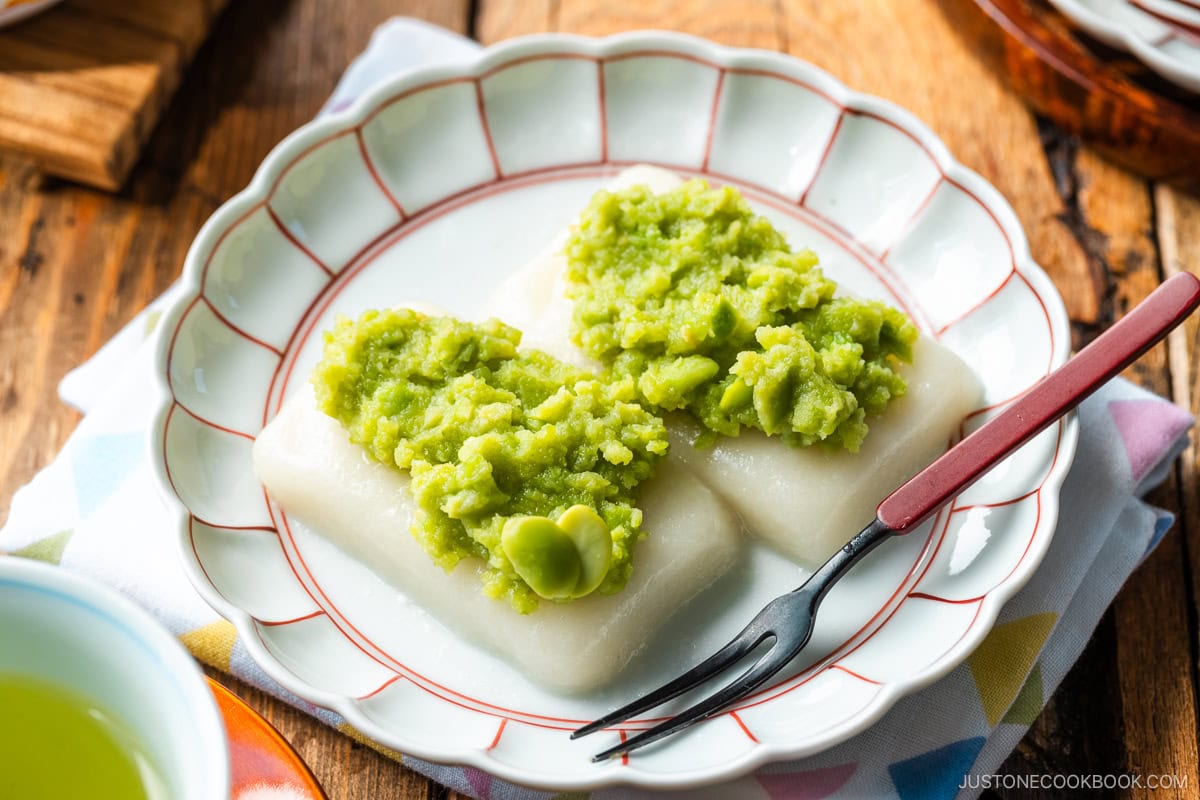
- Zunda Mochi – Top with sweet mashed edamame paste in this chewy dessert.

Nami’s Recipe Tips
These simple tips will help you make Yakimochi every time.
- Cook until soft in the middle. When the kirimochi puffs, the center should be tender. It takes about 5–6 minutes per side on the stove or 3–4 minutes per side under the broiler.
- Don’t overcook. Turn off the heat as soon as the mochi fully puffs. If cooked too long, the molten center can burst and spill out.
- Serve while hot. Yakimochi hardens as it cools. For the best chewy texture, enjoy it right away after grilling.
Storage Tips
To store: It’s best to cook yakimochi right before you serve it, as it will harden as it cools. I recommend preparing only as much as you can consume. For the kiri mochi, store it unopened in a dark, cool place away from humidity. Kiri mochi is a shelf-stable product and should last for several months in a vacuum-sealed package.
FAQs
How do I know when kiri mochi is fully cooked?
The mochi is done when it puffs up and turns lightly golden on the outside. The inside should feel soft and stretchy. If it hasn’t puffed yet, the center is still firm.
Should I oil the pan when grilling mochi?
No. Mochi grills best in a dry pan lined with parchment paper. Oil can cause uneven browning and make the mochi stick.
Why did my mochi burst while cooking?
This happens when mochi is cooked too long. As soon as it puffs, turn off the heat and remove it right away to prevent the hot center from spilling out.
Can I grill kiri mochi in advance?
I don’t recommend it. Grilled mochi hardens quickly as it cools, so it’s best to cook only what you plan to eat and serve it immediately.
I’d love to hear how yours turned out! 💛 Please leave a star rating and comment below to share your experience. Your feedback not only supports Just One Cookbook but also helps other home cooks discover recipes the
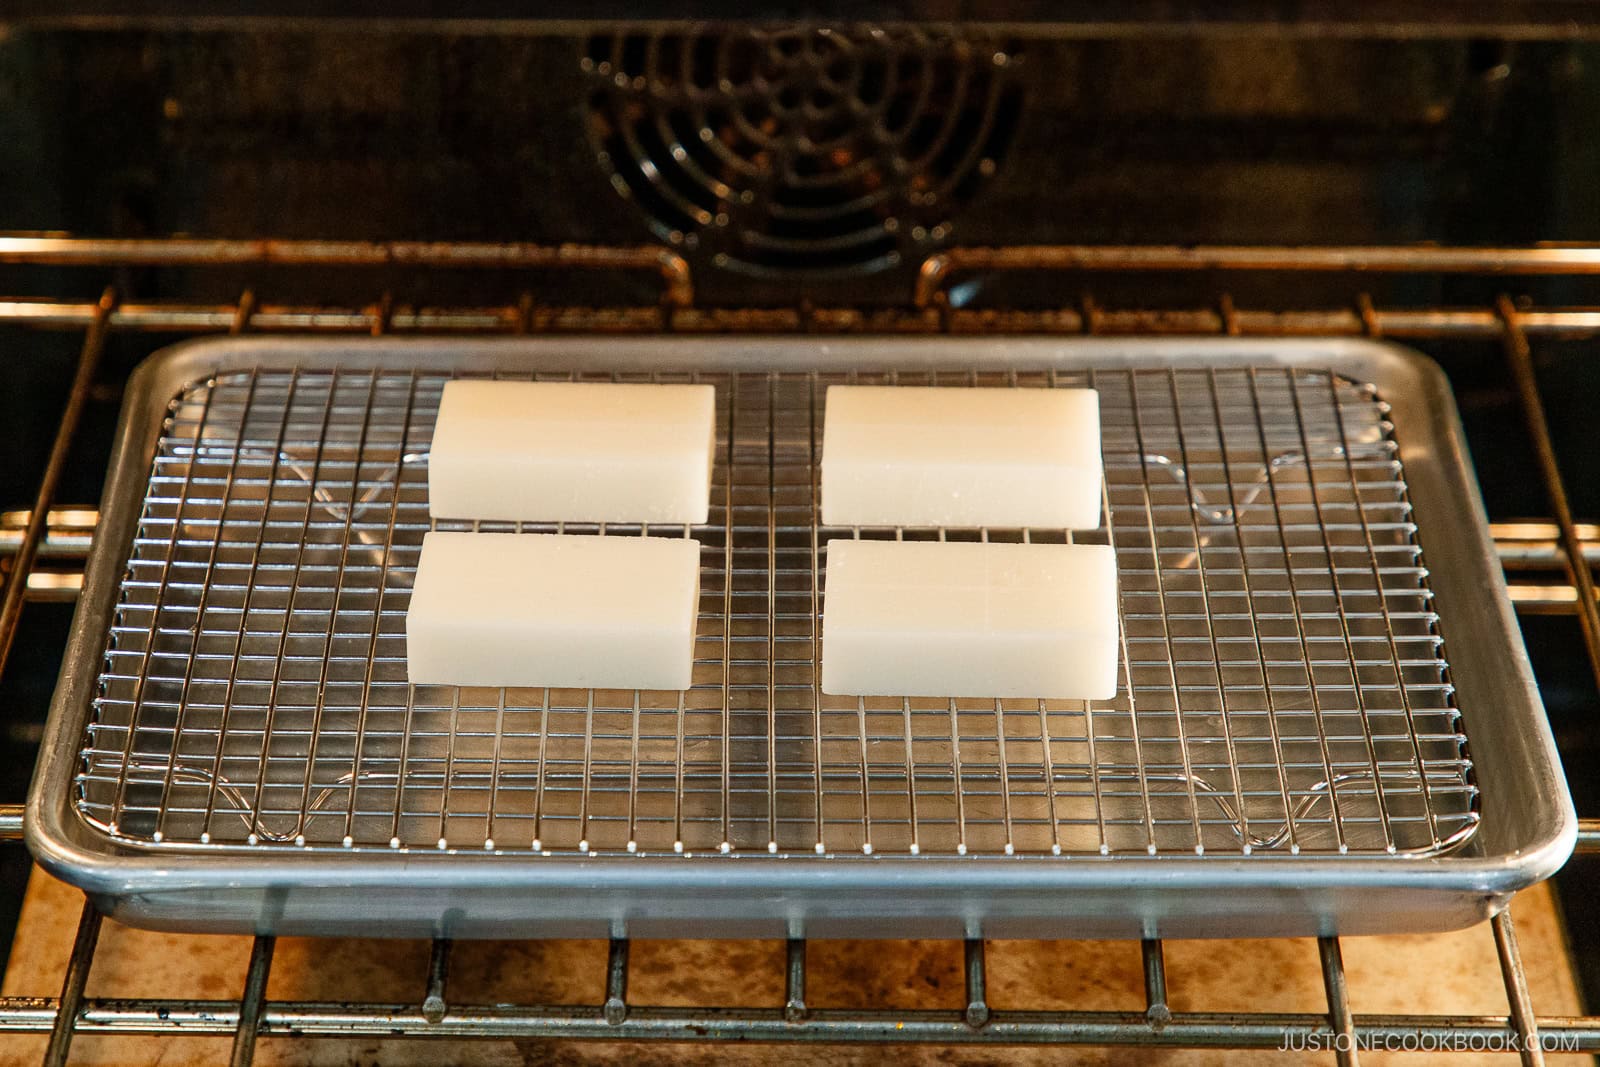
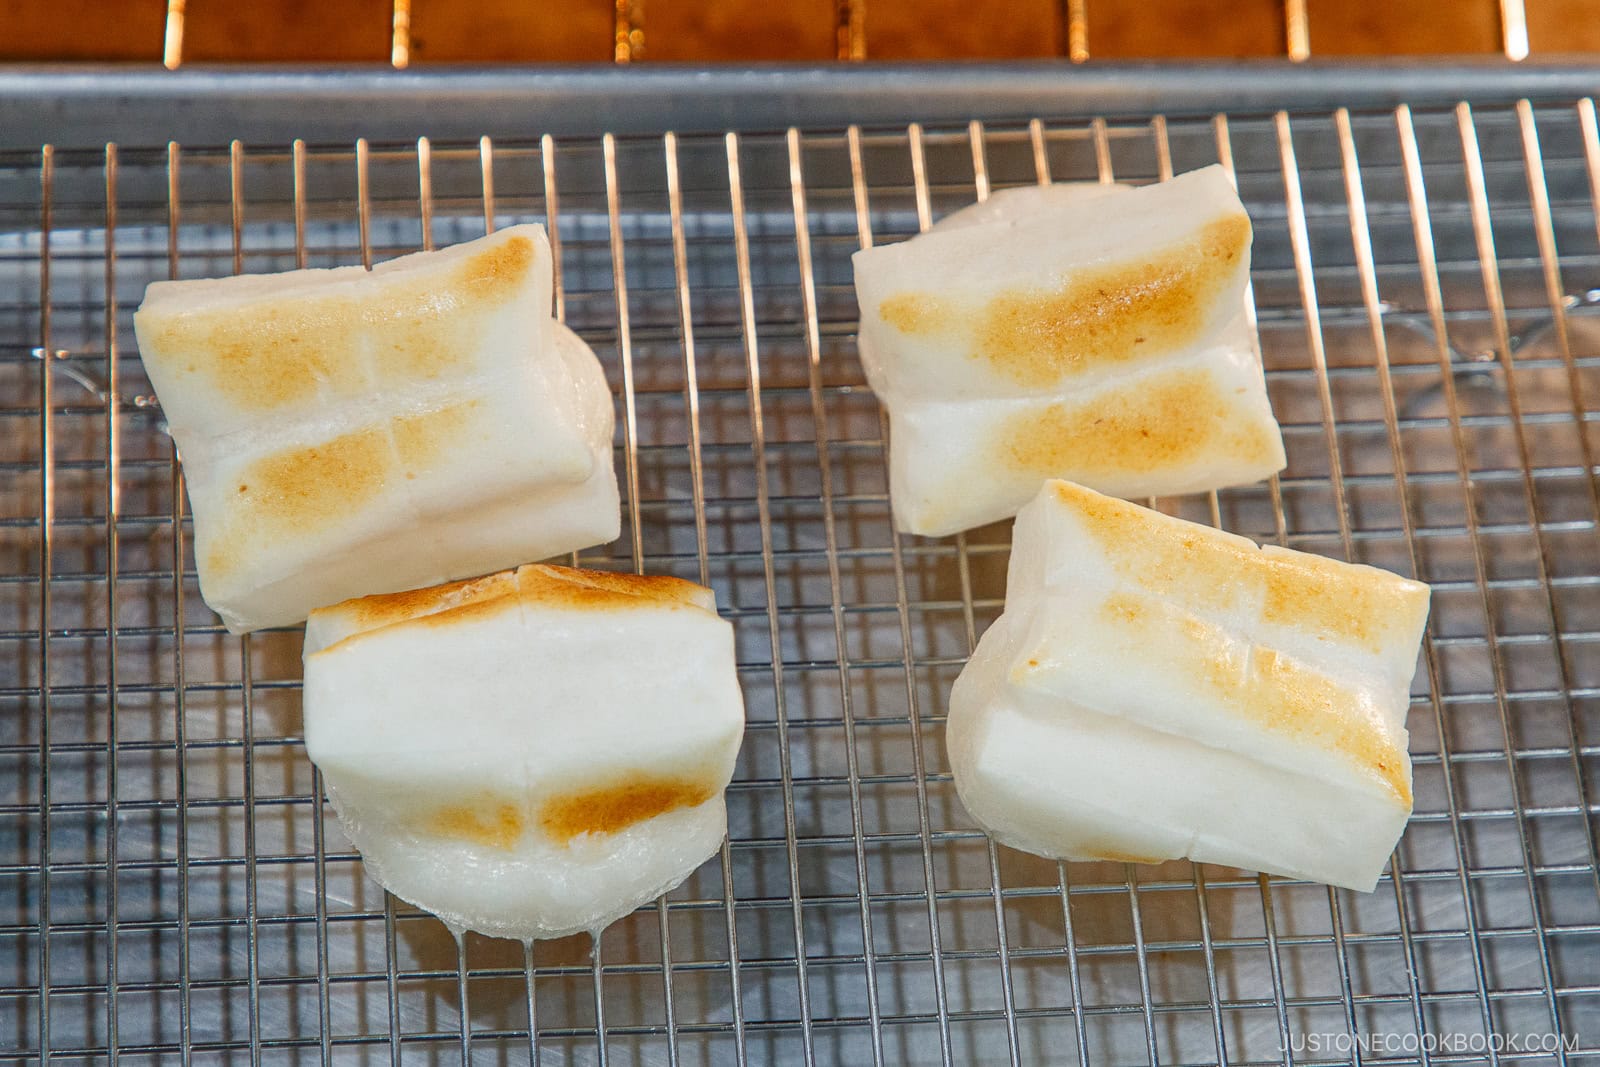
Oven Method
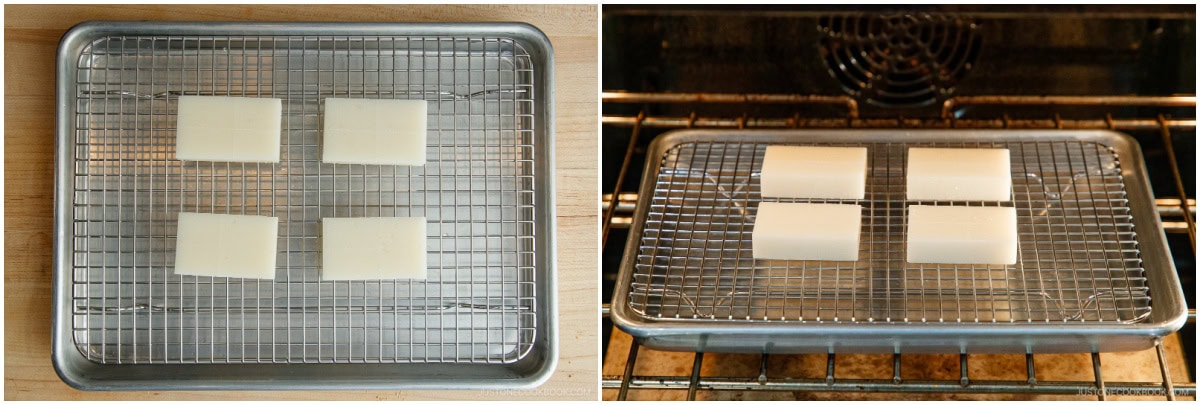
Preheat: Place the oven rack in the middle position and preheat the broiler on High, or a toaster oven at 400ºF (200ºC), for 3 minutes.
Set an ungreased, oven-safe wire rack in a baking sheet and place the mochi on top. Put in the preheated oven and set a timer for 3 minutes.
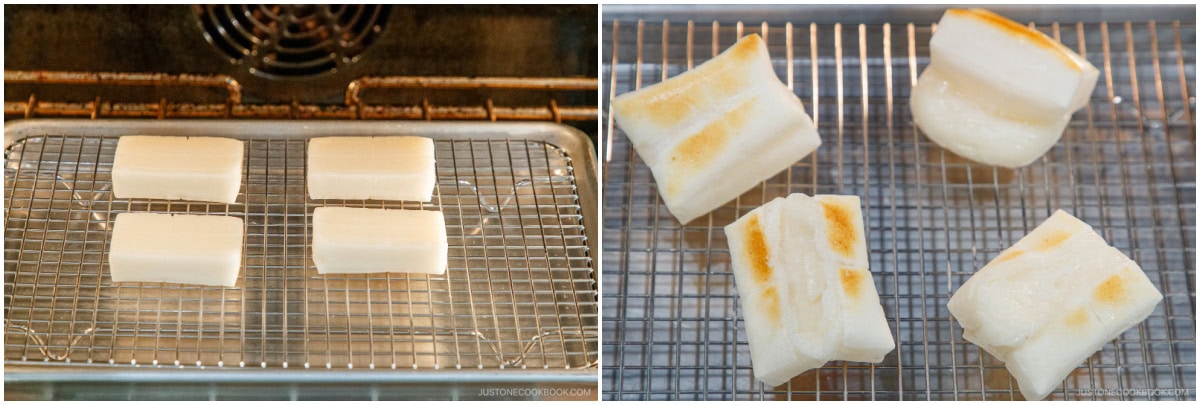
Flip the mochi after 3 minutes, when the top is light golden and starting to puff.

Grill until puffed, golden brown, and soft inside, about 3 minutes. Remove and serve immediately.
Nami's Tip: Remove from the oven as soon as they puff up. If you cook them too long, the hot and molten mochi can burst from the center and overflow.
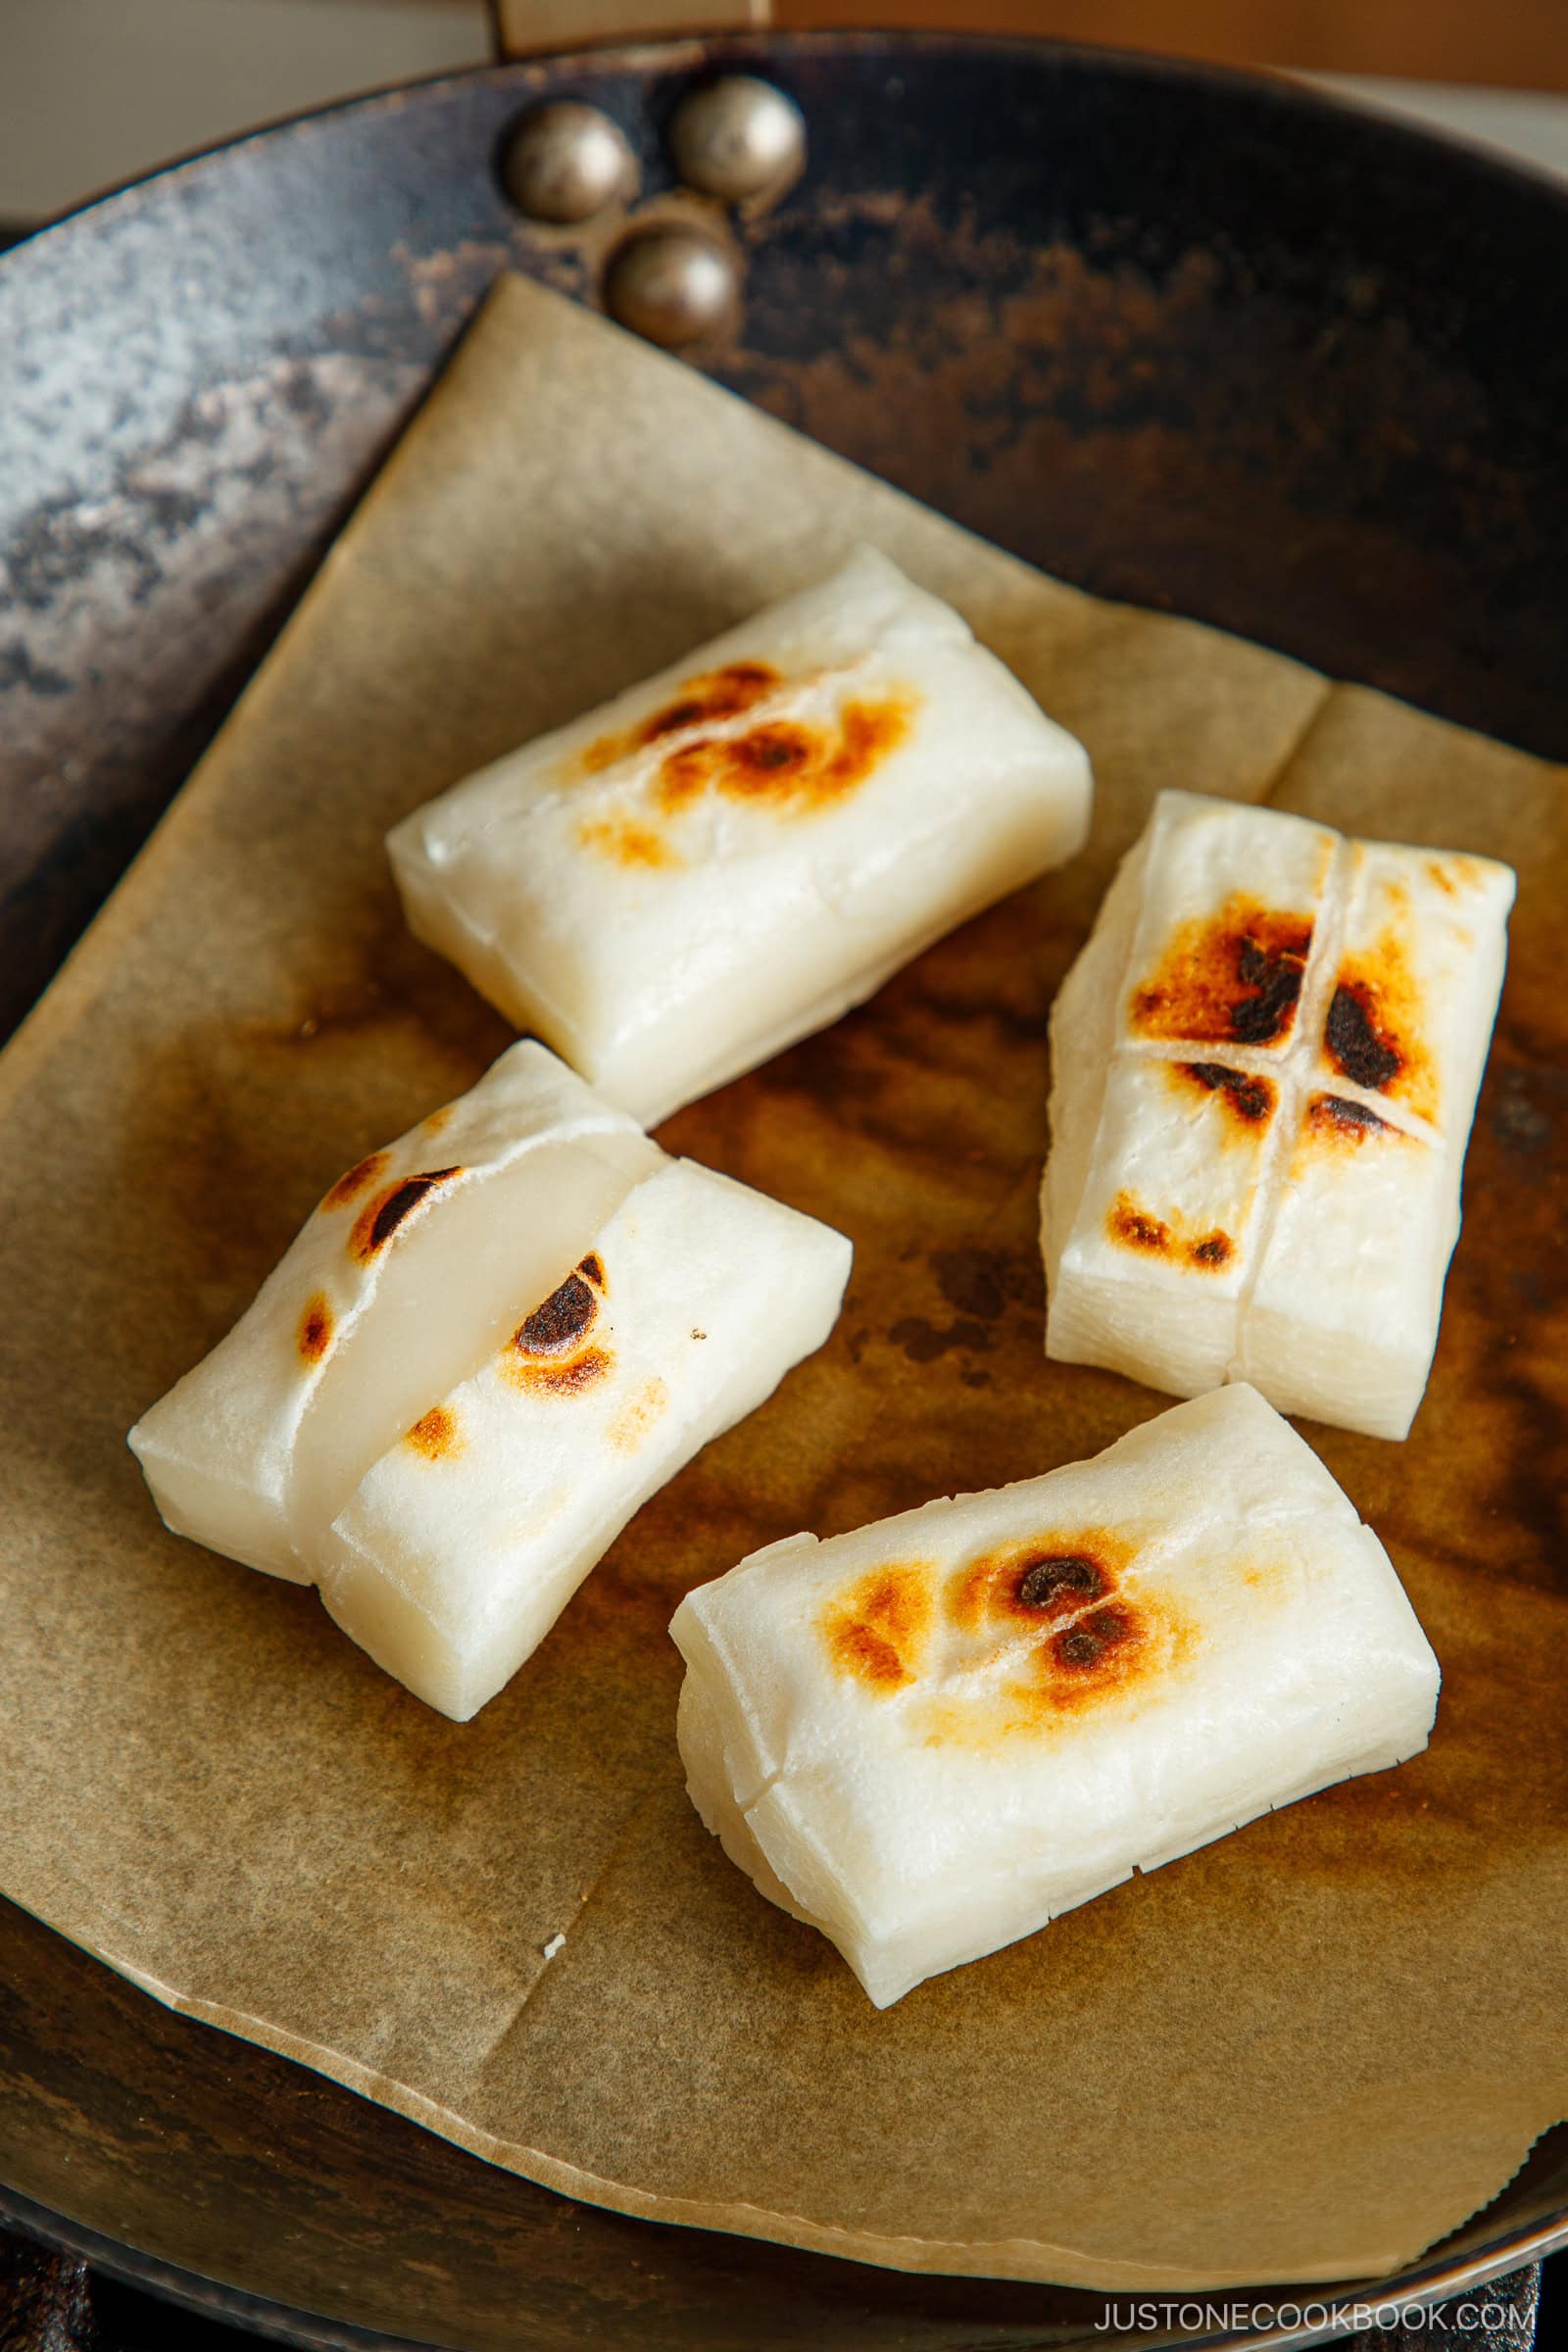
Stovetop Method
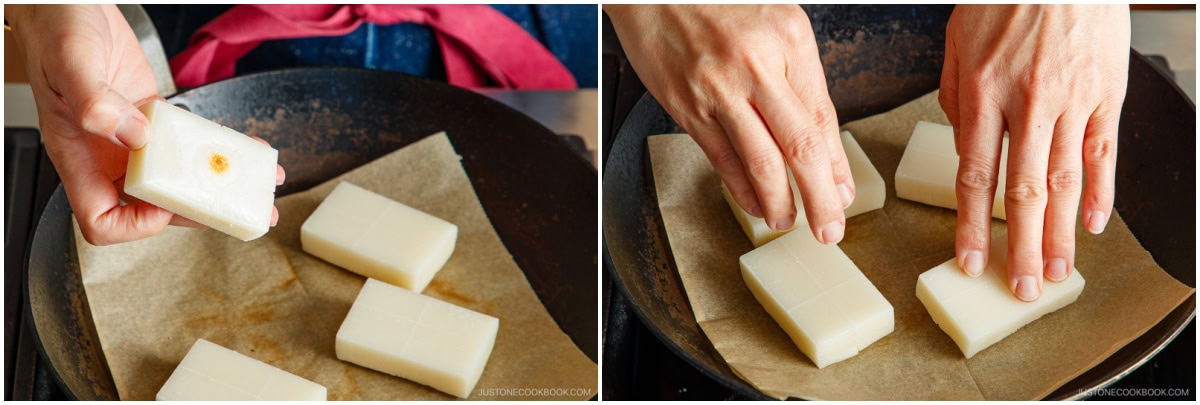
Line a cold frying pan with parchment paper and set the kiri mochi pieces on top.
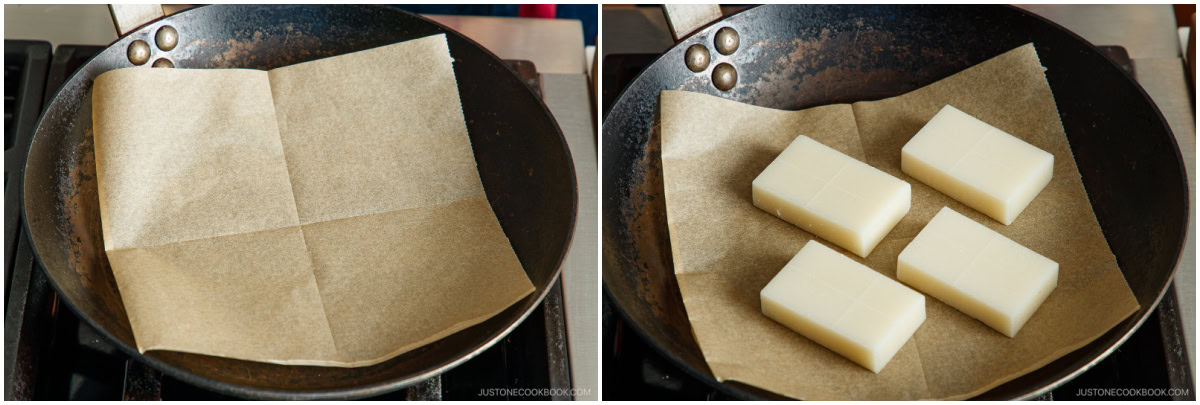
Turn on the heat to medium-low and cover with a lid. Set the timer for 5 minutes.
Nami's Tip: Covering the pan traps heat and moisture, helping the mochi cook evenly.
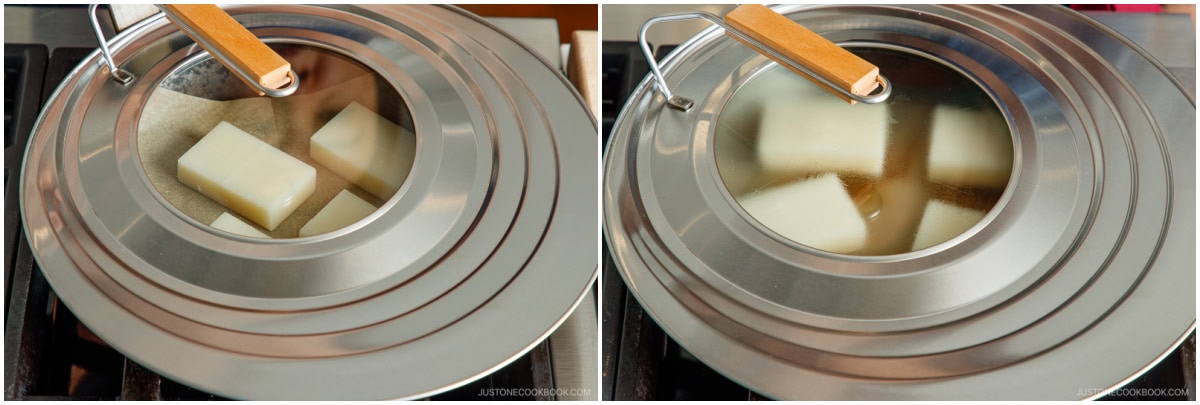
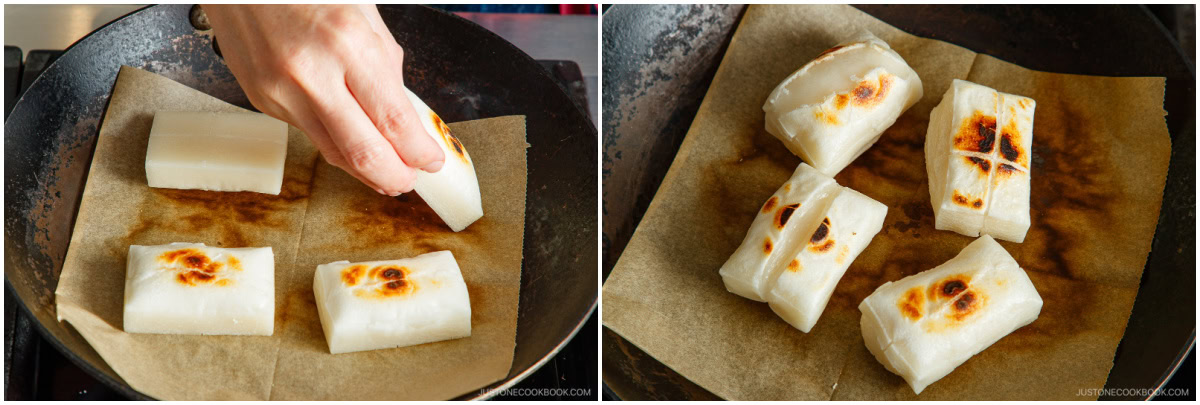
Occasionally lift the lid to check if the mochi is puffing up. When the mochi begins to puff, remove the lid. If the bottom develops golden toast marks in only one spot (see the photo), press down gently once to encourage even toasting.
After 5 minutes, flip and grill on the other side until puffed, browned, and soft inside, about 5–6 minutes. Remove and serve immediately.
Nami's Tip: Remove from the heat as soon as they puff up. If you cook them too long, the hot and molten mochi can burst from the center and overflow.
To Store
It’s best to cook yakimochi right before you serve it, as it will harden as it cools. I recommend preparing only as much as you can consume. For the kiri mochi, store it unopened in a dark, cool place away from humidity. Kiri mochi is a shelf-stable product and should last for several months in a vacuum-sealed package.
Did you make this recipe?
Tag @justonecookbook on Instagram so we can see your delicious creation!
Editor’s Note: This post was originally published on February 25, 2025, and republished on January 7, 2026, with more helpful information.


 English (US) ·