 1 day ago
10
1 day ago
10
Recipe Highlights
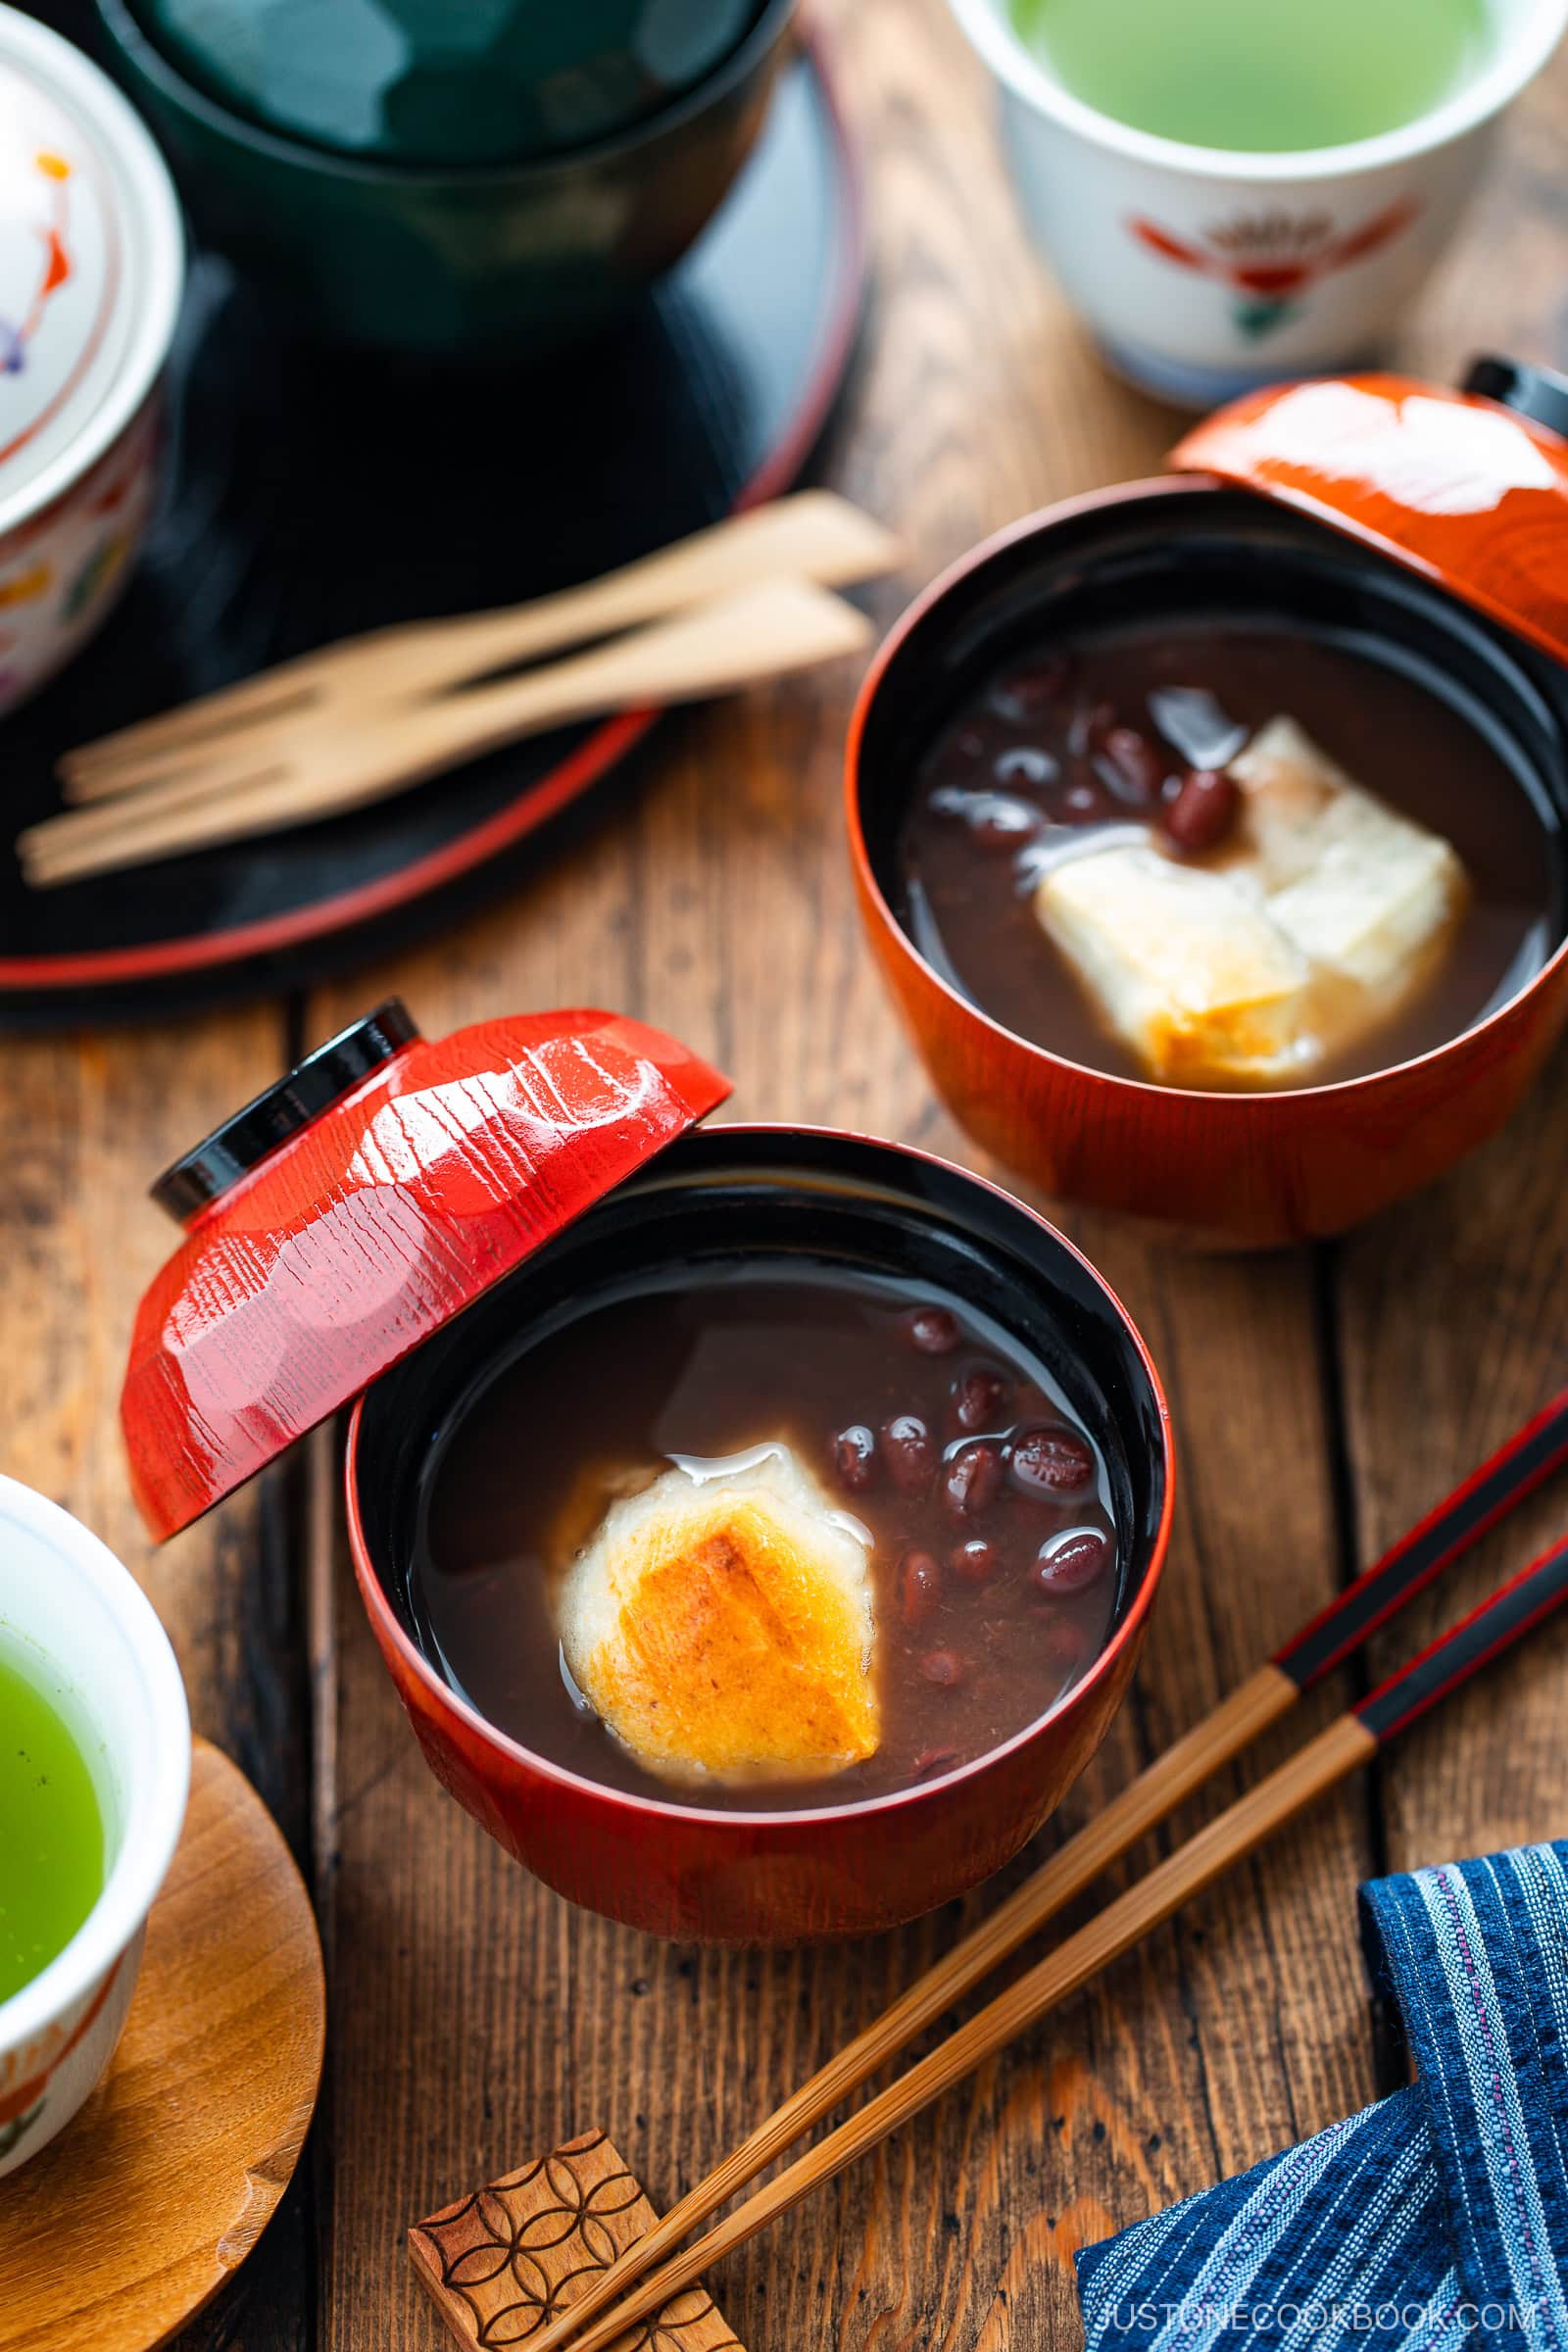
Zenzai (Sweet Red Bean Soup with Mochi) brings back so many cozy childhood memories for me. The slightly sweet azuki beans and toasted, chewy mochi warmed me from the inside out. With modern shortcuts, it’s quicker and easier than ever to make at home.
- Simple and flexible. Make it from scratch with dried azuki beans on the stovetop or in an Instant Pot, or use ready-made red bean paste (anko) for a time-saving shortcut.
- Perfect wintertime comfort. Served hot, it gently warms both body and soul.
- A nostalgic Japanese favorite. I crave it and enjoy making it all year round, especially in my cooler climate.
If you love traditional Japanese sweets, try my Dorayaki, Daifuku, and Shiratama Dango recipes next!
Table of Contents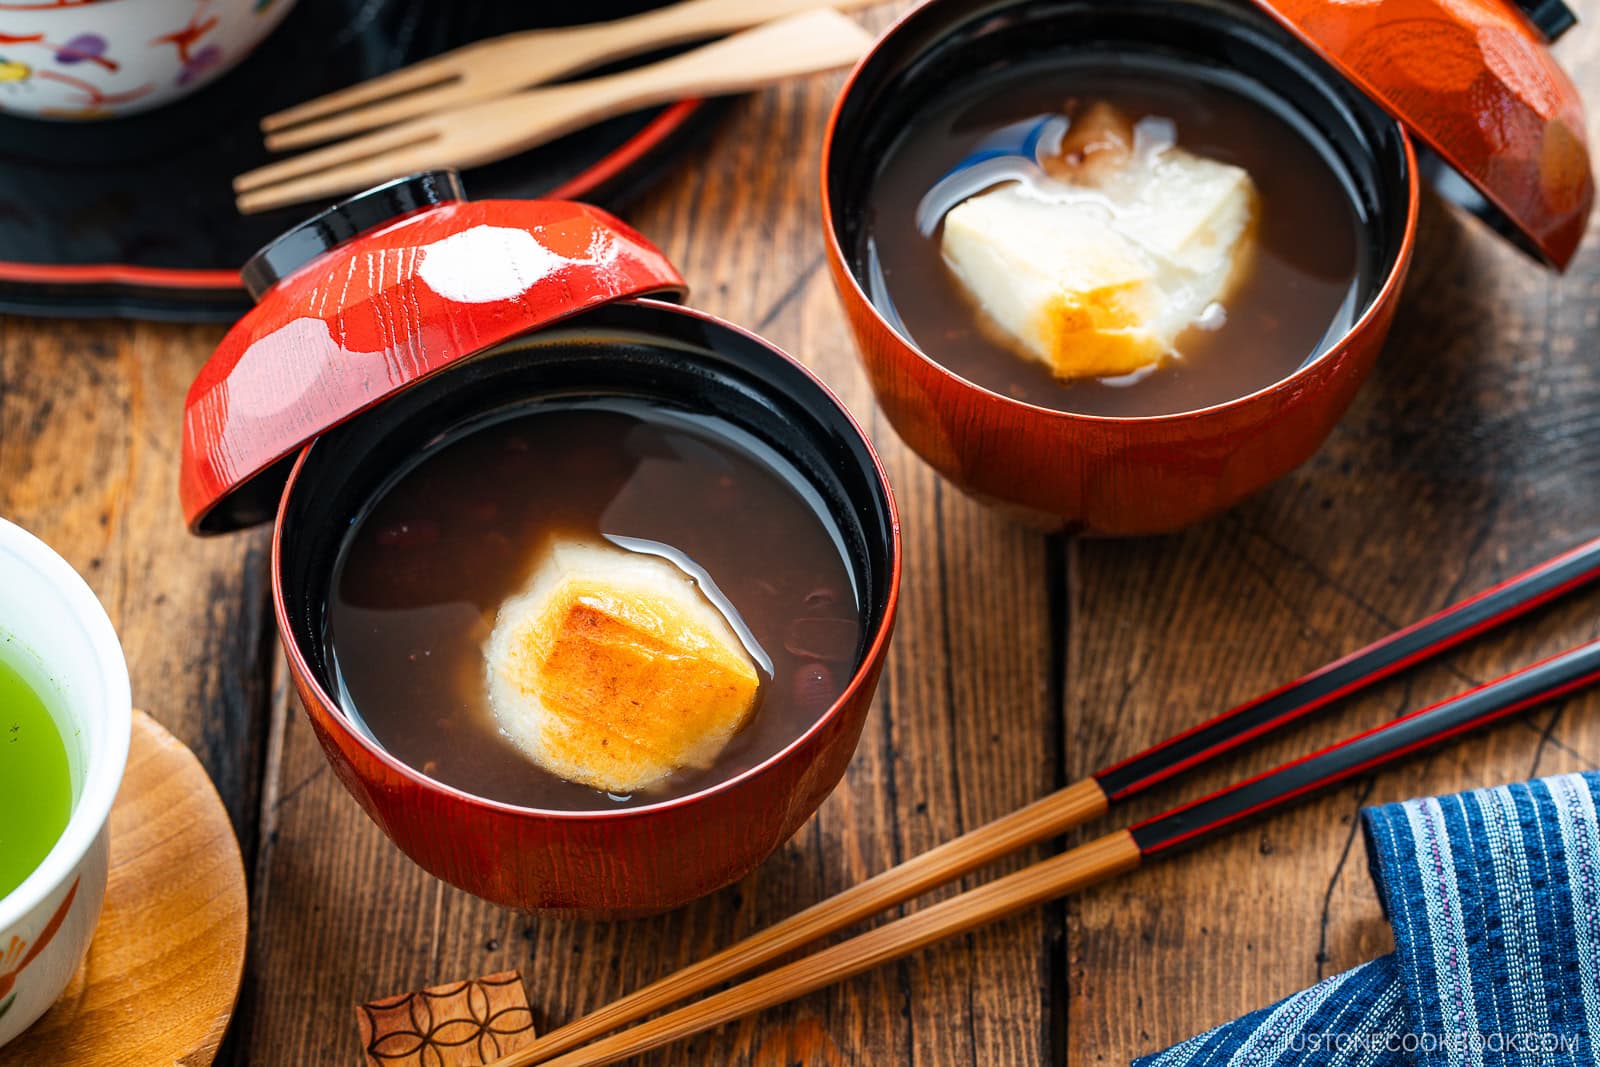
What is Zenzai?
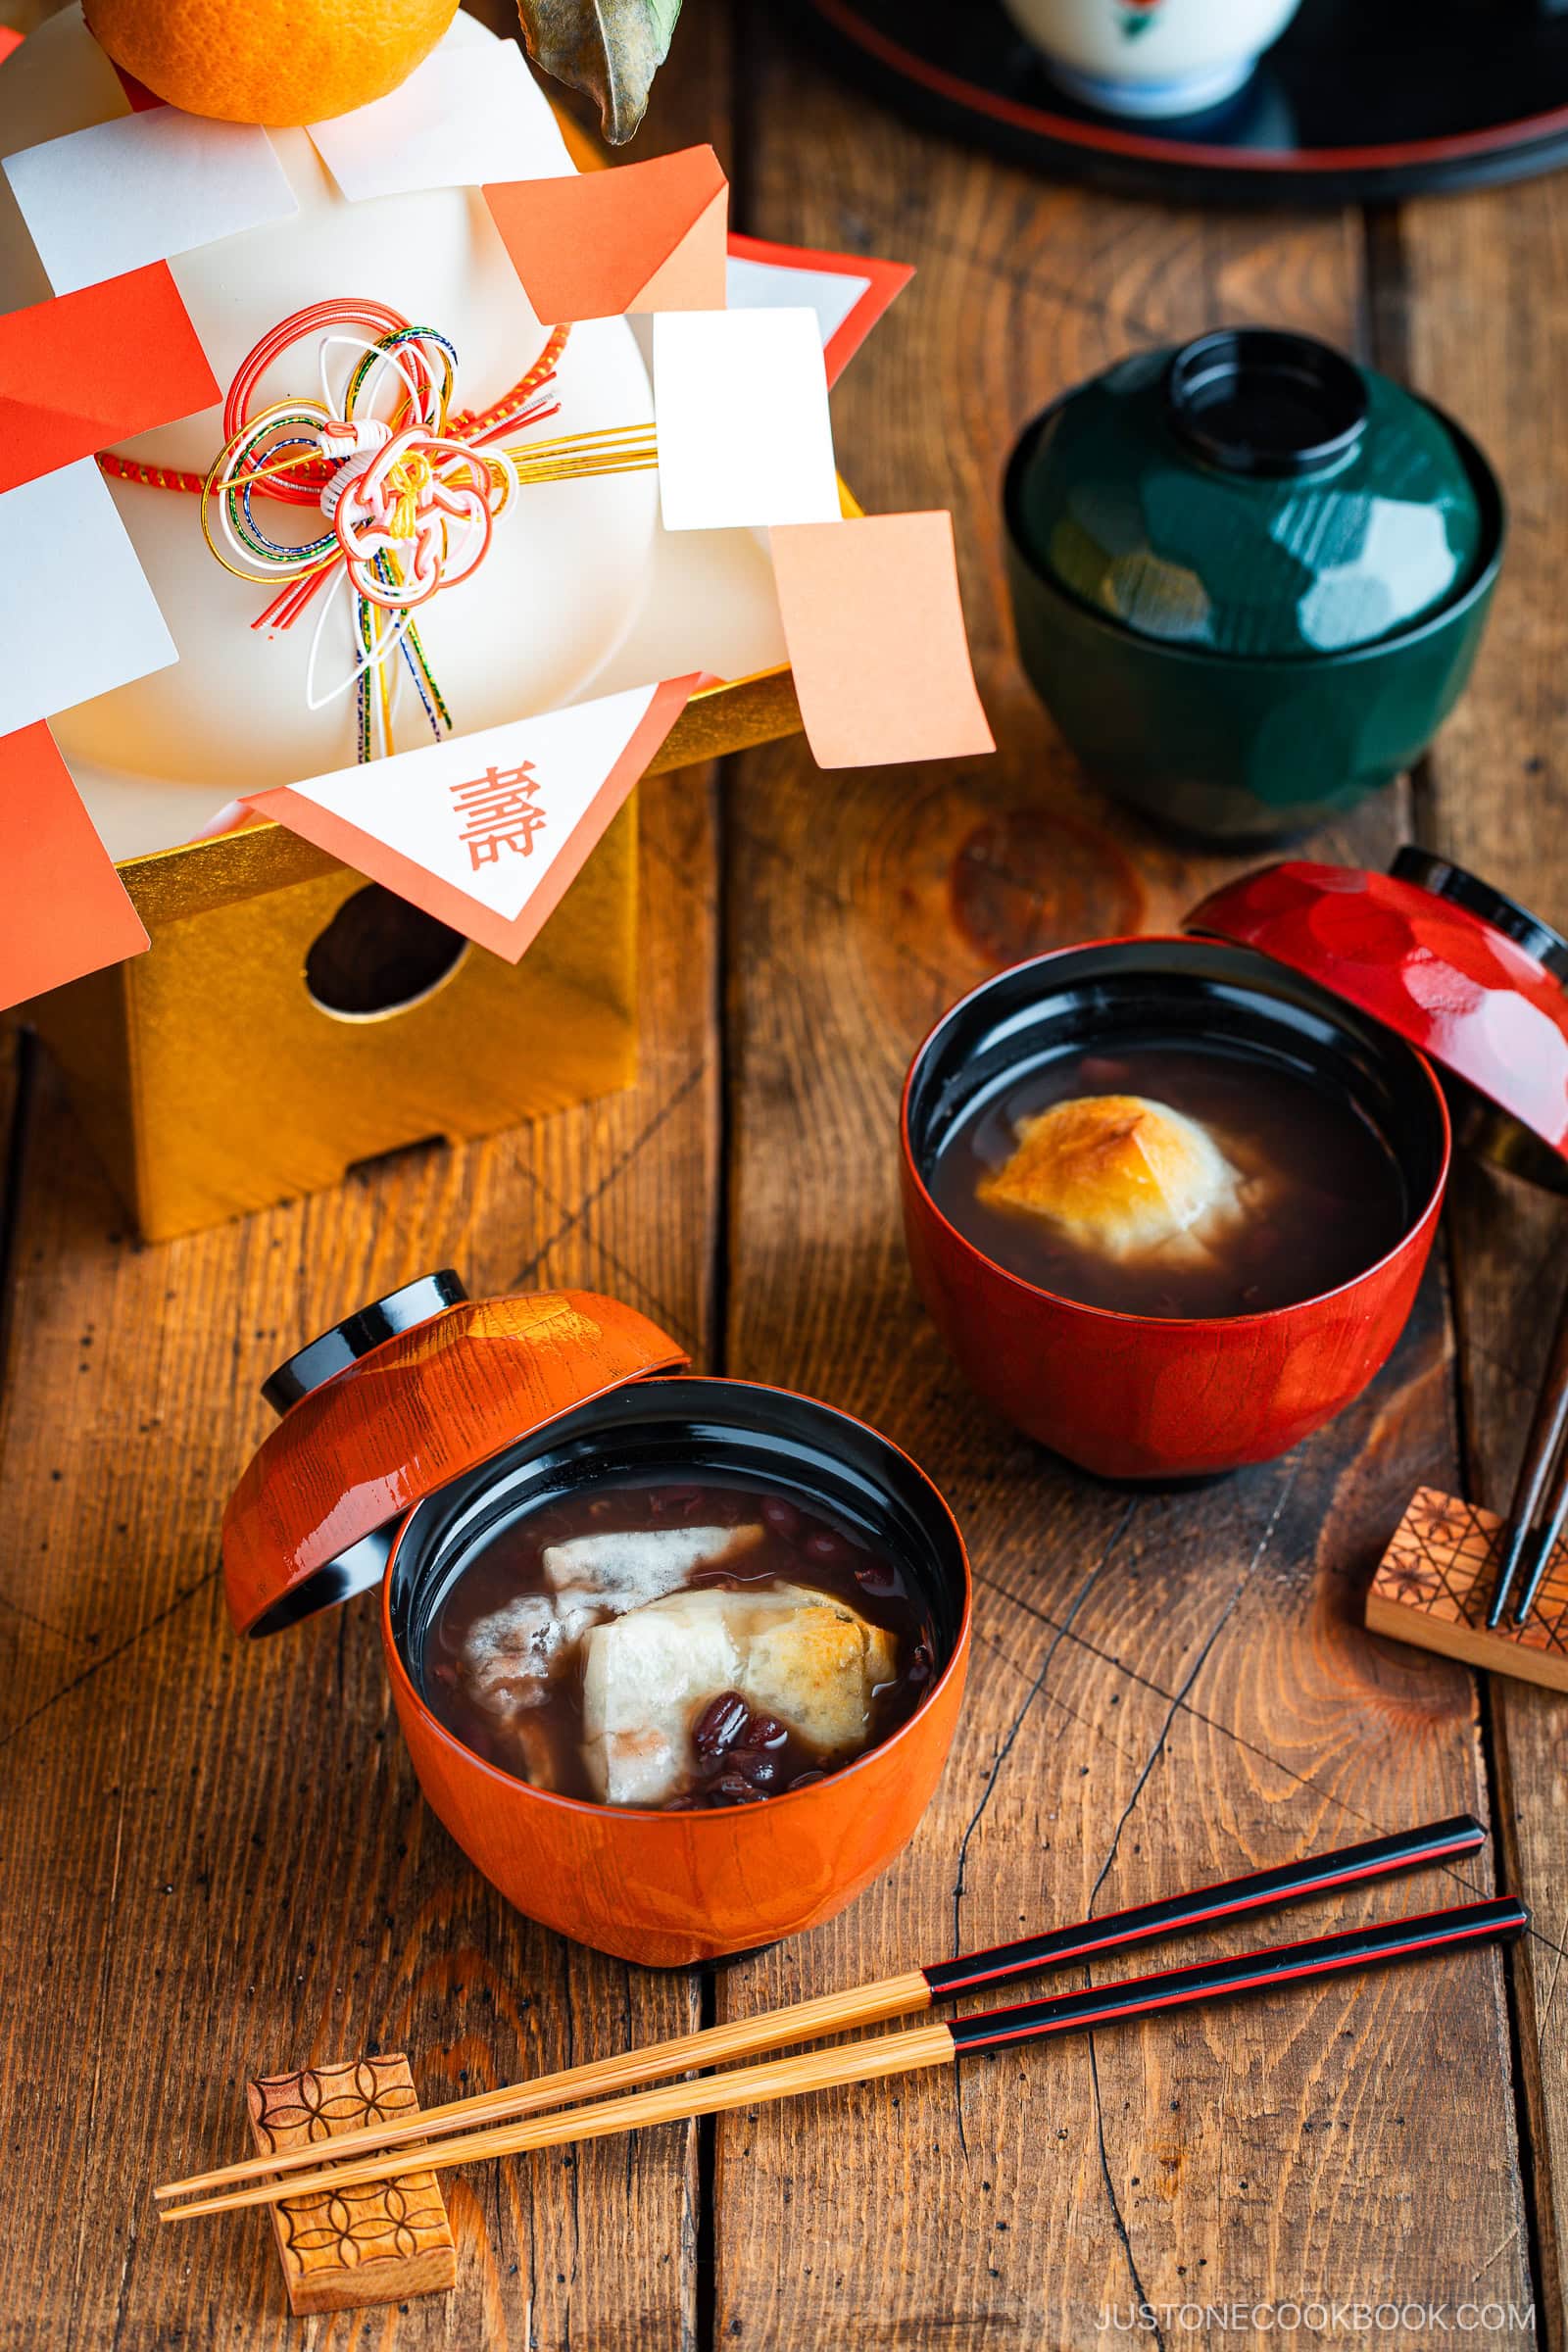
Zenzai (ぜんざい) is a traditional Japanese dessert soup made with azuki beans. It’s served hot and usually topped with toasted mochi. This beloved winter treat is enjoyed during Japanese New Year and year round. It’s also a favorite way to eat mochi on January 11th for the traditional Kagami Biraki (鏡開き) ceremony in Japan.
Some regions or households may call this dish Oshiruko (お汁粉).
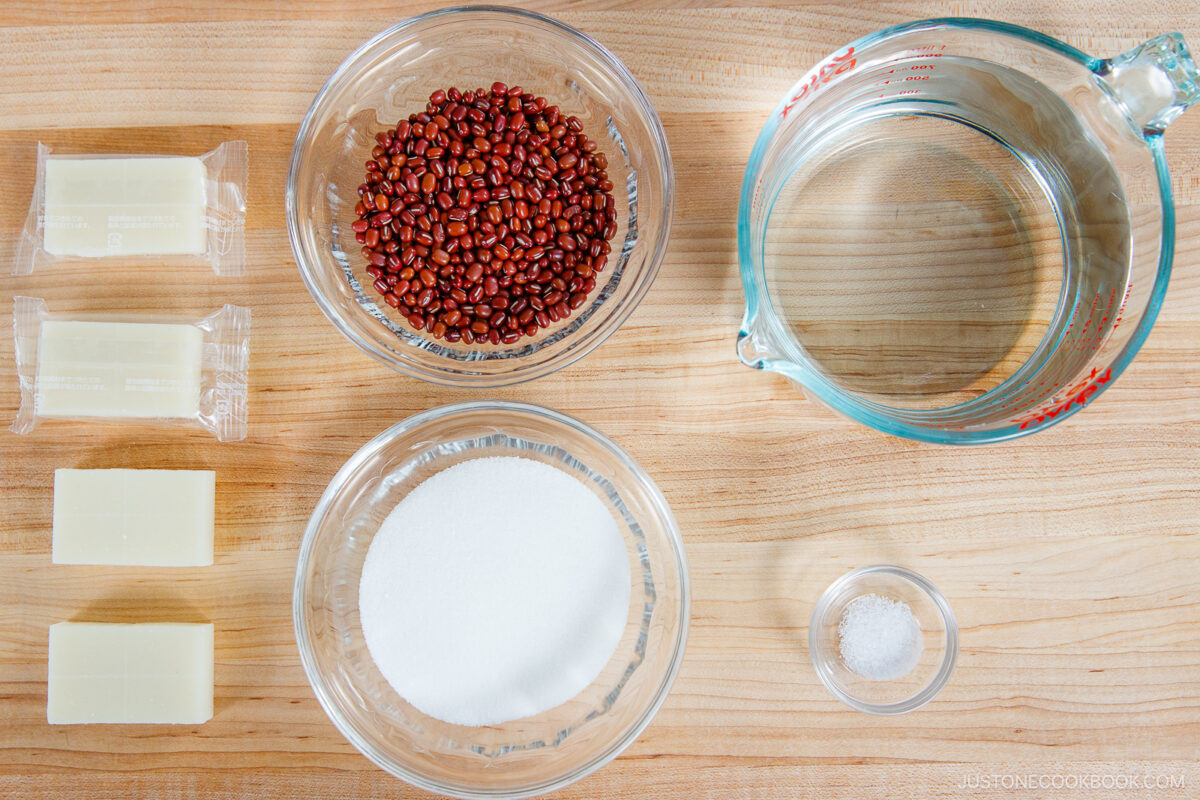
Ingredients for Zenzai (Sweet Red Bean Soup)
- dried azuki beans or sweet red bean paste (anko) – As my mom is from Osaka, my family uses chunky-style anko (tsubuan) for Kansai-style zenzai.
- water
- sugar – skip for store-bought anko
- salt
- kiri mochi (rice cake)
Find the printable recipe with measurements below.
Jump to RecipeHow to Make Zenzai (Sweet Red Bean Soup)
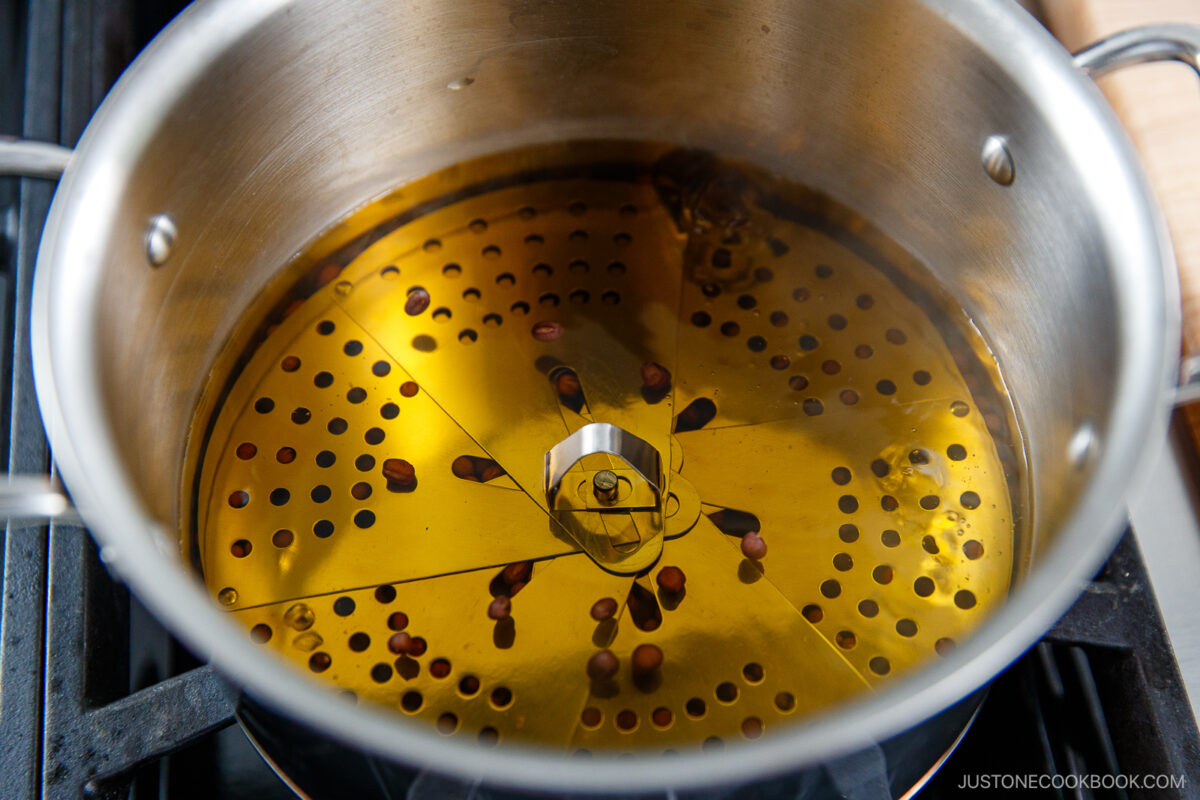
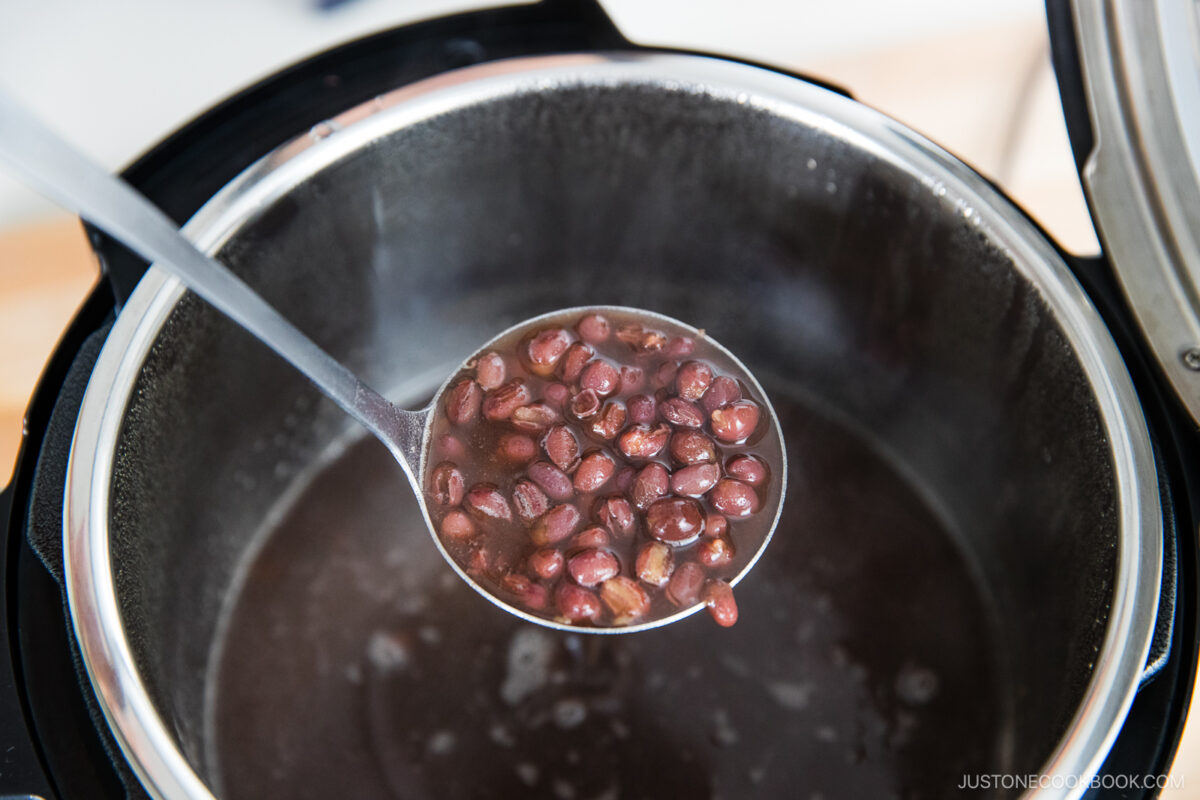
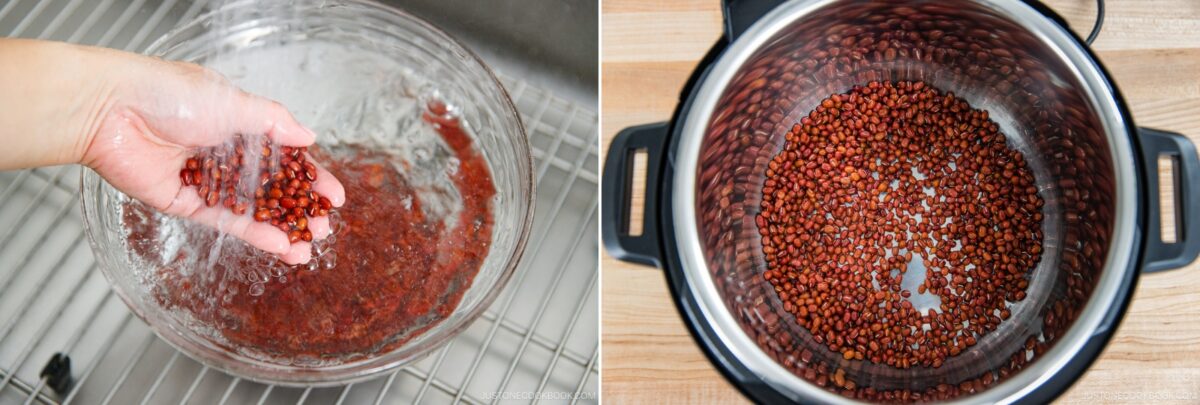
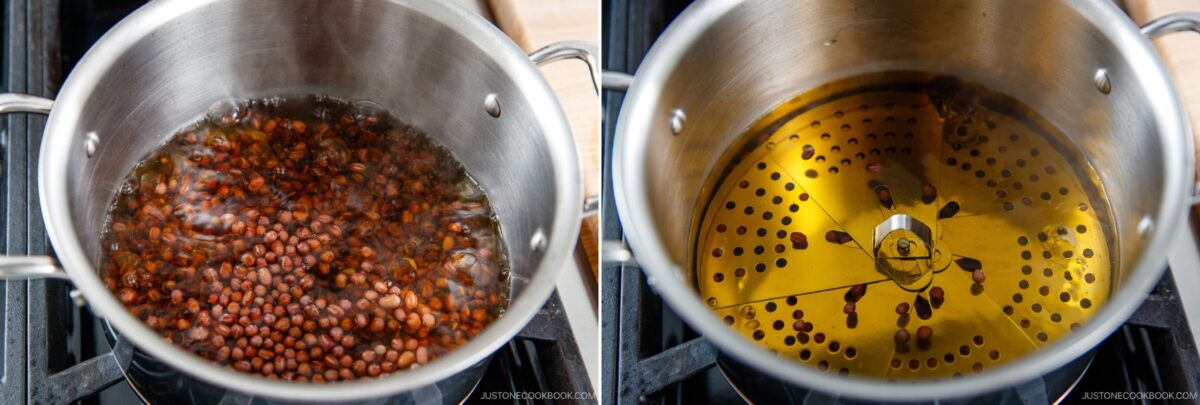
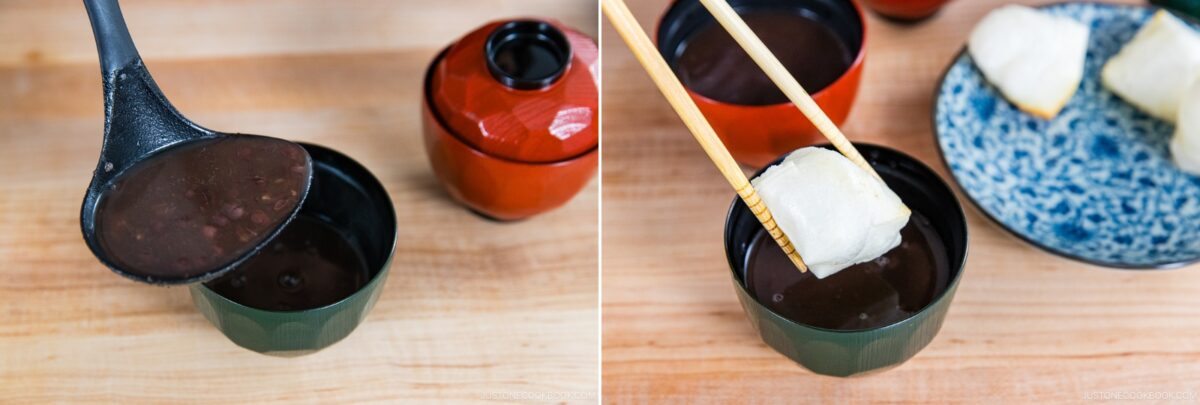
- Cook the beans. Wash the dried azuki and cook in water until tender, using pot on the stove (left photo) or a pressure cooker (right photo). You can jump to step 3 for store bought.
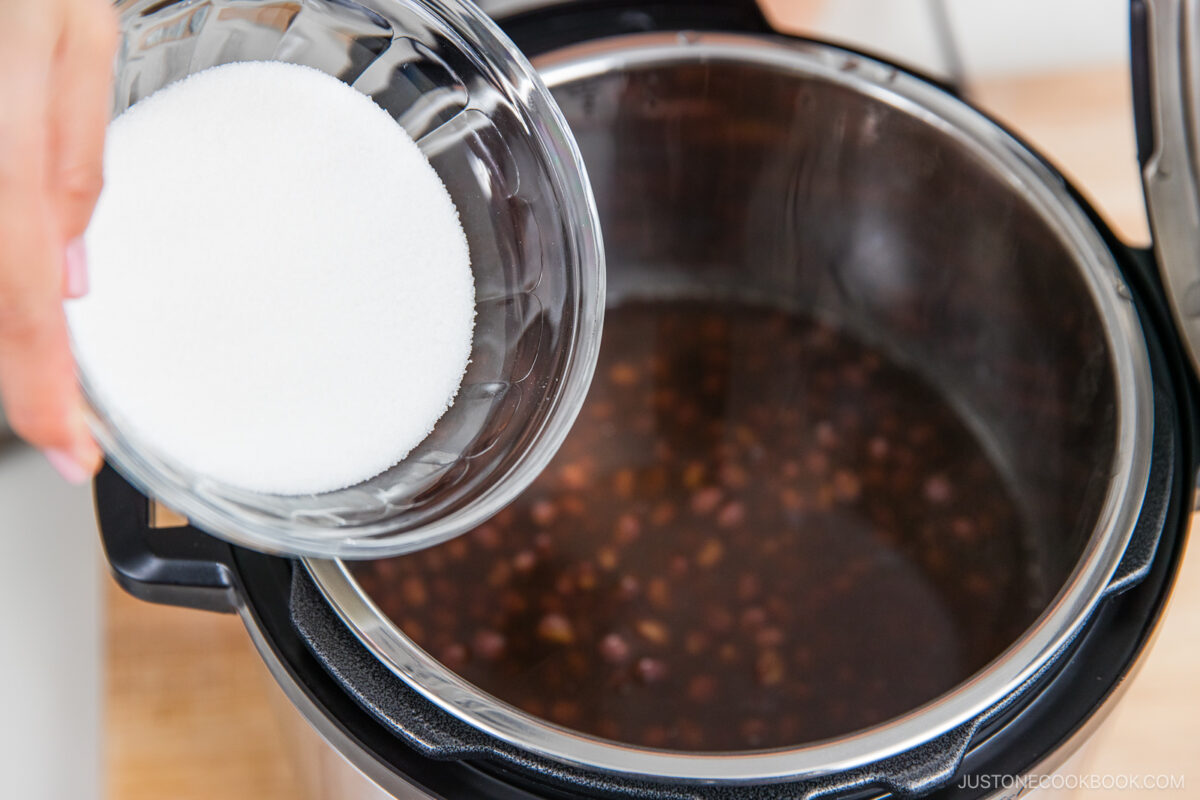
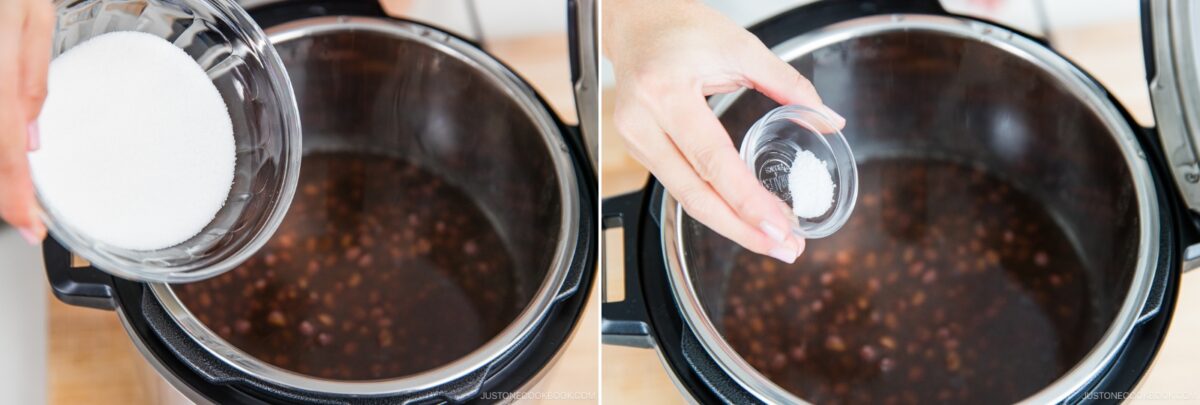
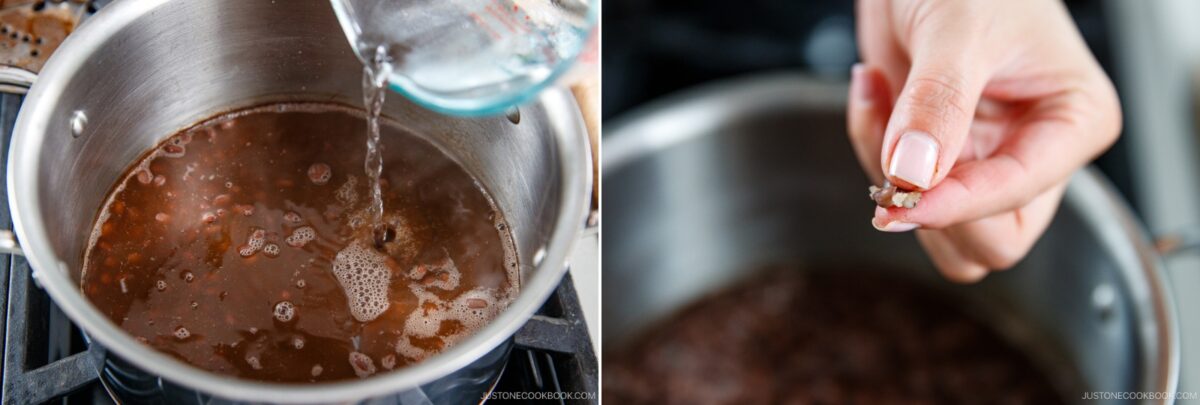
- Sweeten. Add sugar and a pinch of salt. Stir gently until dissolved.

- Adjust the thickness. Add a little water to thin the soup or simmer briefly to reduce, if needed.
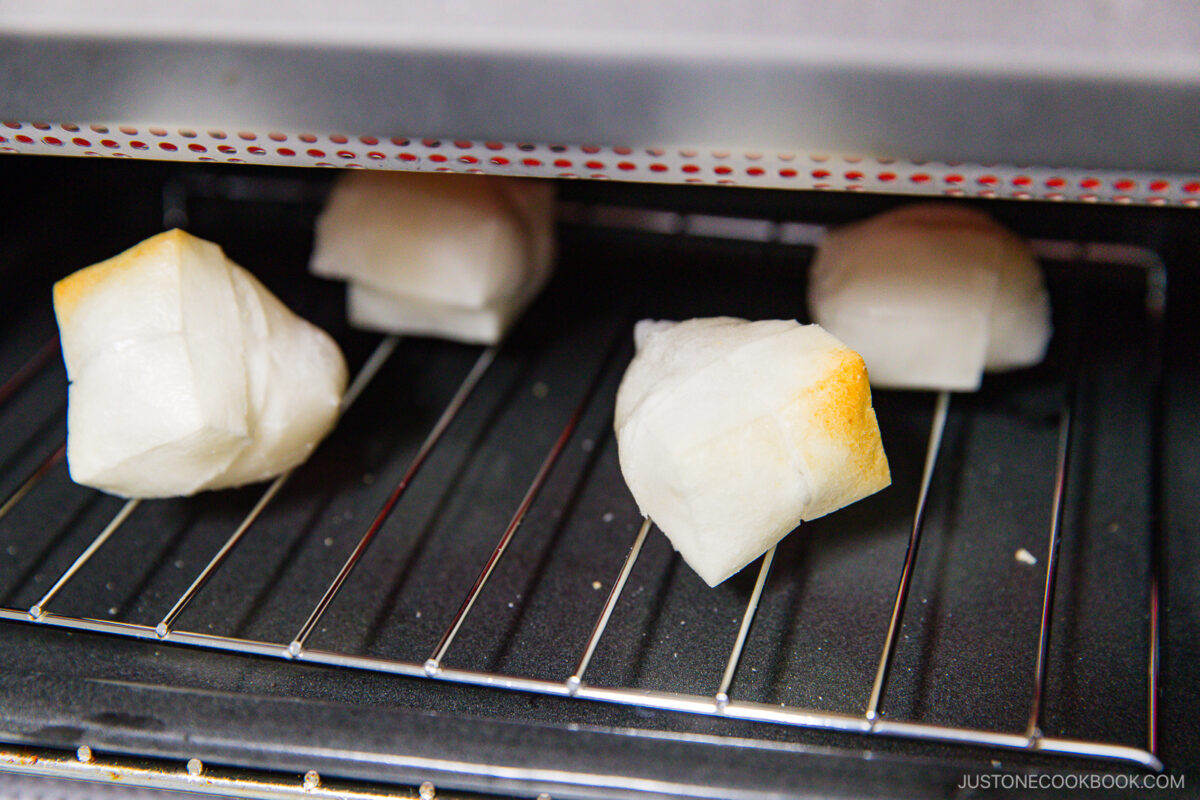
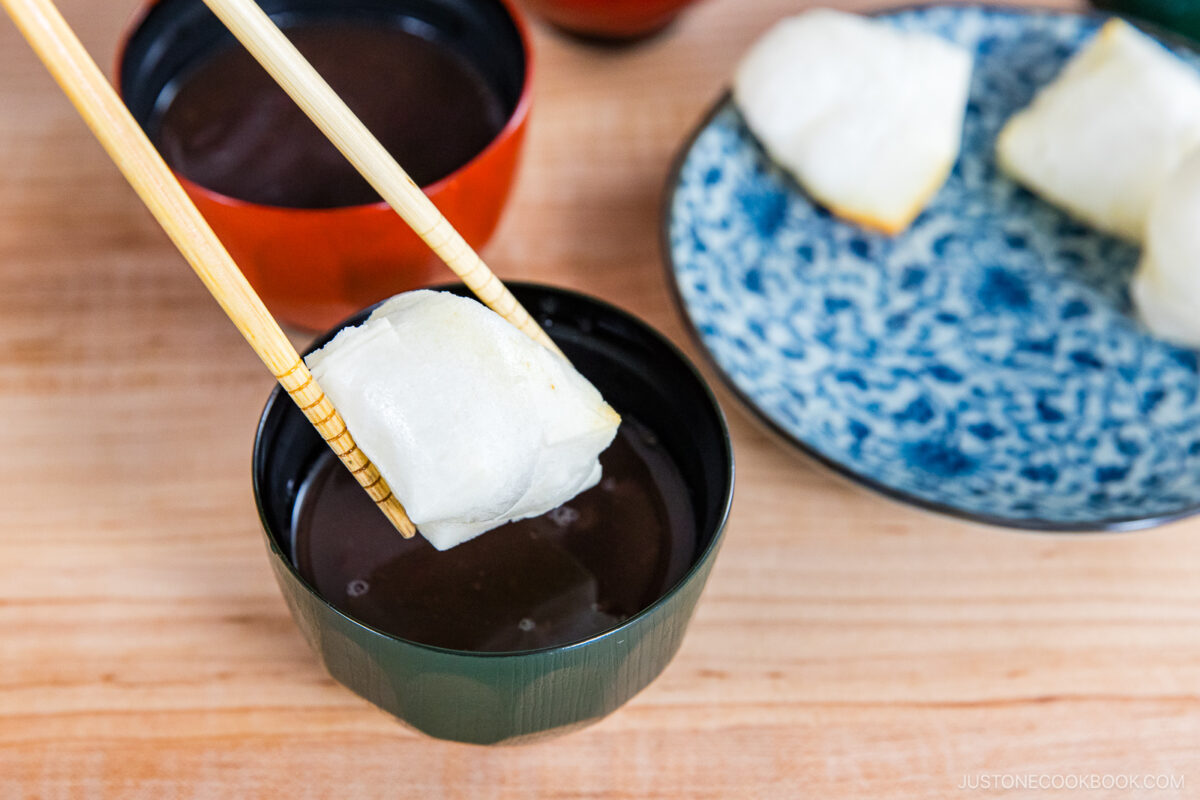
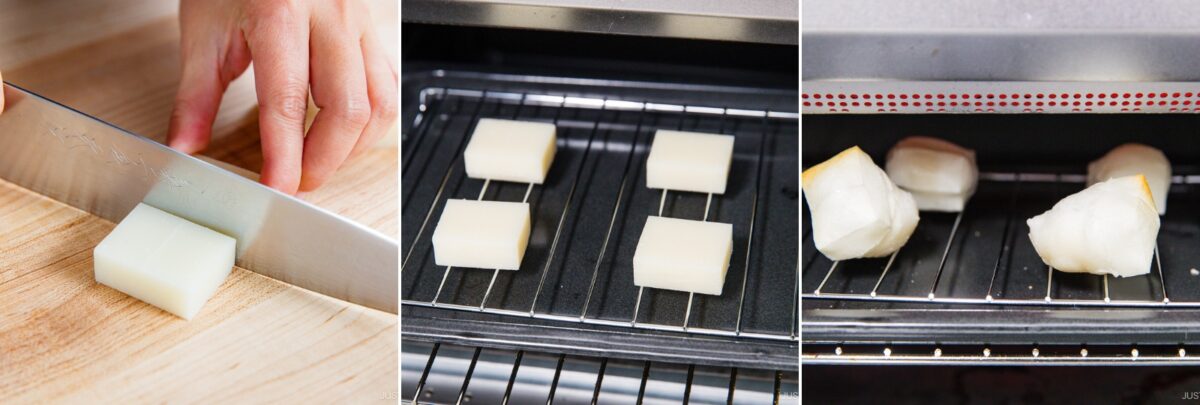
- Toast the mochi and serve. Cut kirimochi in half or quarters and toast until puffed and lightly browned. Ladle the hot red bean soup into bowls and top with toasted mochi.

Nami’s Recipe Tips
These simple tips will help you make Zenzai every time.
- Choose your method. A pressure cooker saves time, but the stovetop method works just as well. See my recipe below for both methods!
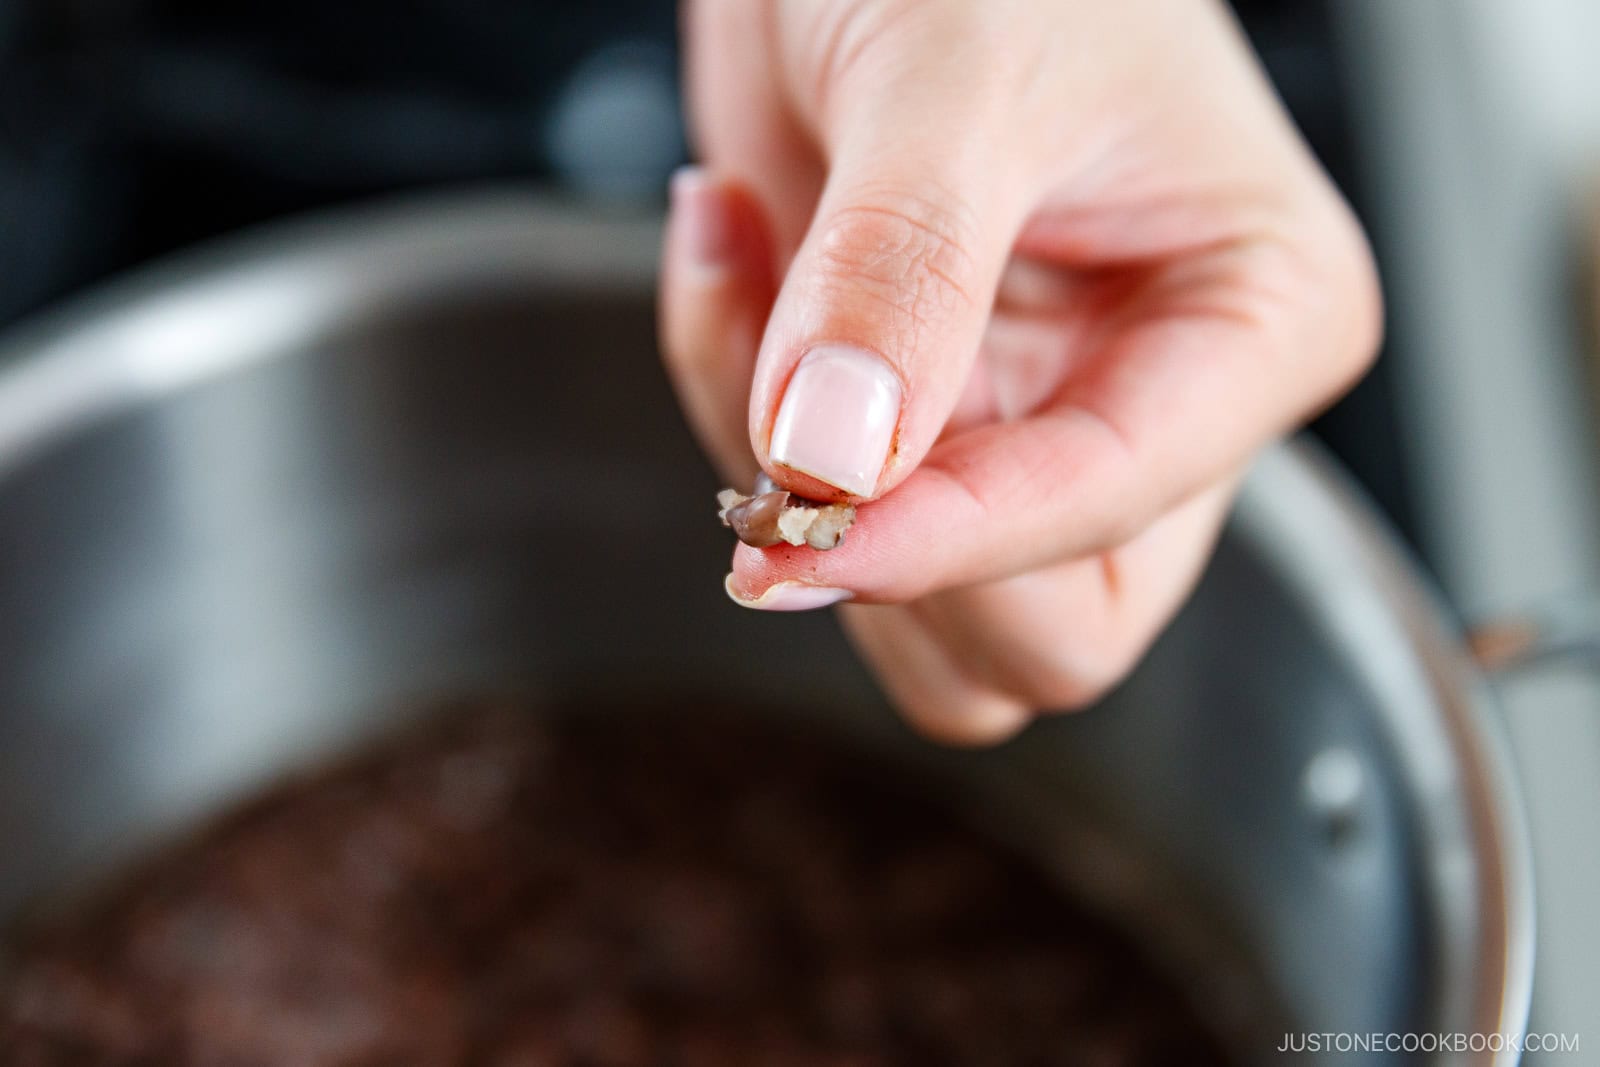
- Cook the azuki beans until tender, not mushy. They should be soft enough to gently crush between your fingers, while still holding their shape.
- Add sugar only after the beans are fully cooked. Adding sugar too early can toughen the skins and slow down cooking.
- Keep the sweetness slightly mild. Zenzai tastes sweeter as it cools, so aim for a gentle sweetness at the end of the cooking process.
- Add a small pinch of salt. Just a tiny amount helps balance and deepen the sweetness.
- Prepare the mochi separately. Grill or toast the mochi and add it just before serving. This keeps the soup clear and adds a nice toasty aroma.

Variations and Customizations
Looking to change things up? Try these easy and tasty ideas!
- Substitute shiratama dango. Some regions serve zenzai with soft rice flour dumplings instead of mochi.
- Make the azuki beans smooth. Mash and strain the cooked beans or use fine red bean paste (koshian) for a smooth texture.
- Use fresh or boiled mochi. This is a great option around Japanese New Year, when families traditionally make freshly pounded rice cakes.
- Chill it. Enjoy it cold as hiyashi zenzai in the summertime.
- Add sweetened chestnuts. For additional sweet and earthy flavor, try kuri kanroni (chestnuts in heavy syrup).
What to Serve with Zenzai (Sweet Red Bean Soup)
This sweet porridge is best kept simple. Here’s how I like to serve it for a snack or dessert:
- With hot tea – Japanese green tea beautifully counterbalances this sweet porridge.
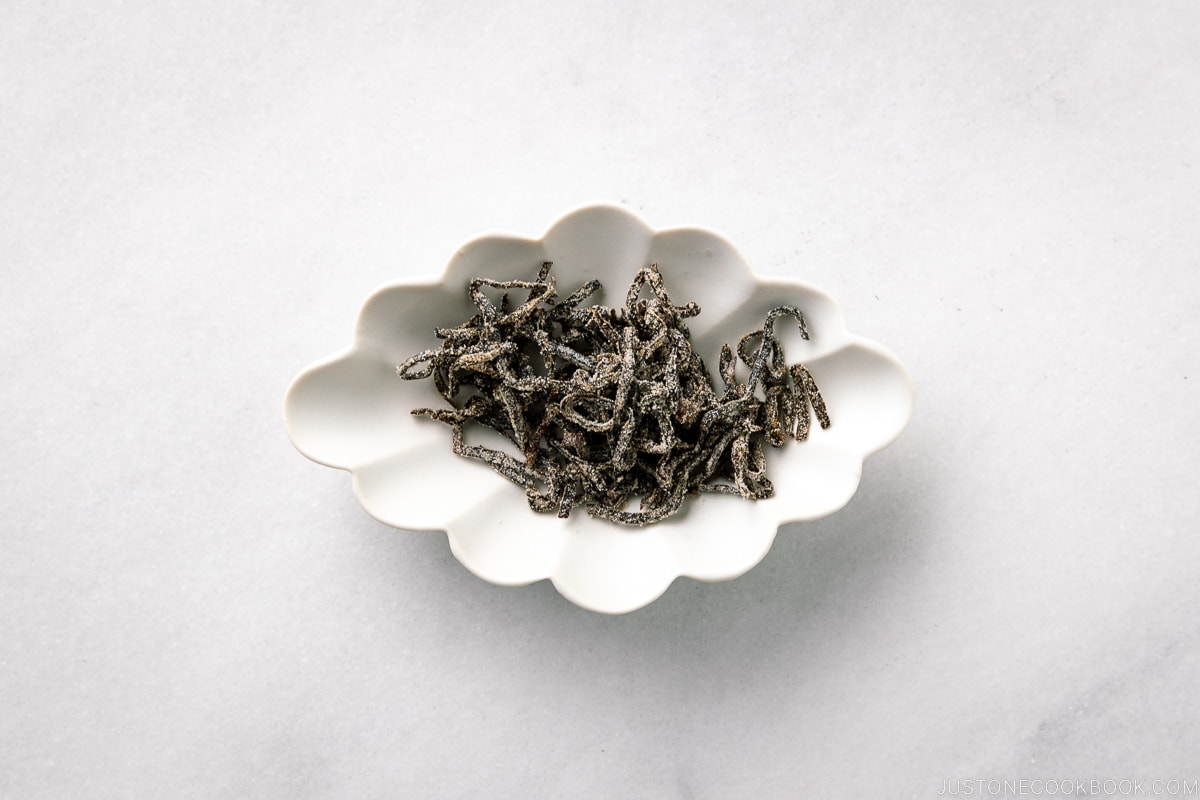
- With shio kombu – A small side of seasoned and dried thin kelp strips makes a tasty sweet-salty pairing.

Storage and Reheating Tips
To store: Transfer the soup to an airtight container and store in the refrigerator for up to 4 days and in the freezer for up to a month. Prepare the mochi right before you serve the zenzai.
To reheat: Warm gently on the stovetop, and thin with a little water if needed.
FAQs
What is the difference between zenzai and oshiruko?
It depends on the region. In Kansai (Osaka area), zenzai is chunky soup with whole beans, while Oshiruko is smooth. In Kanto (Tokyo area), zenzai is dry mochi served with chunky red bean paste while oshiruko is any red bean soup. Oshiruko is often served with soft rice flour dumplings made with shiratamako.
How do you make zenzai with mochi?
Simmer cooked azuki beans with sugar, then serve hot with mochi toasted until puffed and crisp, or boil the mochi. The contrast between sweet beans and chewy mochi makes zenzai so satisfying.
Can I make zenzai with canned or store-bought red beans?
Yes! You can easily use canned or packaged sweet red bean paste (tsubuan or koshian) for zenzai. Simply thin and warm the beans with a little water. It’s a convenient shortcut that I use often!
I’d love to hear how yours turned out! 💛 Please leave a star rating and comment below to share your experience. Your feedback not only supports Just One Cookbook but also helps other home cooks discover recipes they can trust.
Homemade Version Using Dried Azuki Beans (for 4–6 bowls)
Gather all the ingredients.
Nami’s Tip: With the high quality of azuki beans these days, it’s often unnecessary to briefly boil the beans and drain (called yudekoboshi) before cooking in fresh water.
Option 1: Pressure Cooker Method
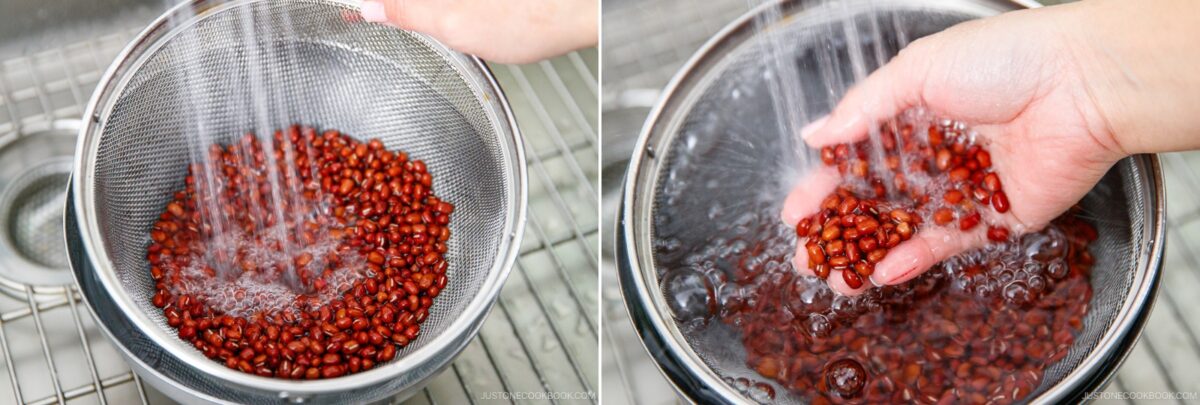
Rinse 1 cup azuki beans carefully until the water runs clear. Discard any floating (damaged) beans. Drain and transfer the beans to a pressure cooker (I use an Instant Pot).
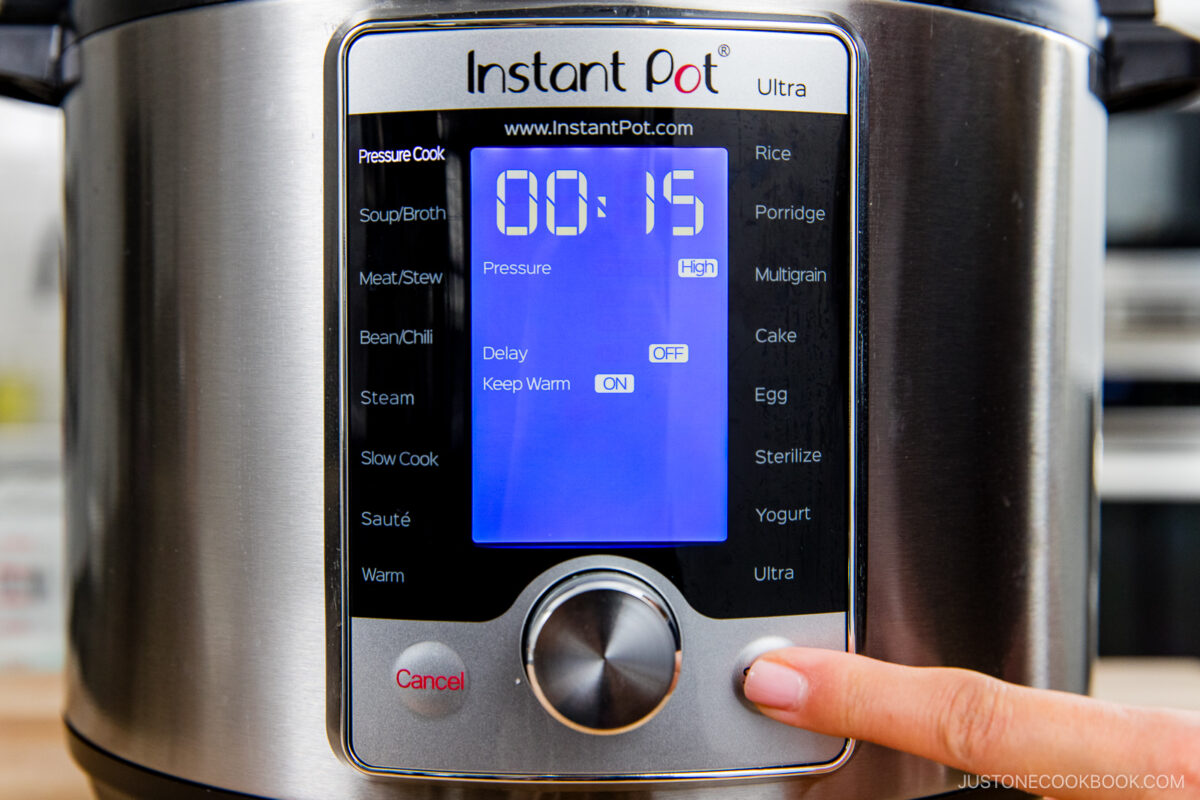
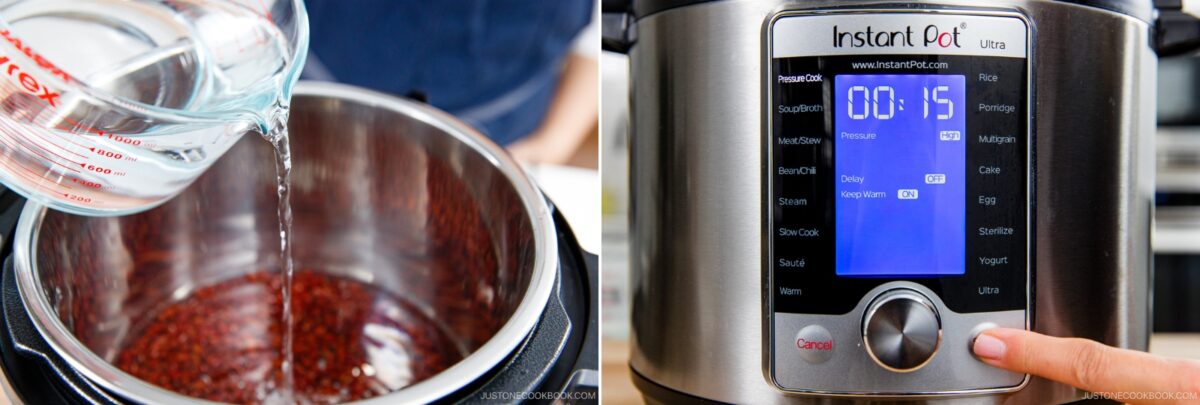
Add 4 cups water. Cover and lock the lid. Make sure the steam release handle points at Sealing and not Venting. Turn on your pressure cooker.
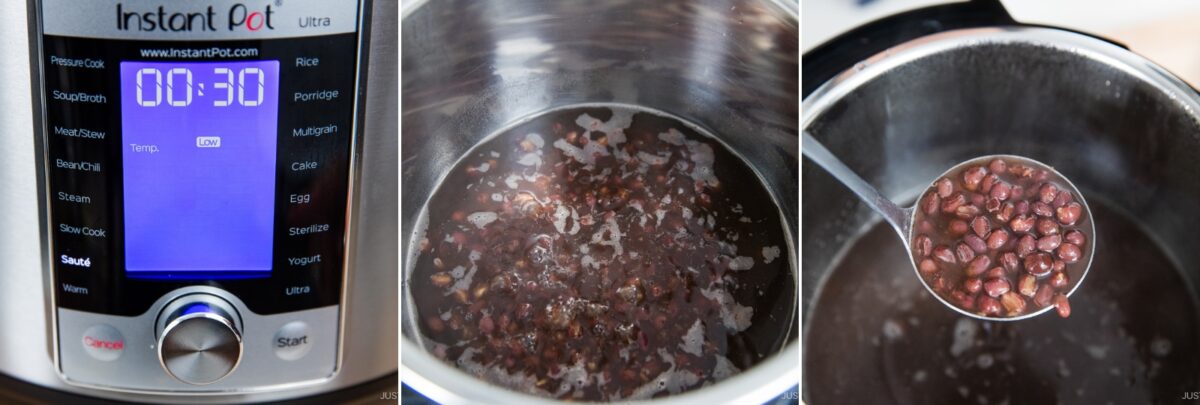
For an Instant Pot, select Manual or Pressure Cook mode, choose High pressure, and set the cooking time to 15 minutes (or 10 minutes for slightly firmer beans).
For a stovetop pressure cooker, cook on high heat until it reaches high pressure. Then, reduce the heat to low and maintain the pressure for 15 minutes.
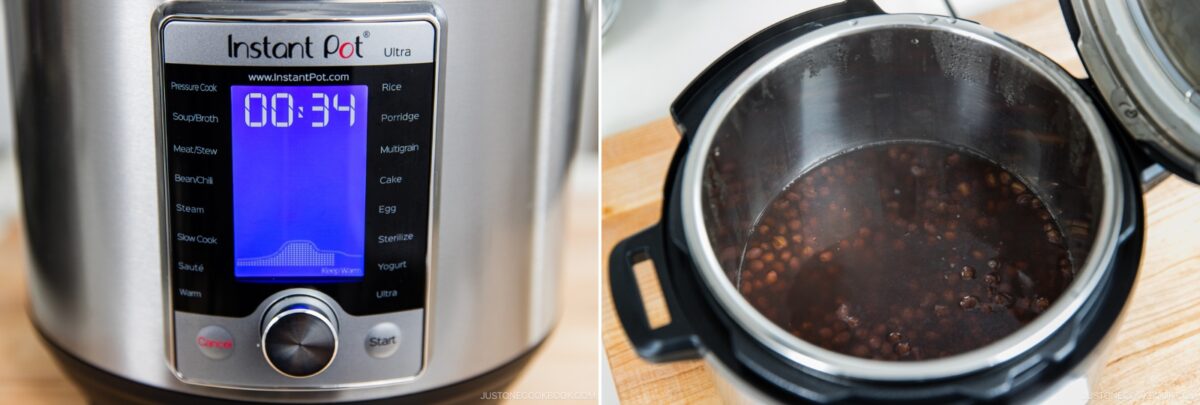
When it’s done cooking, the Instant Pot will switch automatically to the Keep Warm mode. (For a stovetop pressure cooker, remove the pot from the heat.) Let the pressure release naturally for 30 minutes. Then, turn the steam release handle to Venting to release any remaining pressure. Carefully open the lid.
Nami's Tip: Cook until tender, not mushy. The beans should be soft enough to gently crush between your fingers, while still holding their shape.
Add ¾–1 cup sugar into the pot. Then, add a small 1 pinch Diamond Crystal kosher salt to balance and deepen the sweetness.
Nami's Tip: Add sugar only after the beans are fully cooked. Adding it too early can toughen the skin and slow down the cooking process. Aim for a gentle sweetness at this stage, as Zenzai tastes sweeter as it cools.
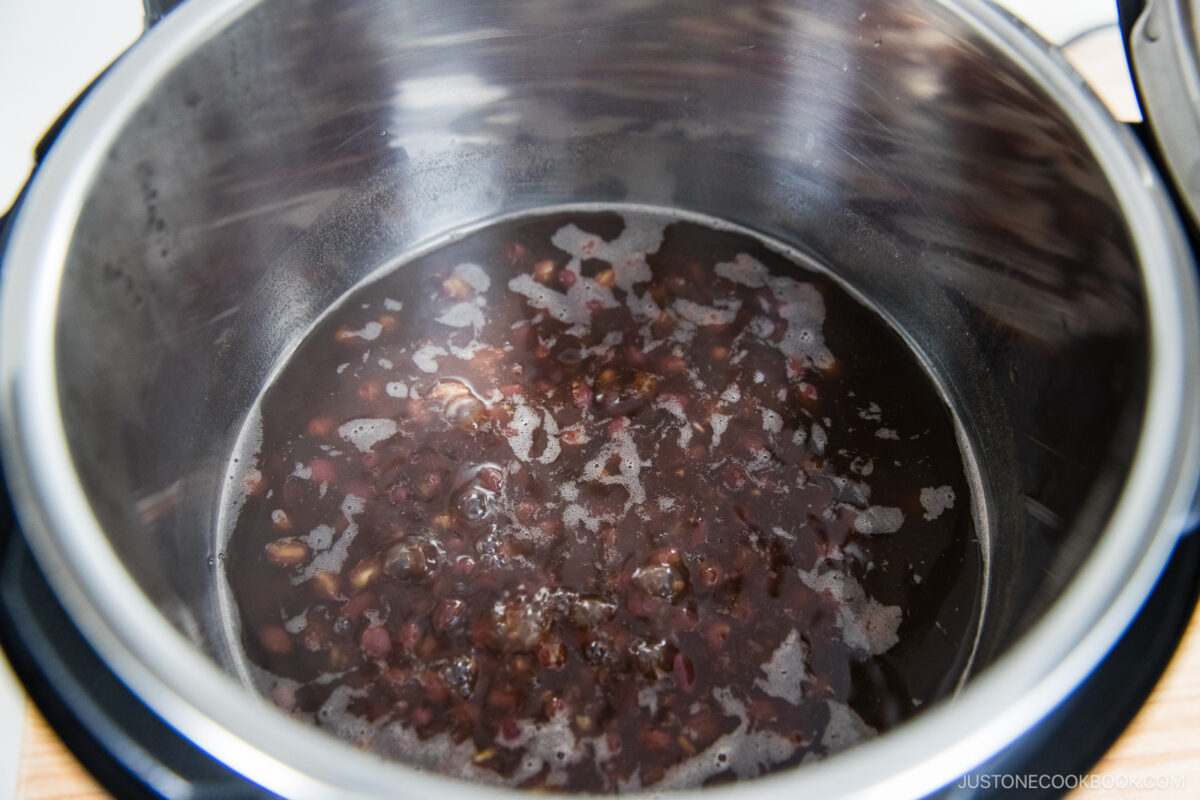
Cook on low heat (using the Sauté function) for about 5 minutes, stirring occasionally, until the sugar is fully dissolved and the soup deepens slightly in color. Keep it warm while you prepare the mochi (skip ahead for instructions).
Option 2: Stovetop Method
Rinse 1 cup azuki beans carefully until the water is clear. Discard any floating (damaged) beans, then drain.
Put the beans and 4 cups water in a pot.
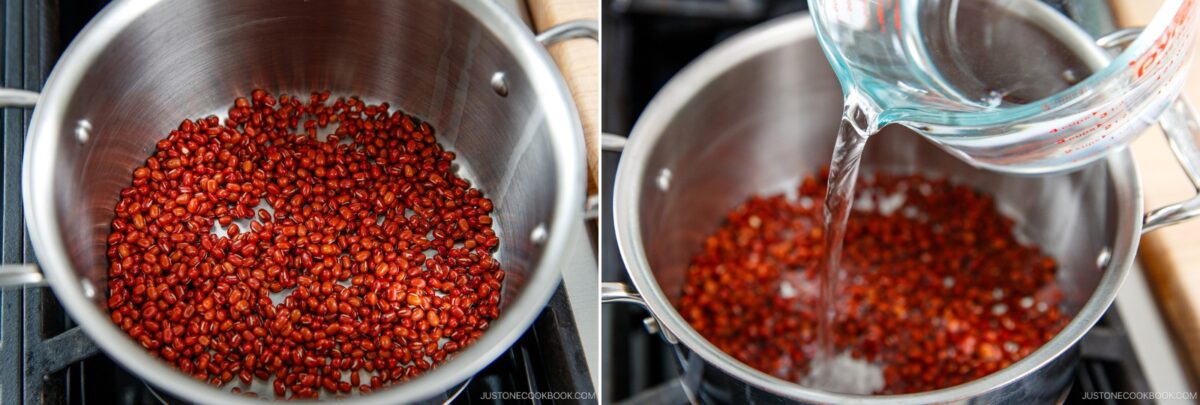
Bring to a boil over medium-high heat. Once boiling, put an otoshibuta (drop lid) on top of the beans and turn down the heat to medium low. Simmer without the pot lid until the beans are tender (but not mushy), about 1–1½ hours.
Nami's Tip: The otoshibuta will keep the beans from dancing around. You can use aluminum foil to make your own otoshibuta.
Some liquid will evaporate, so add water to keep the beans submerged, as needed. Check after 1 hour. If a bean mashes easily between your fingers while still holding its shape, it's done. Otherwise, cook for another 15 minutes and check again.
Add ¾–1 cup sugar and 1 pinch Diamond Crystal kosher salt (small pinch, to taste) and cook over low heat, stirring occasionally, until the sugar dissolves completely. Keep it warm while you prepare the mochi (skip ahead for instructions).
Nami's Tip: Add sugar only after the beans are fully cooked. Adding it too early can toughen the skins and slow down cooking. Aim for a gentle sweetness at this stage, as Zenzai tastes sweeter as it cools. Also, use just a small pinch of salt to balance and deepen the sweetness.
Shortcut Version Using Prepared Red Bean Paste (for 1 bowl)
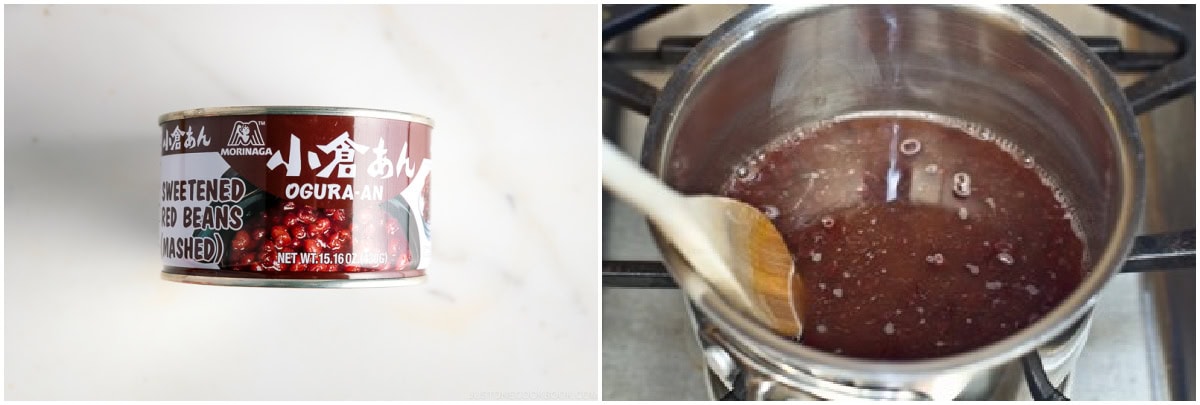
To a small saucepan, add ½ cup sweet red bean paste (anko) that‘s either store bought or homemade. Add ½ cup water. Bring it to a boil. Add 1 pinch Diamond Crystal kosher salt to taste and mix well. To adjust the consistency, add water to thin the soup or simmer longer to reduce and thicken it. Keep it warm while you prepare the mochi (see the next step).
Nami's Tip: I used tsubuan (chunky paste) here, but you can use koshian (fine paste) if you prefer.
To Prepare the Mochi
To make bite-size kirimochi pieces, cut 4 pieces Japanese rice cake (kiri mochi) into halves or quarters. Put them on a wire rack set in a baking sheet, then place in a toaster oven or regular oven. Toast the dried mochi until puffed up and nicely brown, about 10–12 minutes. You can also toast it in a dry frying pan.
Nami's Tip: For fresh homemade mochi or shiratama dango, add it to the soup to warm it up. For frozen mochi, boil it in a pot of water until soft, then add it to the zenzai.
To Serve
Serve the red bean soup in individual bowls and add the mochi. Enjoy!
To Store
Transfer the soup to an airtight container and store in the refrigerator for up to 4 days or in the freezer for up to a month. Prepare the mochi right before you serve the zenzai.
Variations and Customizations:
Looking to change things up? Try these easy and tasty ideas!
- Substitute shiratama dango. Some regions serve zenzai with soft rice flour dumplings instead of mochi.
- Make the azuki beans smooth. Mash and strain the cooked beans or use fine red bean paste (koshian) for a smooth texture.
- Use fresh or boiled mochi. This is a great option around Japanese New Year, when families traditionally make freshly pounded rice cakes.
- Chill it. Enjoy it cold as hiyashi zenzai in the summertime.
- Add sweetened chestnuts. For additional sweet and earthy flavor, try kuri kanroni (chestnuts in heavy syrup).
Calories: 438kcal, Carbohydrates: 100g, Protein: 12g, Fat: 1g, Saturated Fat: 1g, Sodium: 40mg, Potassium: 623mg, Fiber: 6g, Sugar: 68g, Vitamin A: 8IU, Calcium: 66mg, Iron: 2mg
Did you make this recipe?
Tag @justonecookbook on Instagram so we can see your delicious creation!
Editor’s Note: This post was originally published on Mar 12, 2012. It was updated with new images and additional pressure cooking method on January 10, 2020 and republished with more helpful information on January 5, 2026.


 English (US) ·