 1 month ago
39
1 month ago
39

Guide Highlights
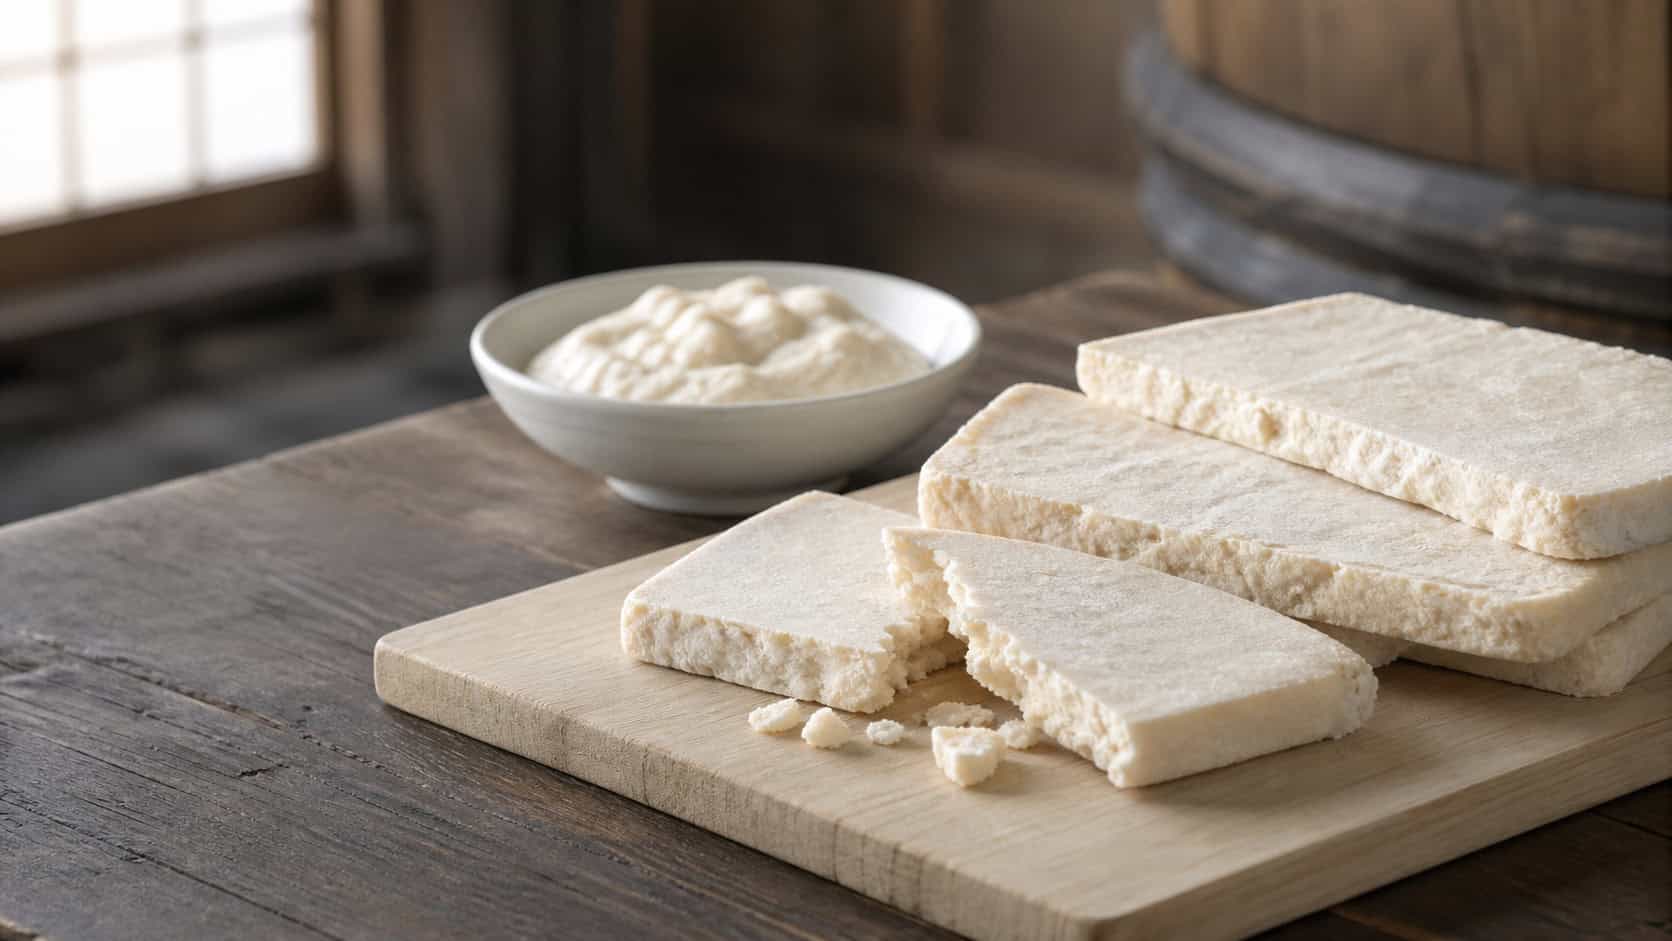
You don’t need a Japanese grocery store nearby to enjoy sashimi at home. I prepare it for my family often, and slicing it yourself is easier than you’d think. Just ask your local seafood market for a sashimi-grade block, or order one online, then you’re ready to slice and serve.
In this How to Cut Sashimi guide, I’ll demystify the entire process so you can slice with confidence. You’ll learn:
- How to hold the knife
- Different sashimi cutting techniques for meaty fish, white fish, and shellfish
- How to slice sashimi cleanly
- Tips for plating and arranging the fresh fish
If you love sashimi, try my Tekka Don, Salmon Sashimi Bowl, and Hamachi Crudo next!
Table of Contents
What is Sashimi?
Sashimi (刺身) is a traditional Japanese dish of fresh raw fish or seafood, sliced thin and served without rice, so the focus stays on the fish’s natural flavor and texture.
Sashimi has roots that appeared as early as the Muromachi period (1336–1573). However, the dish we know today, with soy sauce, started in the Edo period (1603–1868), once soy sauce became widely available.

What to Prepare
- Sashimi-quality fish and shellfish of your choice:
- Meaty, tender fish
- Tuna (maguro)
- Salmon
- Yellowtail (hamachi)
- Amberjack (kanpachi)
- Bonito (katsuo)
- White fish
- Sea bream (tai, madai)
- Snapper (fuedai)
- Flounder (hirame)
- Shellfish
- Scallops (hotate)
- Sweet shrimp (amaebi)
- Meaty, tender fish
- Sharp sturdy knife – A santoku knife or a sashimi knife (yanagiba) if you have one. Learn more in Your Guide to Japanese Knives.
- Cutting board – A wooden hinoki cutting board works well for its natural antibacterial properties.
- Kitchen towel – Keep one damp towel nearby to wipe your knife between cuts.
Sourcing the Sashimi


Choose your sashimi using these tips for safety and quality:
- Find a trustworthy fishmonger – Buy from a reliable sashimi counter (I go to Suruki Market in San Mateo) or online source. This helps you avoid food poisoning from poor handling, improper storage, or pathogens.
- Buy sashimi-grade fish – Ask the staff which fish are safe to eat raw. Note: “sashimi-grade” and “sushi-grade” are marketing terms, not food safety standards.
- Chill the fish well – Keep it in the coldest part of your fridge, on crushed ice if possible. Cold fish slices more cleanly, and stays fresher longer.

- Sharpen your knife. Ask a knife shop to hone and polish it, or use a whetstone yourself, following a video tutorial. I avoid knife sharpeners, which can grind down the blade.
- Moisten your hinoki cutting board. If using a plastic board, sanitize it first with kitchen bleach.
- Dampen your towel and keep it handy. Wipe your knife, workspace, and hands as you go.

How to Cut Sashimi
It’s time to cut. The technique changes with each kind of fish.
Meaty Fish


- Line up the grain. Set the sashimi block (called saku) so the grain runs bottom-left to top-right. Curl your left hand over it, knuckle against the blade to protect your fingertips.
- Set the blade. Turn the knife tip 45 degrees left if you’re right-handed (mirror the angle if left-handed). The blade should sit perpendicular to the grain on the block’s right side. Rest your right index finger on the blade’s top edge.
- Pull and repeat. Pull the knife toward you in one motion, cutting a 1-cm (0.4-inch) rectangular slice. Slide it right, wipe the blade, and repeat.
White Fish


- Set up the cut. For firm white fish, lay the fillet skin side down. Position the right end higher than the left.
- Slice and fan. Angle the blade flat against the flesh on the fillet’s left side, index finger resting on its spine. Draw the knife toward you in one motion, steadying the fish with your other hand. Flip each cut piece, fan it out, and set it down.
Shellfish


- Butterfly or slice the scallops. Rest your nondominant hand on the scallop. Hold the knife parallel to the board. Slice horizontally through the center. To butterfly it, stop short of cutting through and unfold it like a book. Or slice clean through for medallions.
- Prep the shrimp. Remove the shell but keep the tail intact. Cut a slit down the back to butterfly it. Remove the vein. Rinse it in salted water. Pat dry with paper towels.
How to Plate Sashimi
Plating is where sashimi goes from everyday to special occasion. The same slices can look completely different on the plate.
- Chill the plate – Keeps the fish safe, fresh, and the right serving temperature.
- Build height – Arrange slices into a tiered landscape called sansui-mori, or “mountain water heap.” Mound fluffy shredded daikon at the top or center, then place a shiso (perilla) leaf diagonally on top. Fan the sashimi slices skin side up against the shiso, layering back-right to front-left.
- Serve in odd numbers – Arrange three or five slices per kind, or a mix of three or five kinds. Odd numbers are considered auspicious in Japanese culture.
- Use negative space – Don’t crowd the plate. Keep about 20–30% empty for visual balance.


- Balance the fish colors – Place white-fleshed fish and shellfish toward the front, dark fish like tuna and bonito toward the back, since strong flavors can overwhelm the delicate ones. Pair opposite colors to make slices pop—try tuna with shiso, or white fish on dark plates.
- Garnish with color accents – Add a light pop of yellow, red, green, or orange (see the next section for ideas) without overwhelming the plate. Before serving, check the balance of colors, textures, and flavors—don’t overdo the garnishes.

Common Garnishes for Sashimi
Garnish your plate with herbs, vegetables, or fruit, called tsuma (つま). They add color, aroma, flavor, and texture and some even have antibacterial or odor-neutralizing properties. All help cleanse the palate between bites.
- Shredded daikon – Use a daikon julienned peeler, or buy it pre-shredded at a Japanese market’s sashimi counter.
- Shiso (perilla) – Pat dry and use leaves whole or julienned. Scatter perilla sprouts (mejiso) over the sashimi and eat them right along with it. For flower buds (hanahojiso), strip the tiny flowers off the stem with your fingers and sprinkle them over the fish or into the soy sauce.
- Greens – Add a parsley sprig, kaiware daikon (radish sprouts), chopped scallions, or cucumber (julienned, sliced, or decoratively cut).


- Edible chrysanthemum flowers – Tear the petals and add them to the soy sauce plate.
- Myoga (Japanese ginger) – Julienne it or slice it in half.
- Citrus fruits – Add a slice of yuzu, sudachi, kabosu, or lemon.


- Wakame seaweed – Serve it boiled and undressed, with soy sauce or ponzu on the side.
- Wasabi – Grate fresh wasabi finely, or use paste or reconstituted powder. Place a small mound on the side closest to you and serve with soy sauce.
- Grated ginger – Serve with blue-skinned fish like sardines and mackerel. Squeeze out the juice and set a small mound on the plate. Skip pickled sushi ginger (gari) here—it’s meant for sushi, not sashimi.
Storage Tips
To store: Serve sashimi immediately for the best freshness and quality. If you sliced it yourself, there’s no expiration label to go by—use your judgment based on freshness. As a general guide: meaty fish like tuna keeps about 3 days refrigerated, white fish about 2 days, and blue-skinned fish like sardines or mackerel should be eaten within a day. Pat the fish dry, wrap tightly, and store in the coldest part of your fridge. When in doubt, eat sooner rather than later.
What to Serve with Sashimi
I serve sashimi year-round. Make it a complete meal with these classic picks:
- Homemade Miso Soup – A warm, savory bowl balances the cool sashimi.
- Japanese Cucumber Salad – Its crisp, vinegary bite refreshes the palate between slices.
- Pickled vegetables – Add color and crunch with Asazuke pickles—ready in 1 hour.
- Chawanmushi – Adds a comforting, protein-rich side to round out the meal.


FAQ
Is it safe to make sashimi at home?
Yes, with care. Buy from a trusted fishmonger and ask which fish are safe to eat raw. Keep it very cold until you slice it, then serve shortly after slicing. Keep in mind that “sashimi-grade” is a marketing term, not a safety guarantee.
Do I need a special knife to cut sashimi?
Not necessarily. A sharp santoku or sturdy kitchen knife works fine. A dedicated sashimi knife helps but isn’t necessary. What matters most is a sharp edge and one smooth pull. Sawing leaves ragged cuts that damage the fish.
How do I keep fish firm enough to slice cleanly?
Chill it well. Cold fish holds its shape and slices into clean, even pieces. Store it in the coldest part of your fridge. Slice it straight from chilled, not at room temperature.
Why is sashimi served with daikon and shiso?
Both are classic tsuma—garnishes that add color, aroma, and texture while helping cleanse the palate between bites. Shredded daikon adds crunch and can be mounded for height in plating, like in sansui-mori style. Shiso adds a fresh, herbaceous aroma and a pop of green.
I hope this guide inspires you to serve and enjoy sashimi at home! Keep it relaxed, and have fun with it. After a few rounds of practice, you’ll enjoy the rhythm of preparing this iconic Japanese dish.
I’d love to hear how yours turned out! 💛 Please leave a star rating and comment below to share your experience. Your feedback not only supports Just One Cookbook but also helps other home cooks discover recipes they can trust.
How to Cut Sashimi
To Slice Meaty Fish – Tuna, Yellowtail, Salmon, Amberjack, Bonito
Lay the sashimi block horizontally so the grain runs bottom-left to top-right. Position the edge to the right on the cutting surface. Turn the knife tip 45 degrees left (if you're right-handed).
Nami's Tip: The blade should sit perpendicular to the grain on the block's right side.

Rest your index finger on the blade's spine. Pull the knife toward you in one smooth motion, slicing into even pieces about 1 cm (0.4 inches) thick. Slide each piece to the right as you cut. Wipe the residue from the blade with a damp cloth between slices.
Nami's Tip: A single pull on a clean blade gives clean, smooth cuts and an attractive shape. Do not saw back and forth, which will create ragged slices.

From the top, the slices should look uniform in width.

To Slice White Fish – Snapper, Flounder, Sea Bream
Lay the fillet skin side down with the narrow tail end toward the right side (if you're right-handed). Angle the right side higher than the left side.
Place the blade flat against the flesh, starting at the left, index finger resting on the spine. Steady the flesh with your other hand and slice thin pieces, drawing the knife toward you in one smooth motion.
Nami's Tip: Thin, wide cross-sections that chew well are the best way to enjoy the tough, fibrous flesh of white fish.

Flip each slice, fan it out, and set it to the side.

To Slice Shellfish – Scallops and Shrimp
Scallops (hotate): Rest your nondominant hand on the scallop. Hold the knife parallel to the board. Slice horizontally through the center. To butterfly it, stop short of cutting all the way through and open it like a book. Slice clean through for medallions or thin slices.
Shrimp (amaebi): Remove the shell but keep the tail intact. Cut a slit down the back to butterfly the shrimp. Remove the vein. Rinse it in salted water and pat dry with paper towels.

To Plate and Garnish
Arrange on chilled plates and add garnishes. See the blog post for plating suggestions and garnishing ideas. Serve immediately with a small plate of soy sauce.

To Store
Serve sashimi immediately for the best freshness and quality. If you sliced it yourself, there's no expiration label to go by—use your judgment based on freshness. As a general guide: meaty fish like tuna keeps about 3 days refrigerated, white fish about 2 days, and blue-skinned fish like sardines or mackerel should be eaten within a day. Pat the fish dry, wrap tightly, and store in the coldest part of your fridge, ideally on a bed of ice. When in doubt, eat sooner rather than later.
Sashimi – Use a different cutting technique based on the category of seafood:
- Meaty, tender fish – Tuna (maguro), salmon, yellowtail (hamachi), amberjack (kanpachi), bonito (katsuo)
- White fish – Snapper (fuedai), flounder (hirame), sea bream (tai, madai)
- Shellfish – Scallops (hotate), sweet shrimp (amaebi)
Did you make this recipe?
Tag @justonecookbook on Instagram so we can see your delicious creation!
Editor’s Note: This post was originally published on December 20, 2023, and republished with more helpful information on June 21, 2026.


 English (US) ·