 3 weeks ago
32
3 weeks ago
32
Silky-smooth or delightfully chunky, Anko is the sweet soul of traditional Japanese wagashi and contemporary desserts. Learn how to make anko today with just four pantry ingredients.
Anko or sweet red bean paste may sound mysterious, but it comes together with nothing more than azuki beans, sugar, salt, and a little patience. I’ll walk you through my easy stovetop method for How to Make Anko and show you how to create both chunky and fine types to fill your favorite Japanese sweets at home.
If you love Japanese sweets with red bean paste, try my Daifuku mochi, Dorayaki, and Taiyaki recipes next!
What is Anko?
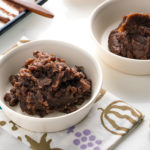
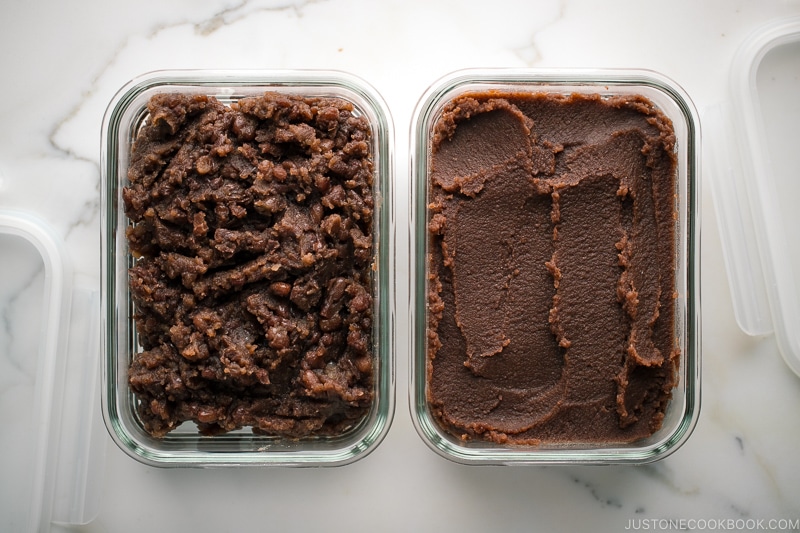
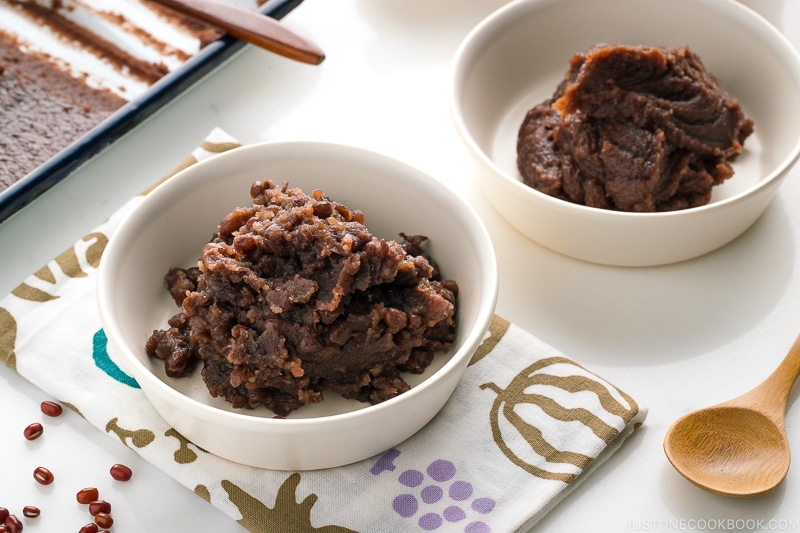
Anko (餡子) or an (餡) is Japan’s classic sweet red bean paste, simmered from azuki (adzuki) beans and sugar until thick and glossy. There are two beloved textures: rustic and chunky tsubuan (粒あん) and fine and smooth koshian (こしあん). You’ll taste anko in dessert soups, sweet dumplings, sweet mochi rice cakes, even Japanese shaved ice. Once you master the base paste, countless treats open up.
Why I Love This Recipe
- Only 4 ingredients
- No overnight soaking
- Less sugar than store bought
- Easy to purée with a food processor or blender
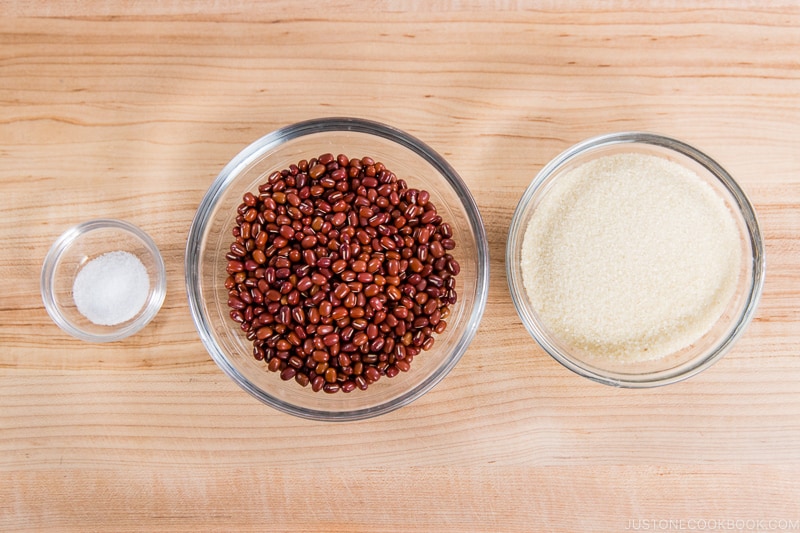
Ingredients for Anko
- Dried azuki beans (also spelled adzuki beans)
- Water
- Sugar (see Tips)
- Kosher salt
Find the printable recipe with measurements below.
How to Make Anko
Preparation
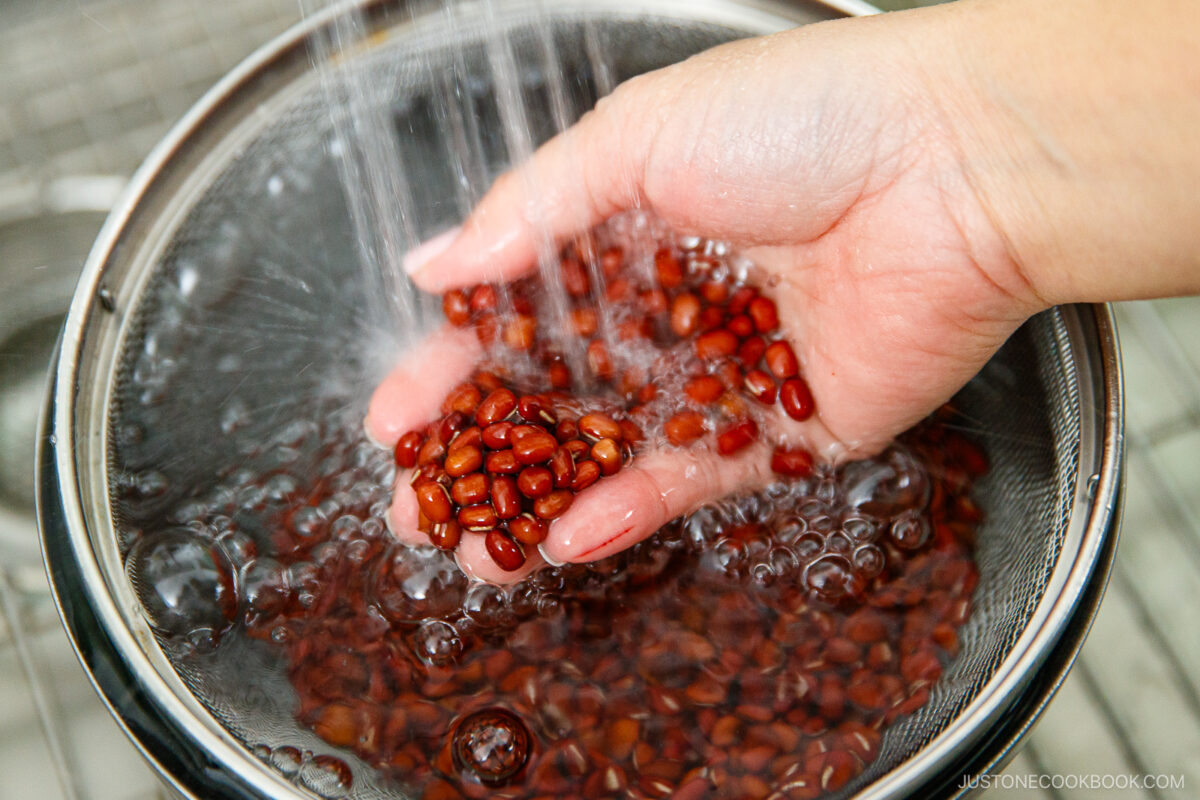
- Rinse and parboil. Pick through the azuki, rinse well, and cover with water in a large pot. Bring to a boil, then drain to remove bitterness.
Cooking
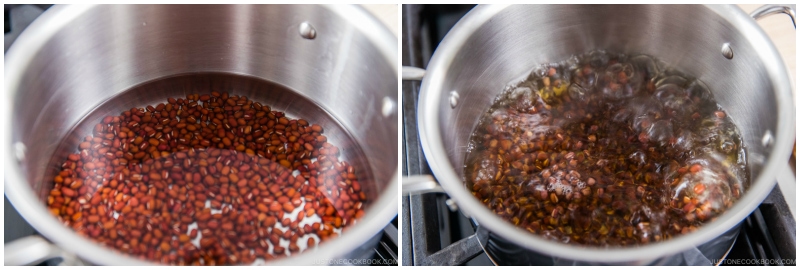
- Simmer until tender. Return beans to the pot, add fresh water to cover, and simmer with a drop lid for 60–90 minutes. Top up water as needed. A bean should mash easily between your fingers.
Assemble
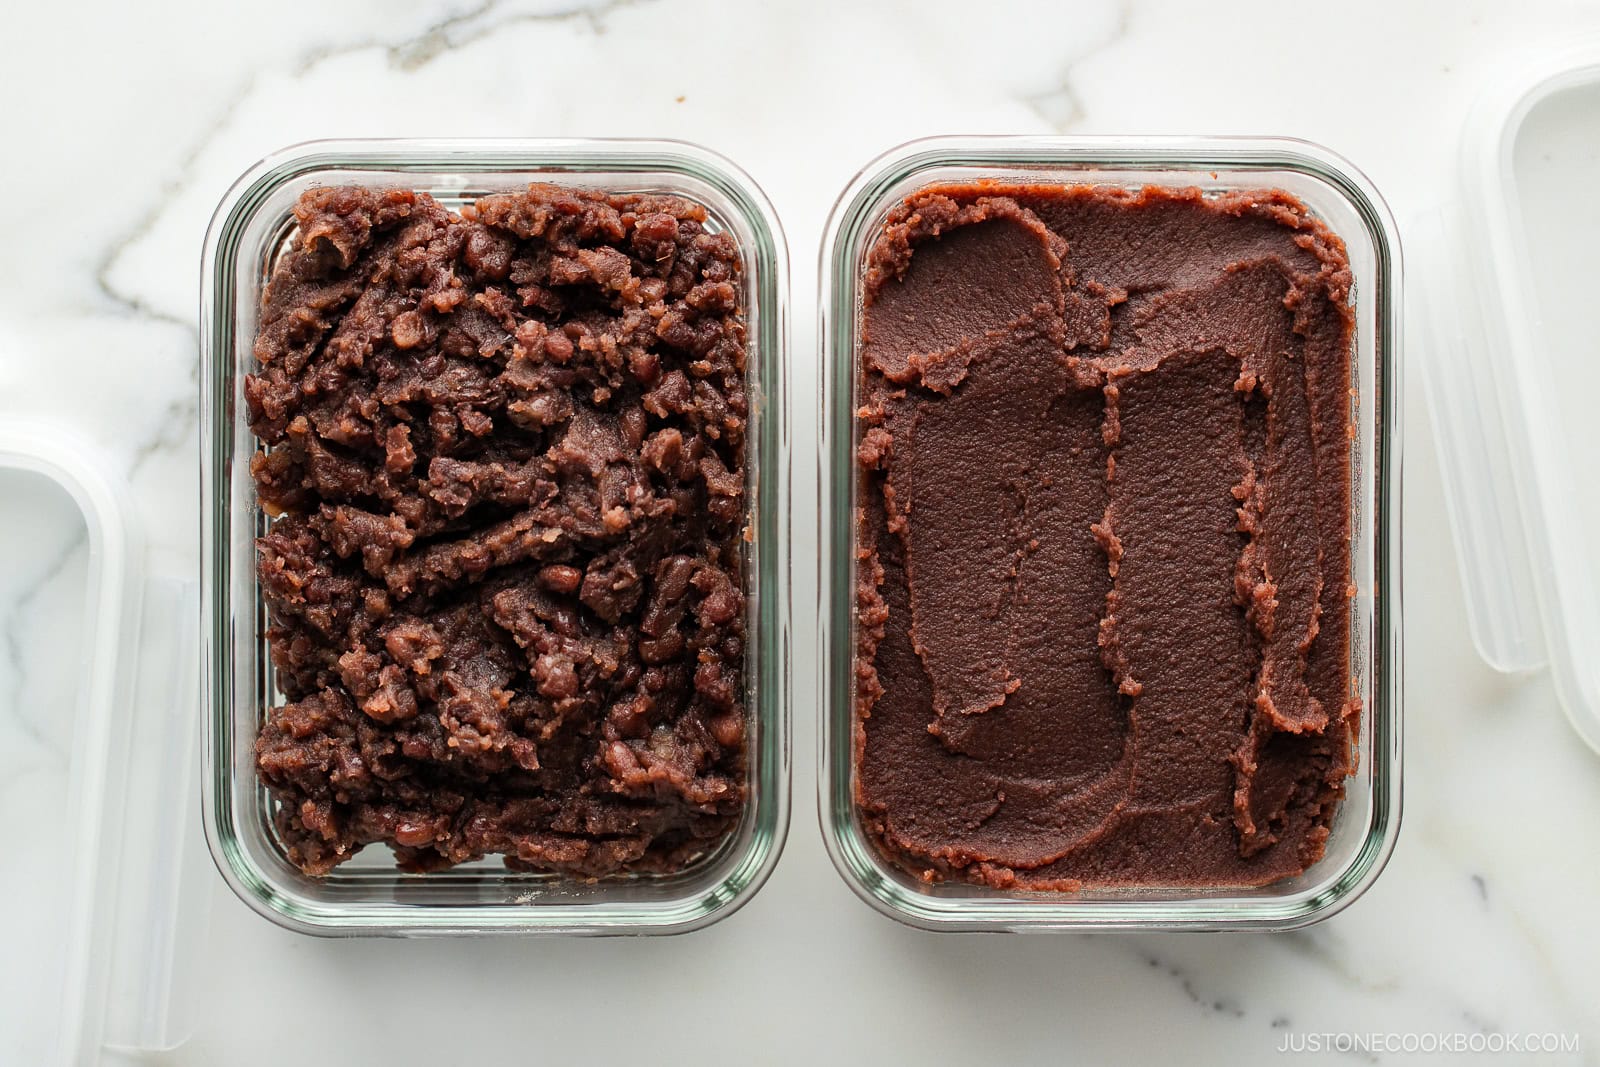
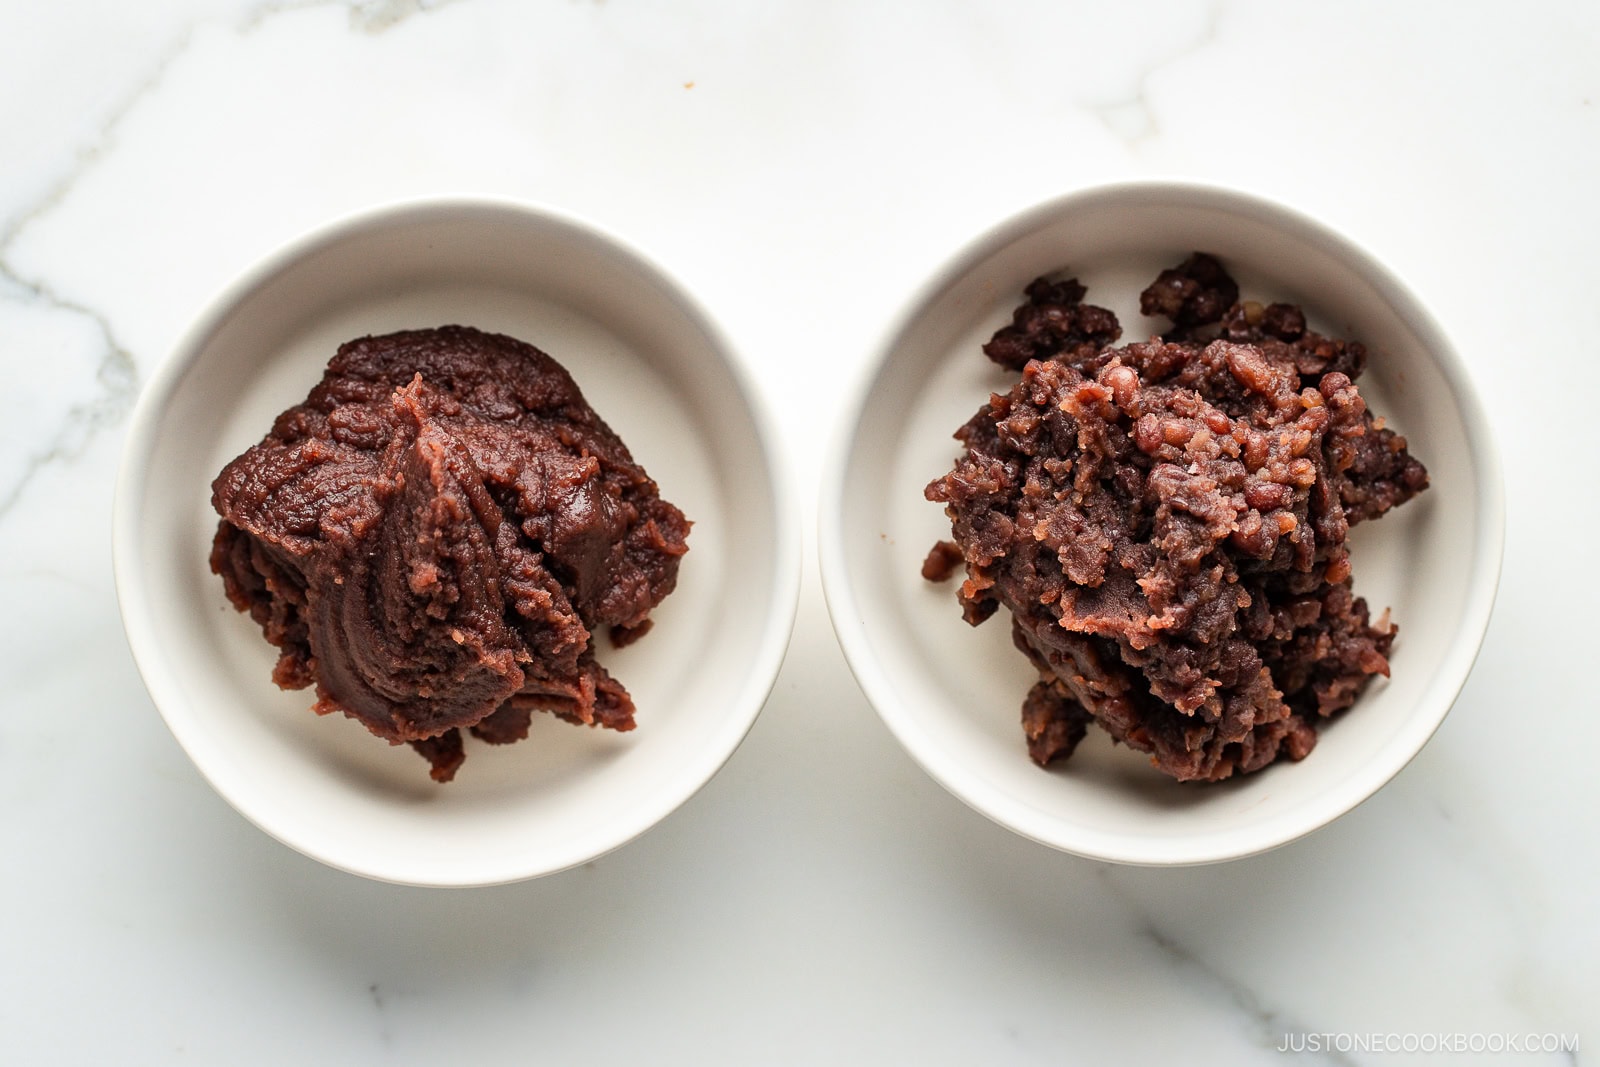
- Option 1 – Make tsubuan (chunky paste). Drain beans, return to the pot, and stir in half the sugar over medium-low heat. When dissolved, add the rest of the sugar and the salt. Keep stirring until you can draw a line across the bottom of the pot with a spatula. Spread on a tray to cool (see below).
- Option 2 – Make koshian (fine paste). Reserve a little cooking liquid, drain beans, and process to a smooth purée (add liquid only if needed). Return purée to the pot, add sugar in two additions, then salt, and cook down as above. Cool on a tray (see below).
Nami’s Recipe Tips
- Skip overnight soaking – Azuki skins soften during cooking, so you can start right away. No soaking needed with modern beans!
- Throw away the boiling water – This removes the astringency (shibumi, 渋み) of the food. I do it just once, while some people do it twice or three times.
- Bean-to-sugar ratio – A traditional 1:1 ratio preserves the paste longer. I like slightly less sugar at 175–200 g for 200 g beans for balanced flavor.
- A pinch of salt matters – Salt enhances sweetness without extra sugar.
- Stop at the “line test” – Remove from heat as soon as you can part the paste with a spatula; carry-over heat thickens it further.
Variations and Customizations
- Instant Pot shortcut – For speed, see my Pressure Cooker Anko method.
- Use white beans – For a milder taste, make my White Bean Paste (Shiroan) recipe.
How to Use Anko
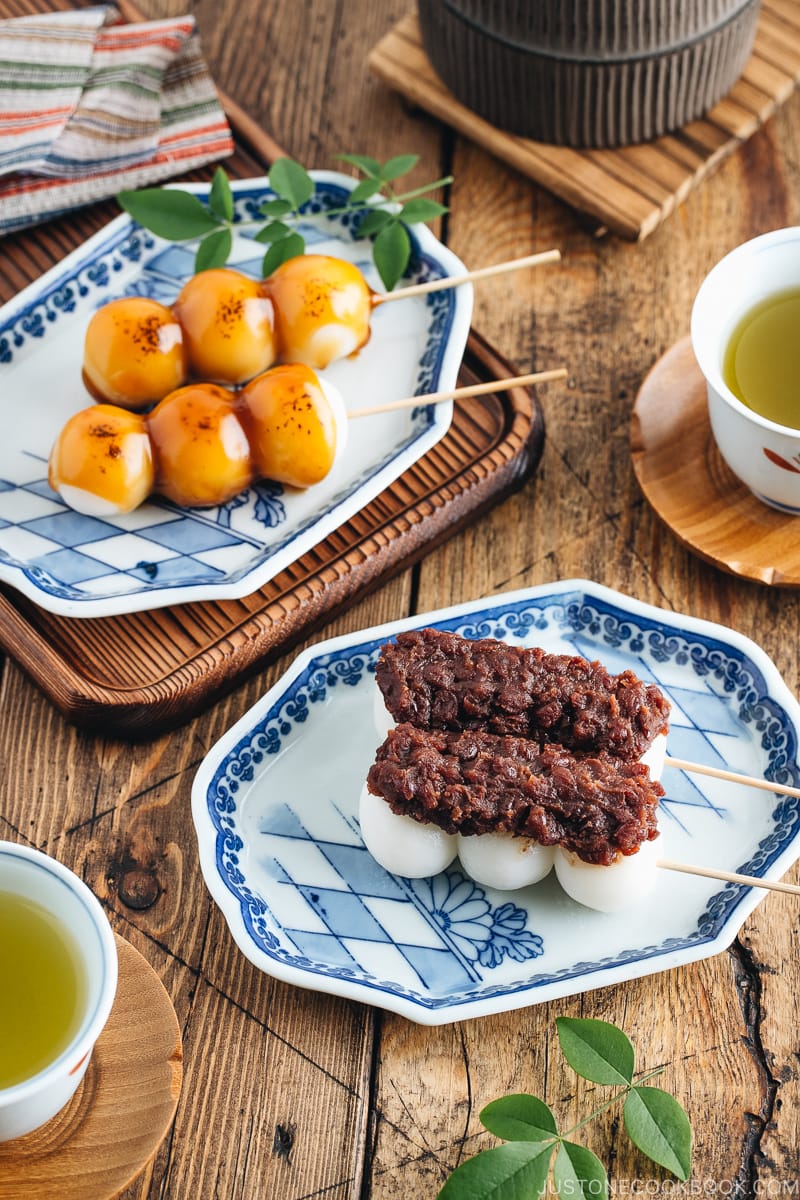
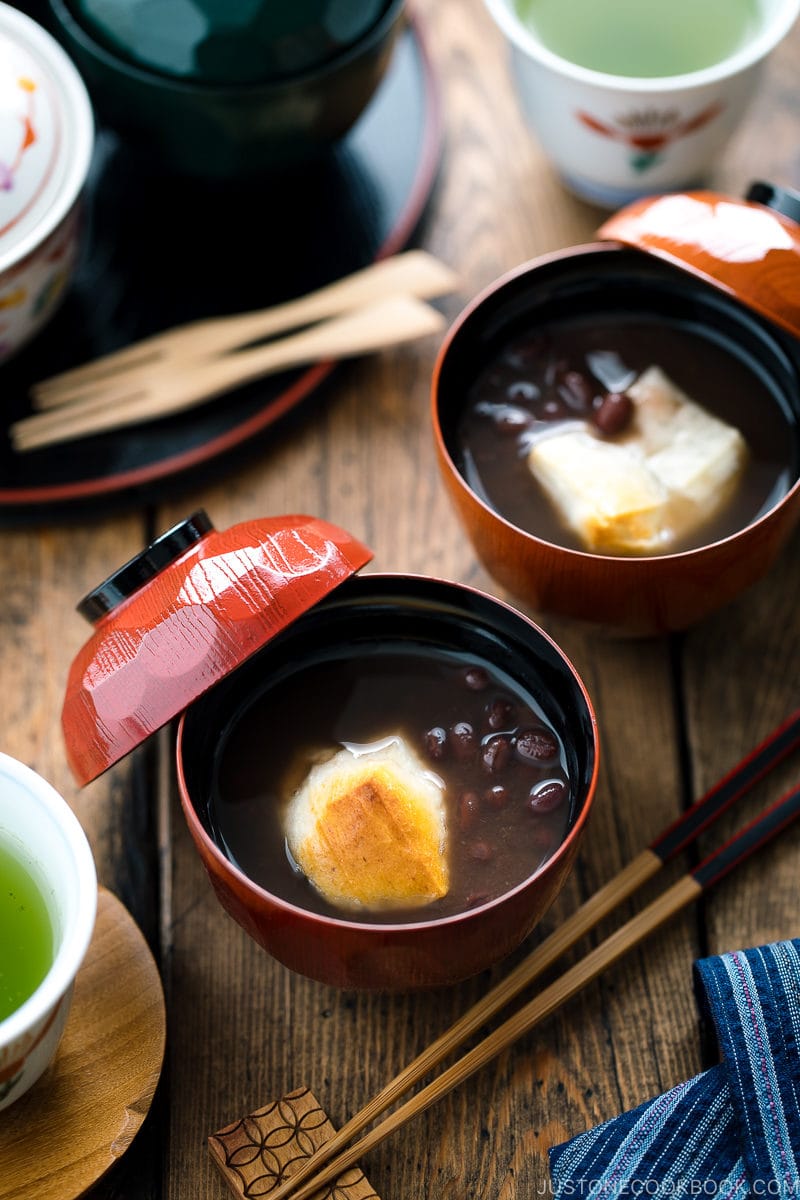
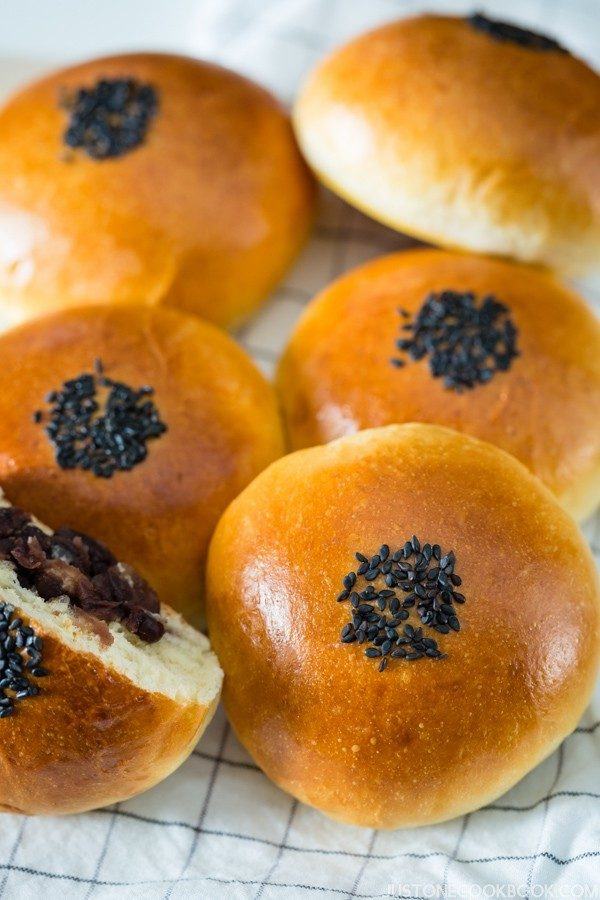
- Tsubu-an: Use the chunky type of anko in Zenzai (Red Bean Soup), Anpan, Red Bean Pancakes, or Ujikintoki (Matcha Shaved Ice).
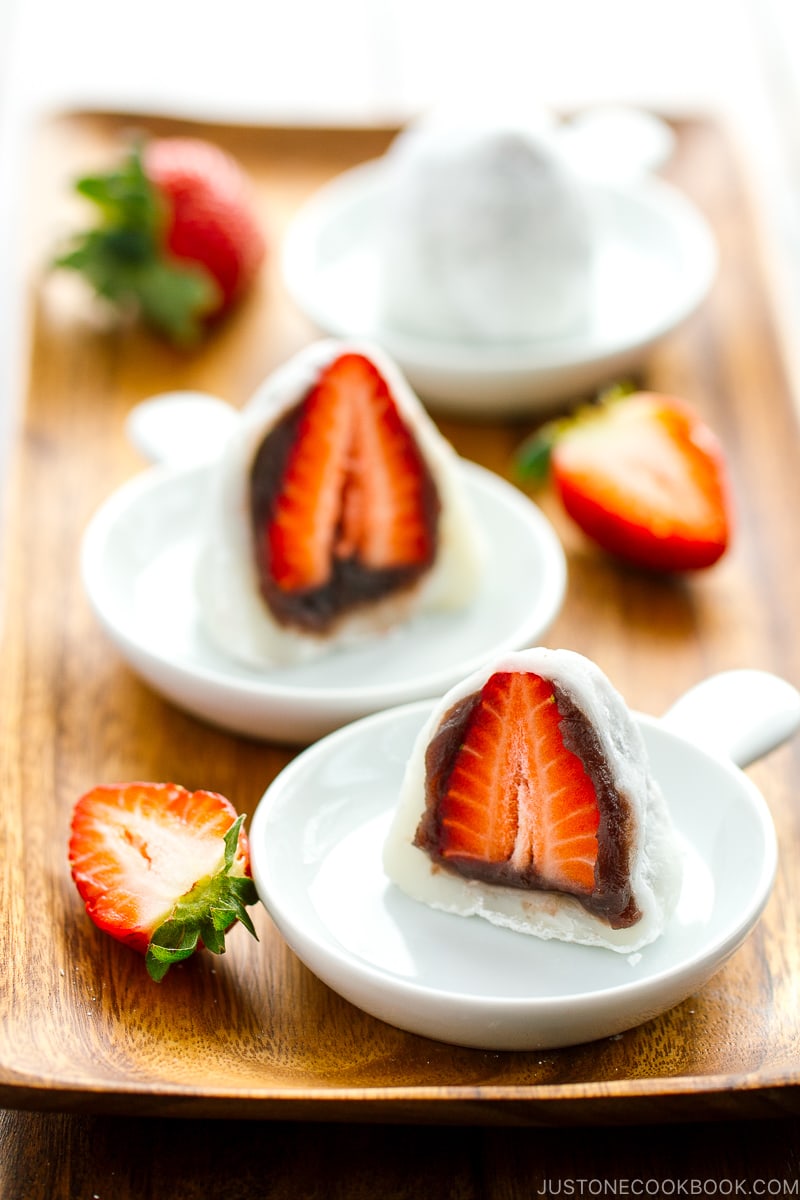
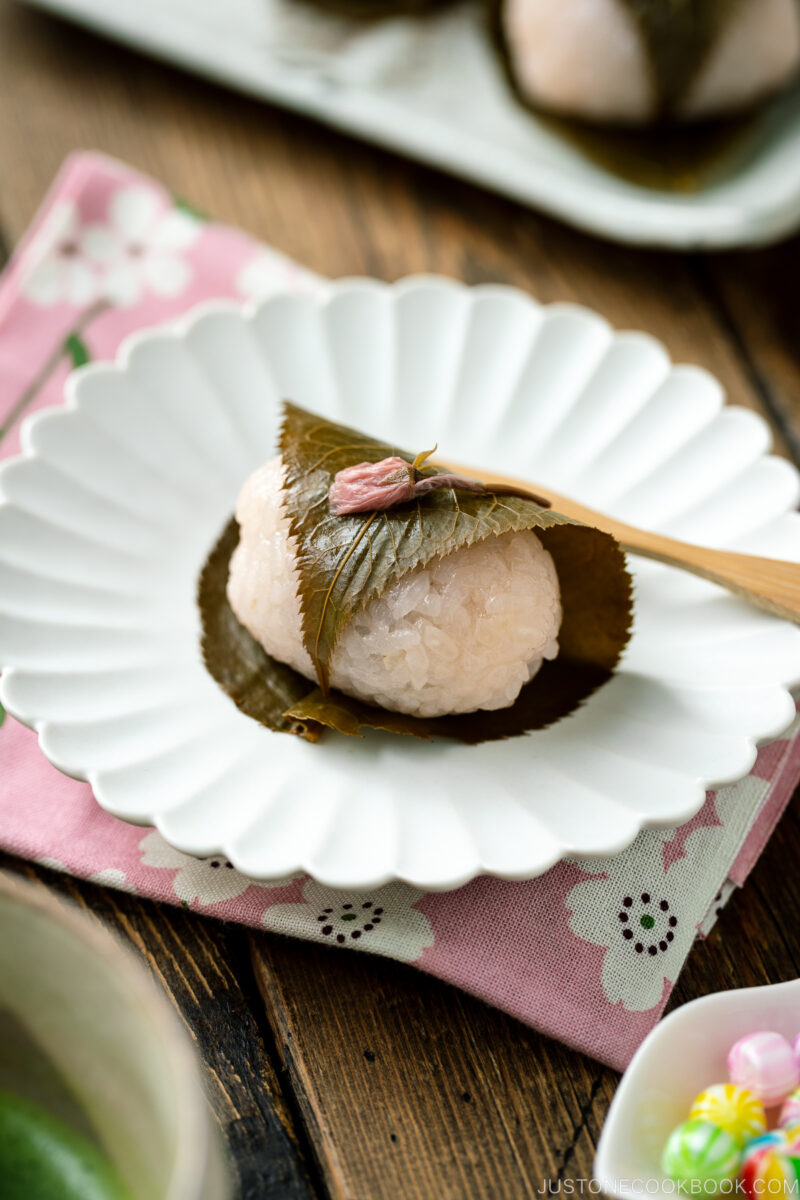
- Koshi-an: This fine paste is perfect for Strawberry Mochi (Ichigo Daifuku), Sakura Mochi, or Manju.
- Get creative: Use as a filling in your favorite pastries or topping for ice cream.
Storage Tips
To store: Cool completely, pack into an airtight container, and refrigerate 3–4 days.
To freeze: Portion 100 g scoops, wrap, and freeze for up to 2 months. When ready to use, thaw overnight in the fridge.
Frequently Asked Questions
Can I cut the sugar even more?
Less sugar shortens shelf life. If you reduce it below 75 percent of the bean weight, freeze any paste you will not use within three days.
Why add salt to a sweet paste?
Salt suppresses bitterness and lifts the natural sweetness of the beans—try it and taste the difference.
My paste is too thick. How do I fix it?
Stir in a spoonful of the reserved cooking liquid (or hot water) over low heat until you reach the texture you like.
What if I only want koshian?
Follow the koshian steps from the start. Using a food processor means you don’t need to sieve out the skins.
Prep Time: 10 minutes
Cook Time: 1 hour 30 minutes
Total Time: 1 hour 40 minutes
Servings: 1 batch, 1.3 lb/600 g total (1 Tbsp = 20 g)
Japanese Ingredient Substitution: If you want substitutes for Japanese condiments and ingredients, click here.
Gather all the ingredients.
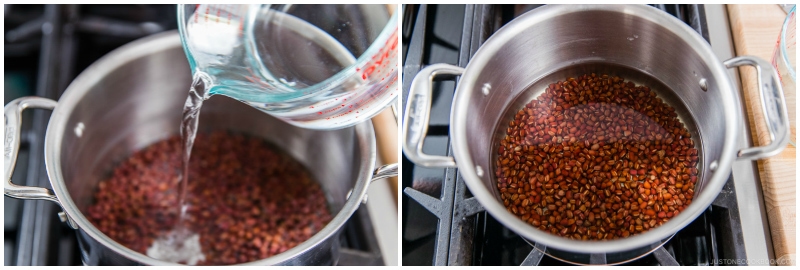
Rinse 7 oz azuki beans and discard any broken beans. Drain.
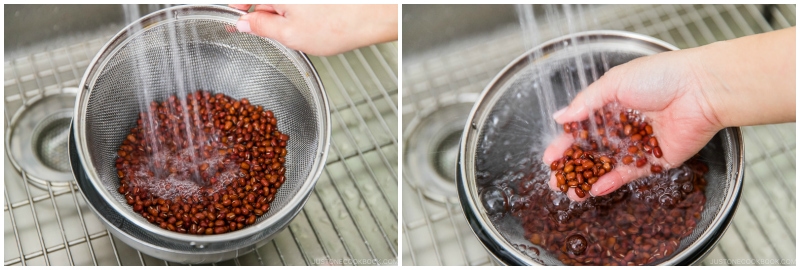
To Parboil
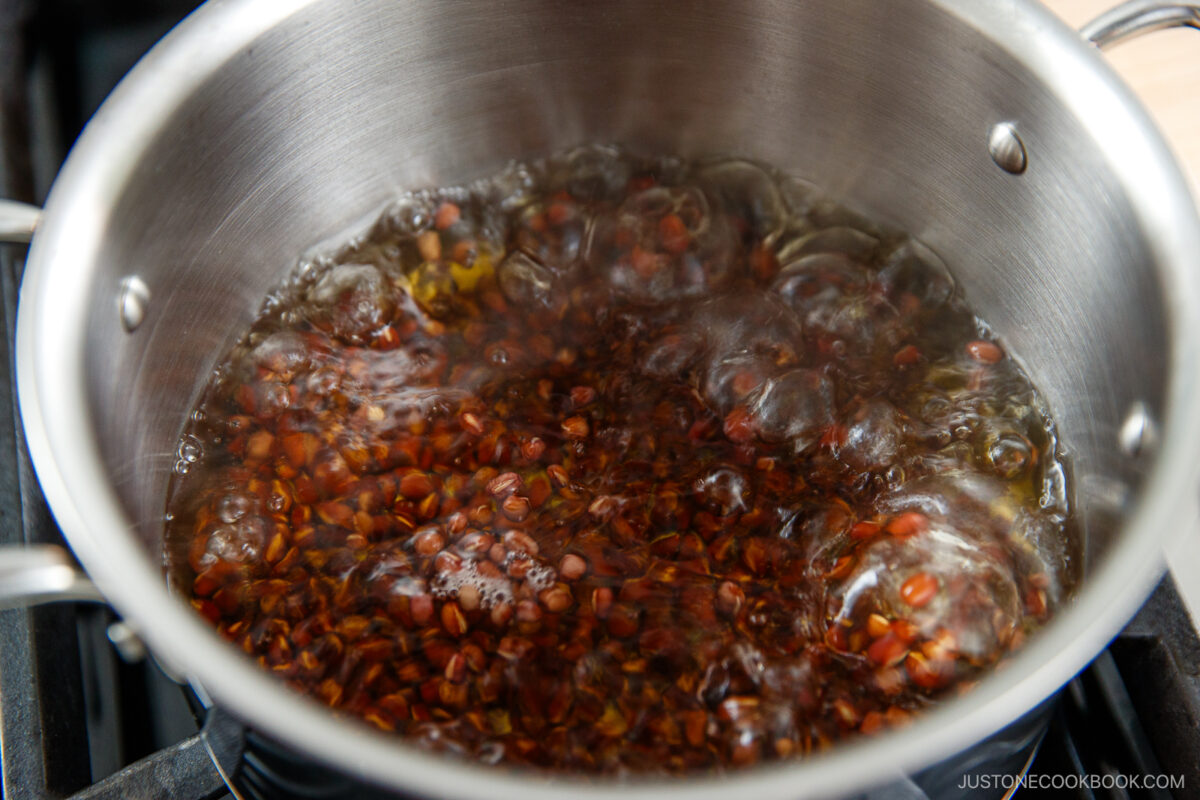
Transfer the beans to a large pot and enough water to cover them by 1–2 inches.
Place the pot on the stove and bring it to a boil over medium-high heat.
Once boiling, drain the beans in a fine-mesh sieve. Return the beans to the same pot.

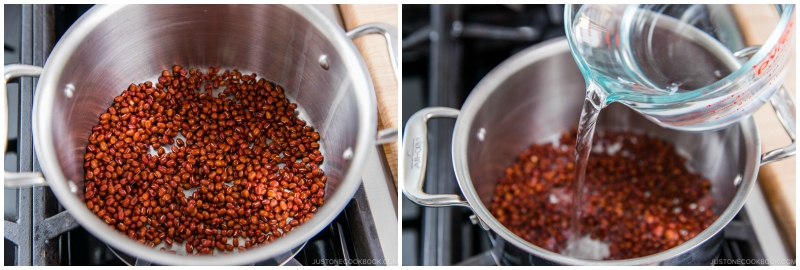
To Cook
Add more water to the pot to cover the beans by 1–2 inches.
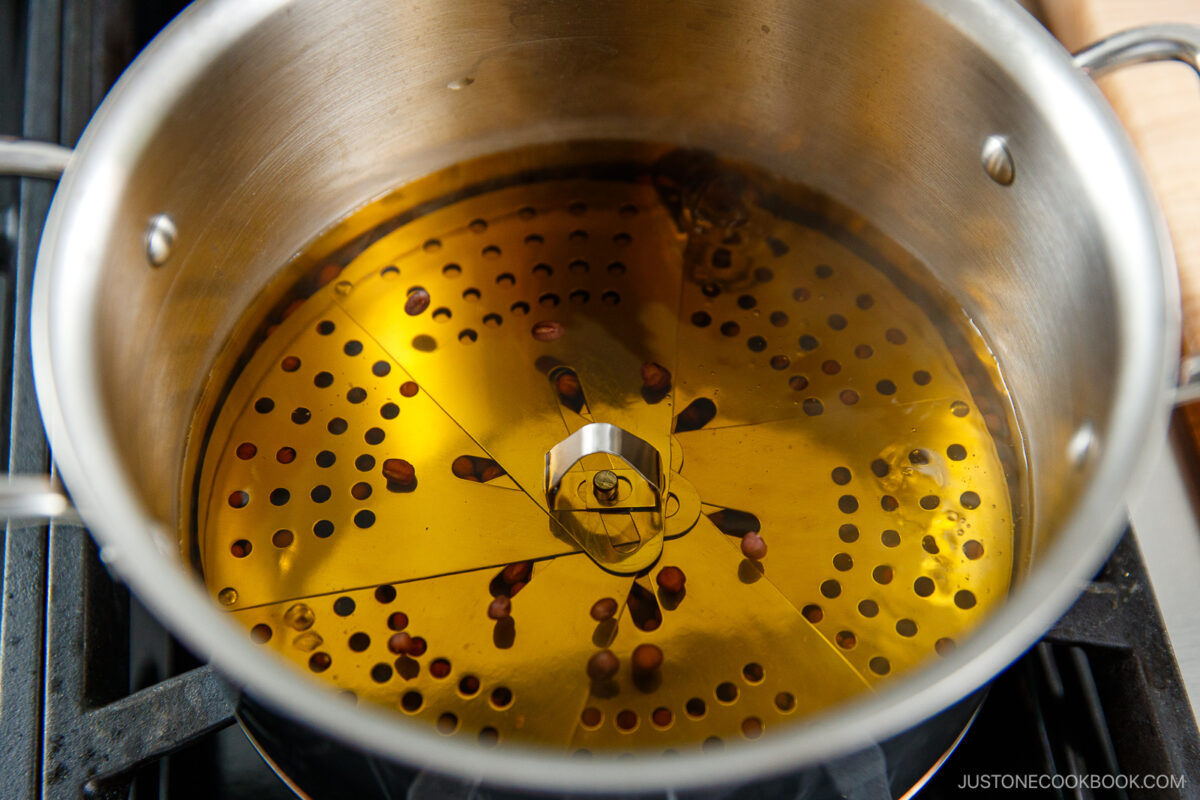
Bring it to a boil over medium-high heat. Once boiling, put an otoshibuta (drop lid) on top of the beans. Reduce the heat to medium low and keep it simmering for the next 1–1½ hours. Tip: The otoshibuta will prevent the beans from dancing around too much. Learn how to make it yourself or find one on Amazon and JOC Goods.
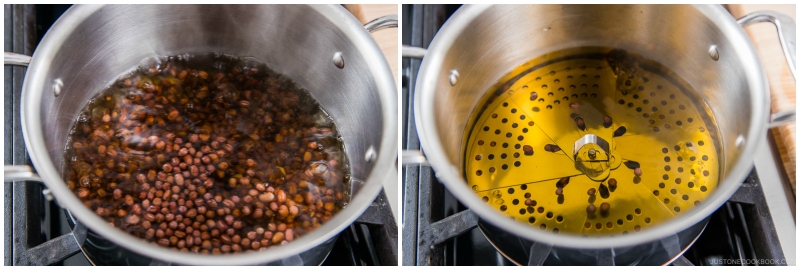
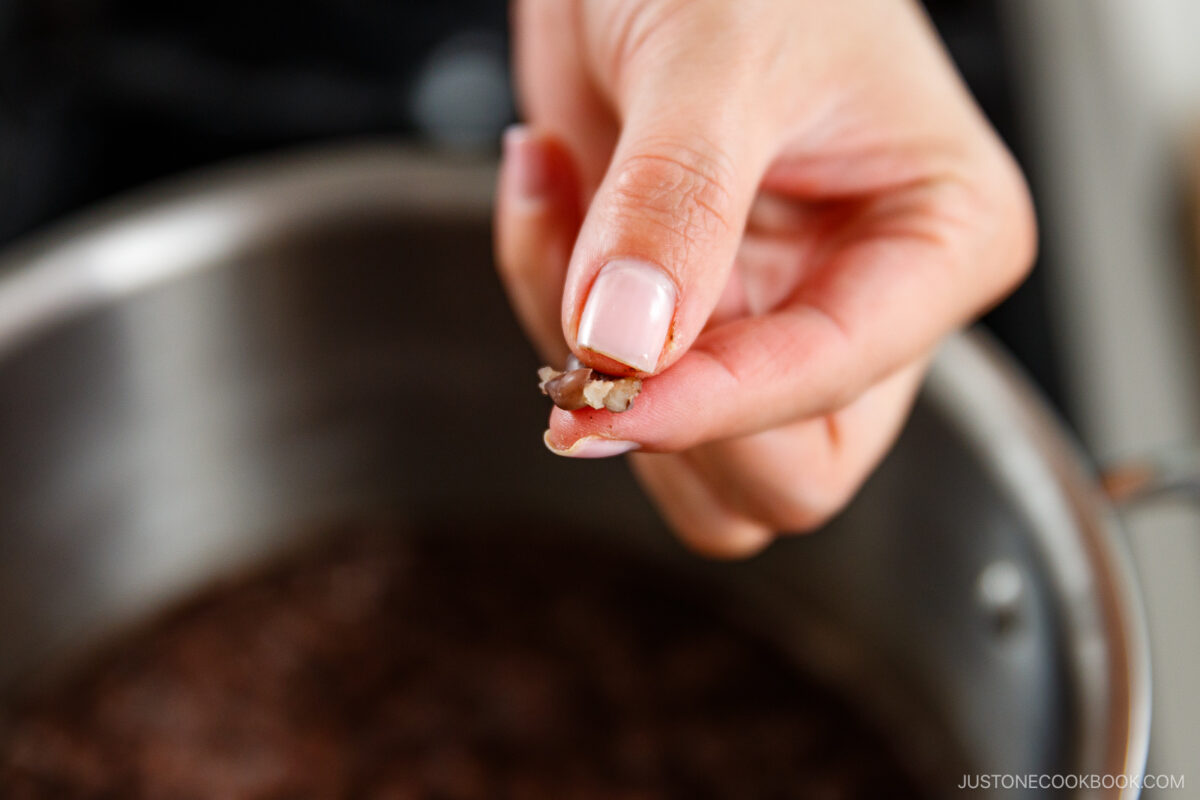
Some of the liquid will evaporate, so add more water to keep the beans covered, as needed. After 1 hour, check if the beans are cooked. Pick up a bean and mash it with your fingers. When it mashes easily, it‘s done.
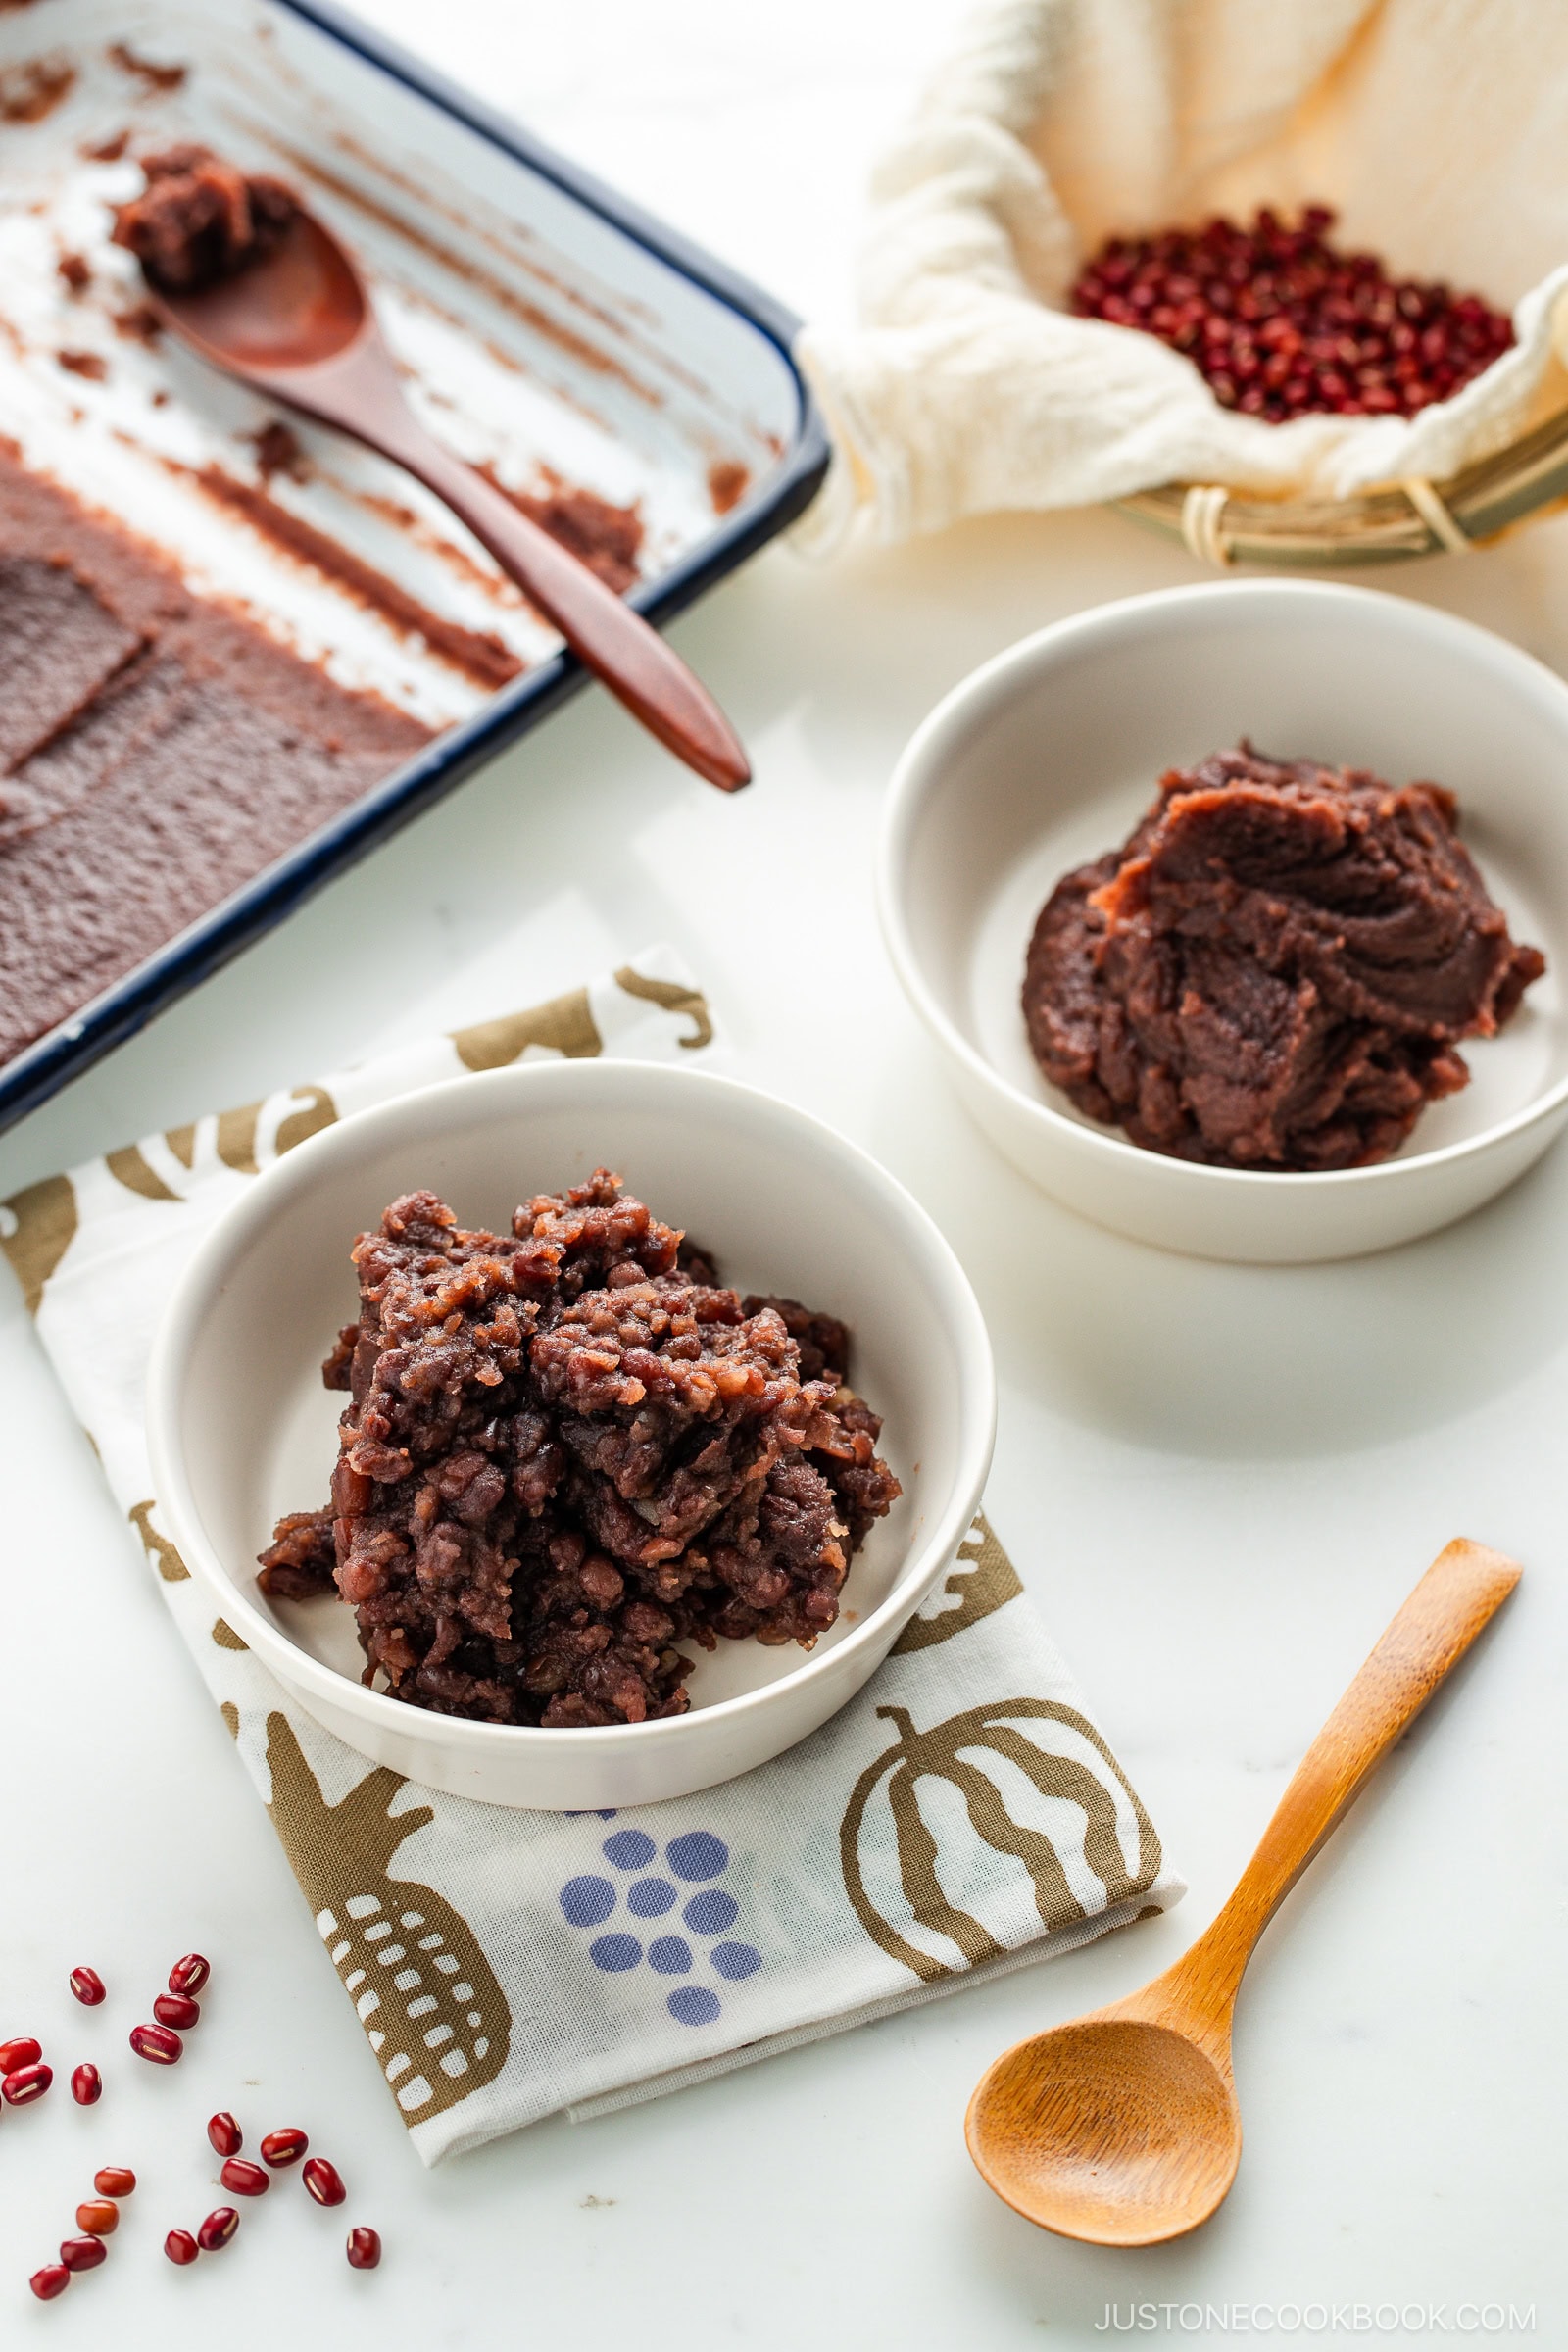
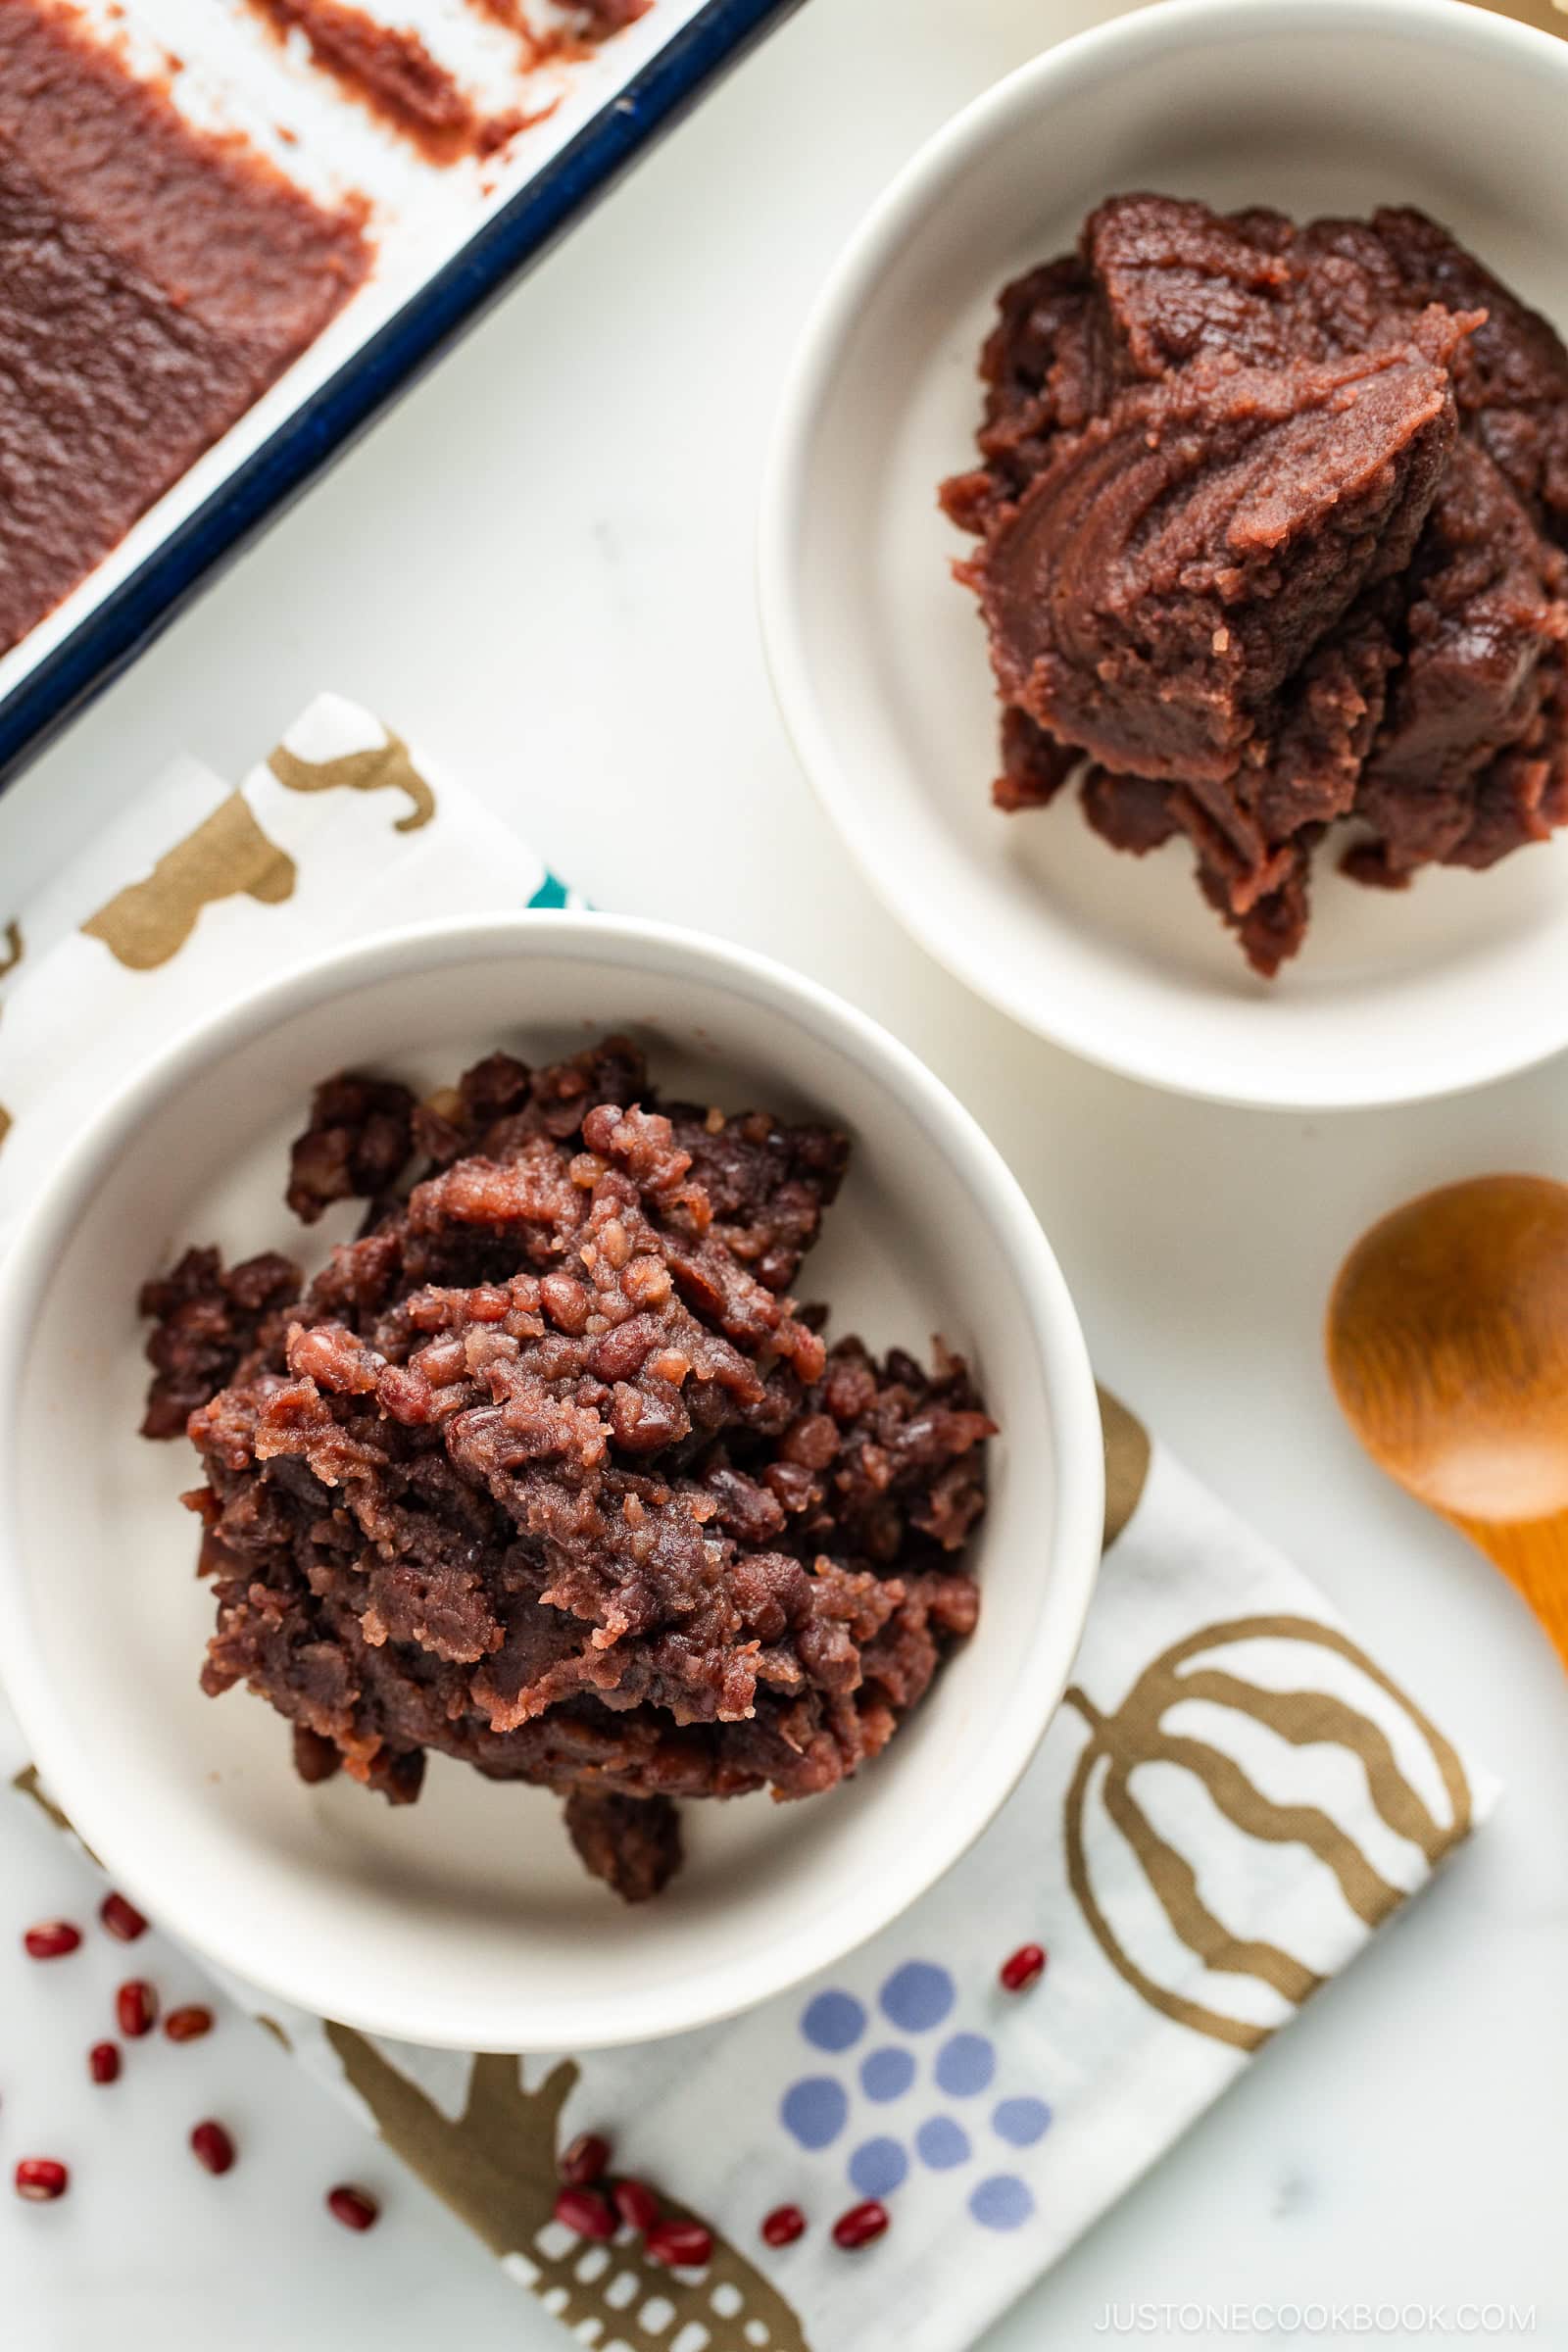
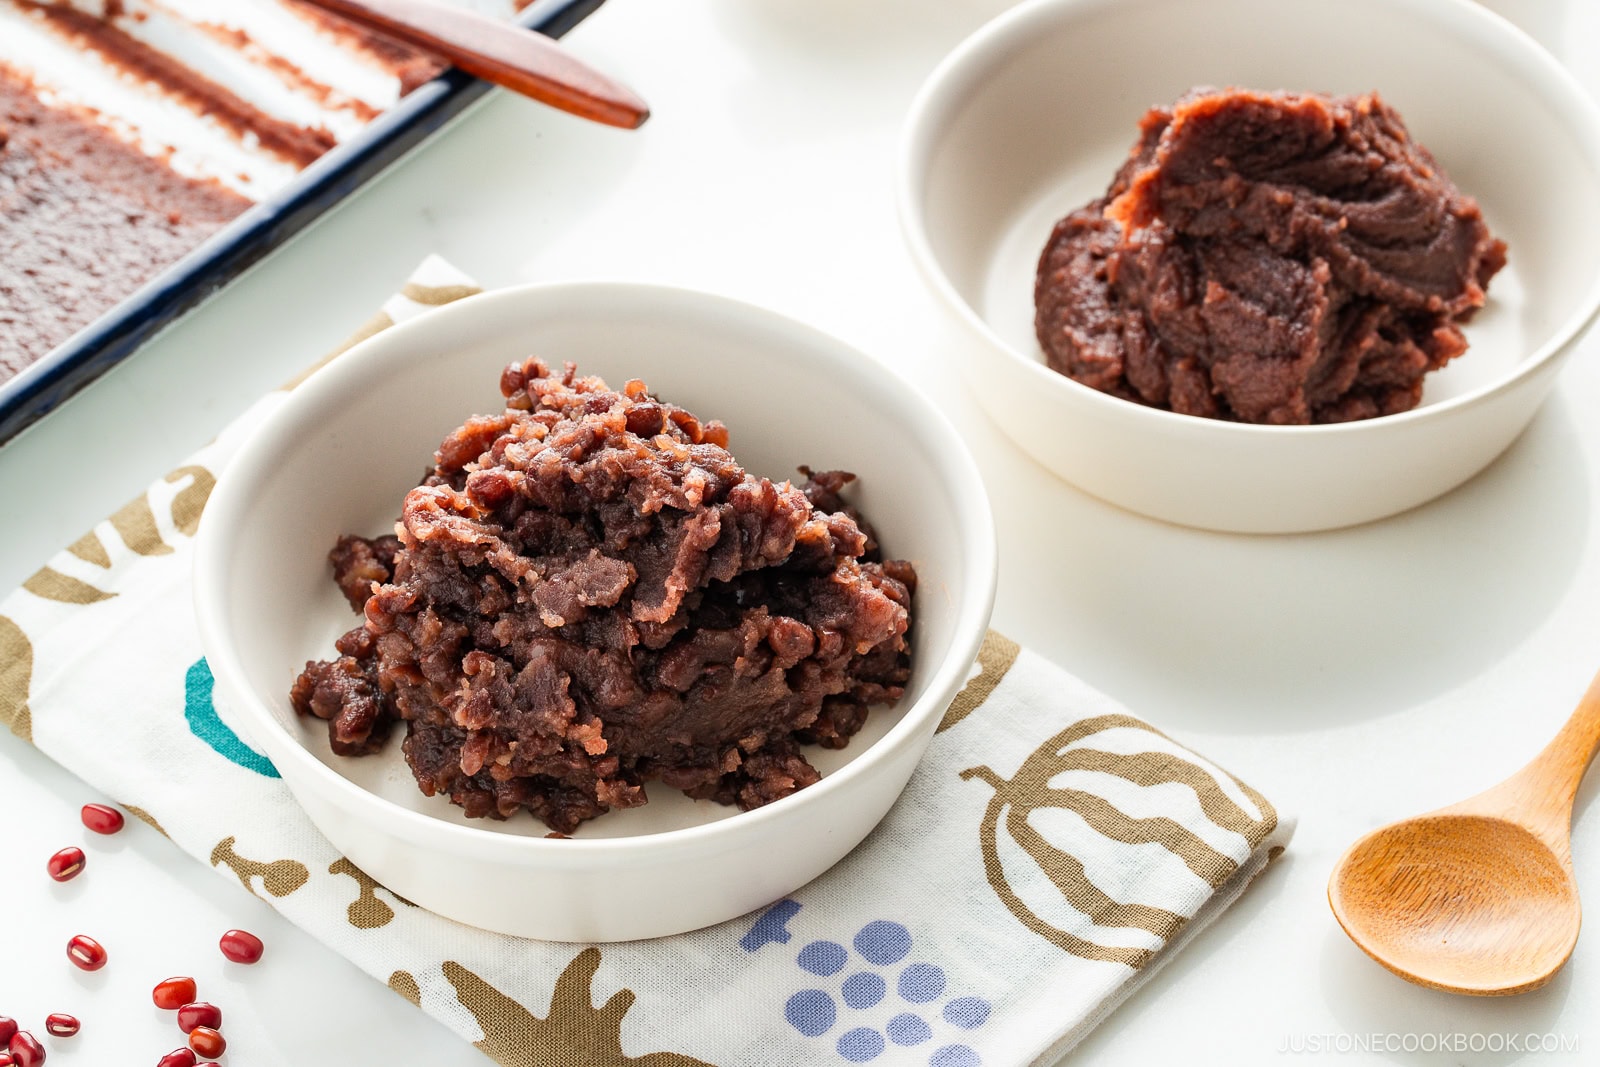
To Make Tsubuan (Chunky Paste)
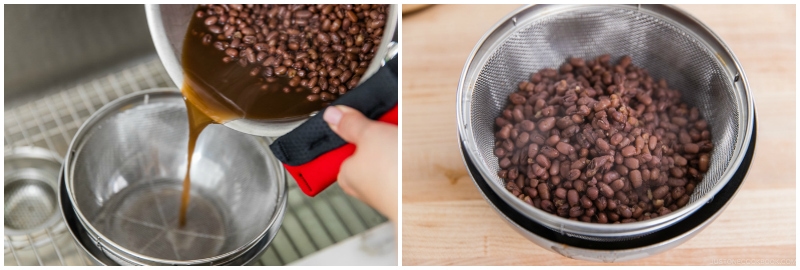
Drain the cooked azuki beans in a sieve.
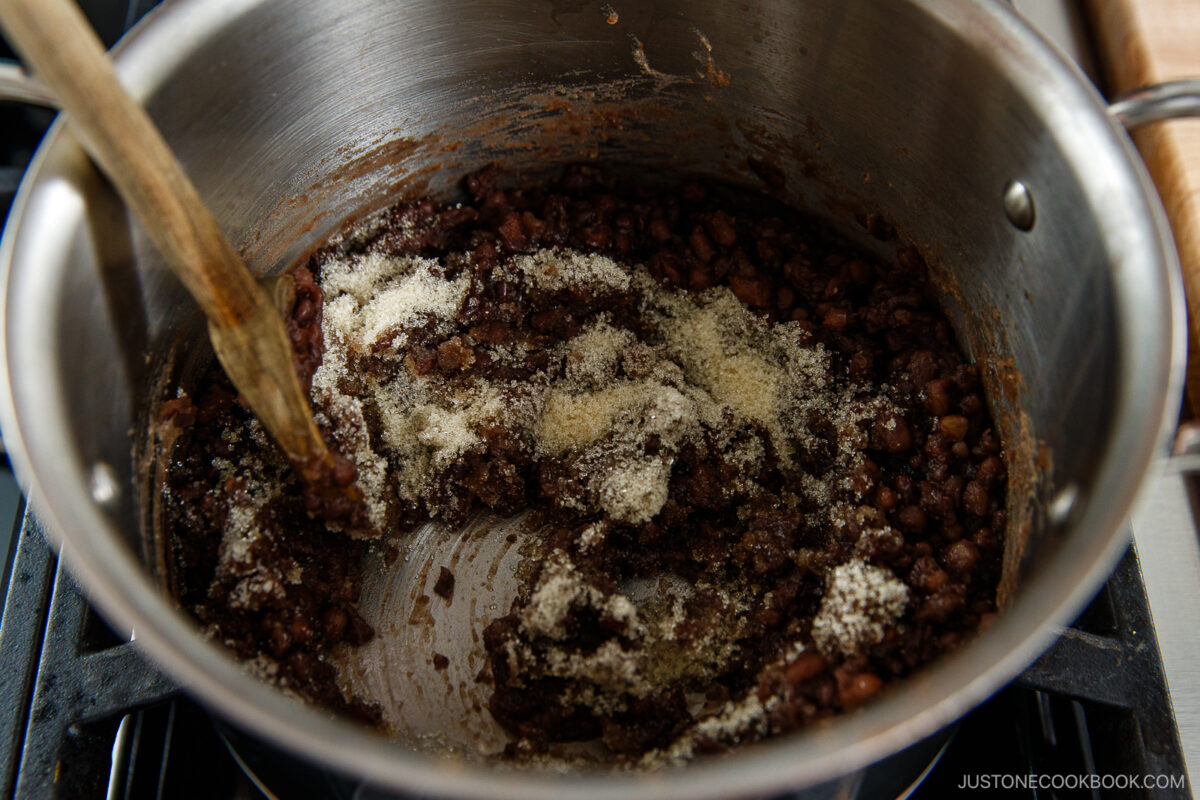
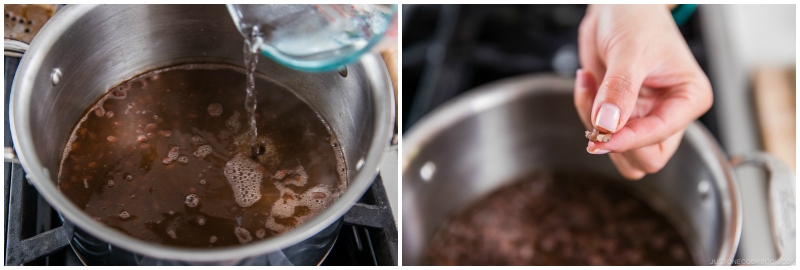
Return the beans to the same pot. Turn the heat to medium low and add half of the ¾ cup sugar.
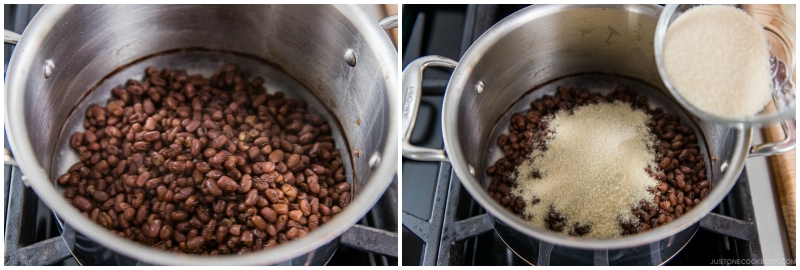
Mix well. Once the sugar has dissolved, add the rest of the sugar.
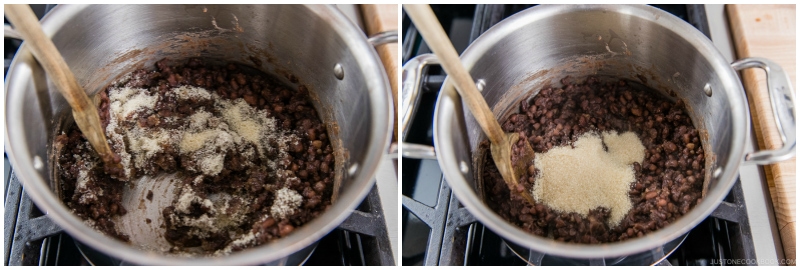
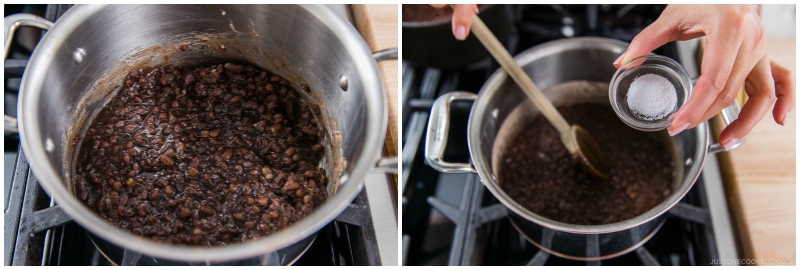
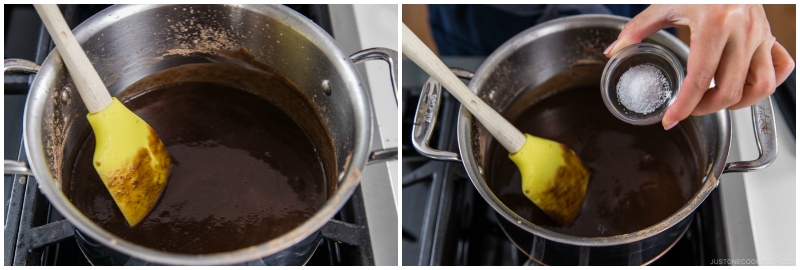
Mix well, stirring constantly. Then, add ½ tsp Diamond Crystal kosher salt and stir.
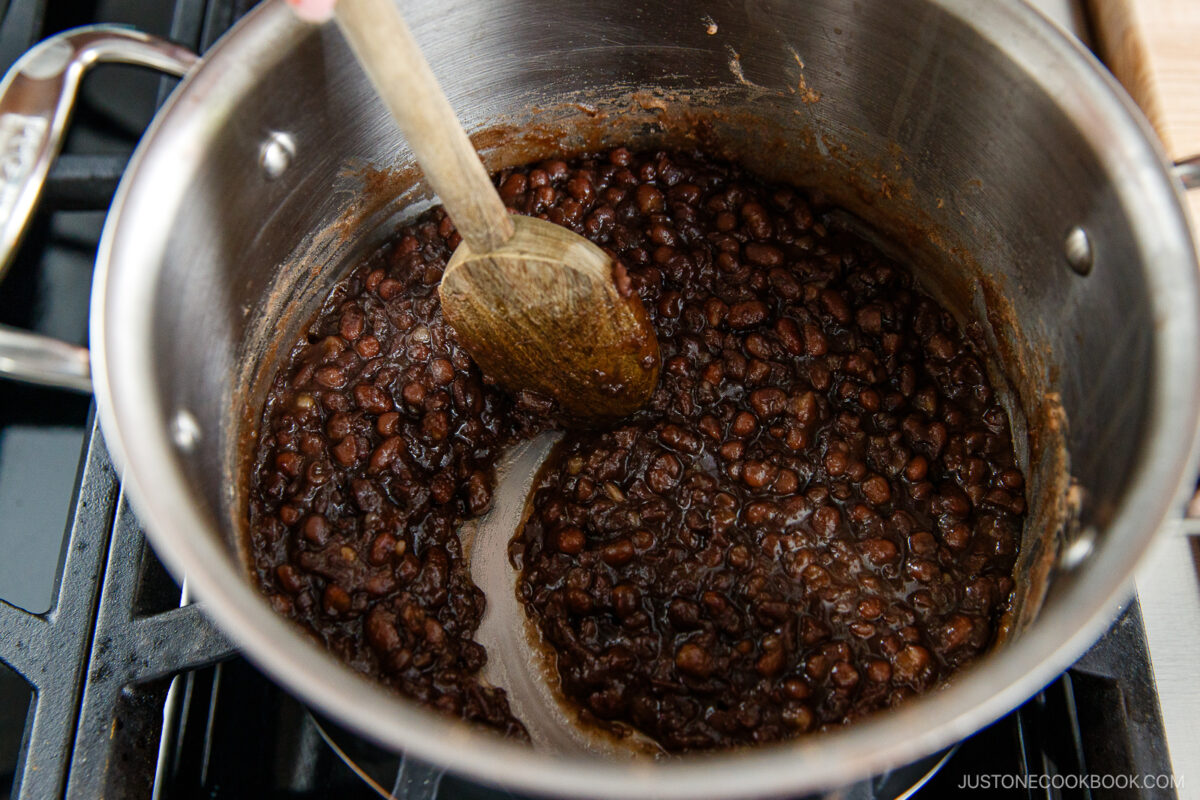
If you plan to use the red beans for Zenzai (Oshiruko), you can use it right away. If you prefer a thicker version, reduce the soup further.

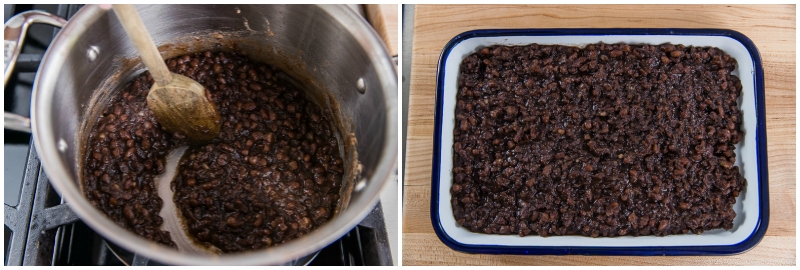
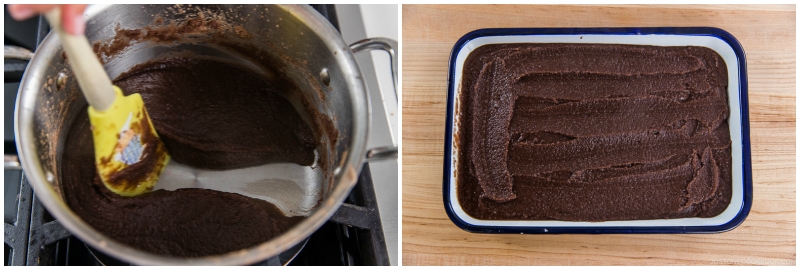
Let the moisture evaporate. When you can draw a line on the bottom of the pot with your spatula, turn off the heat. Don‘t worry if the anko is still loose; it will continue to thicken as it cools. Transfer it to a flat baking sheet to cool completely. The tsubuan is now ready to use in Japanese sweets like Daifuku Mochi, Anpan, Red Bean Pancakes, and Matcha Zenzai (Red Bean Soup). Scroll down to see how to store it.
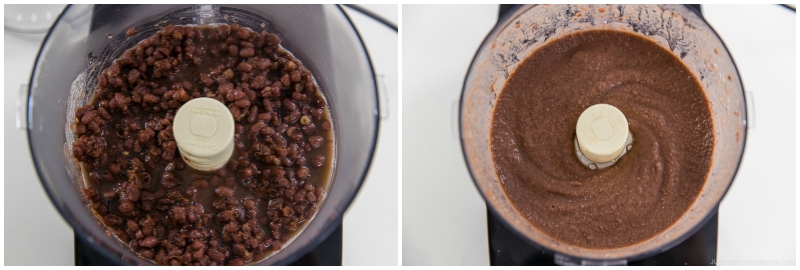
To Make Koshian (Fine Paste)
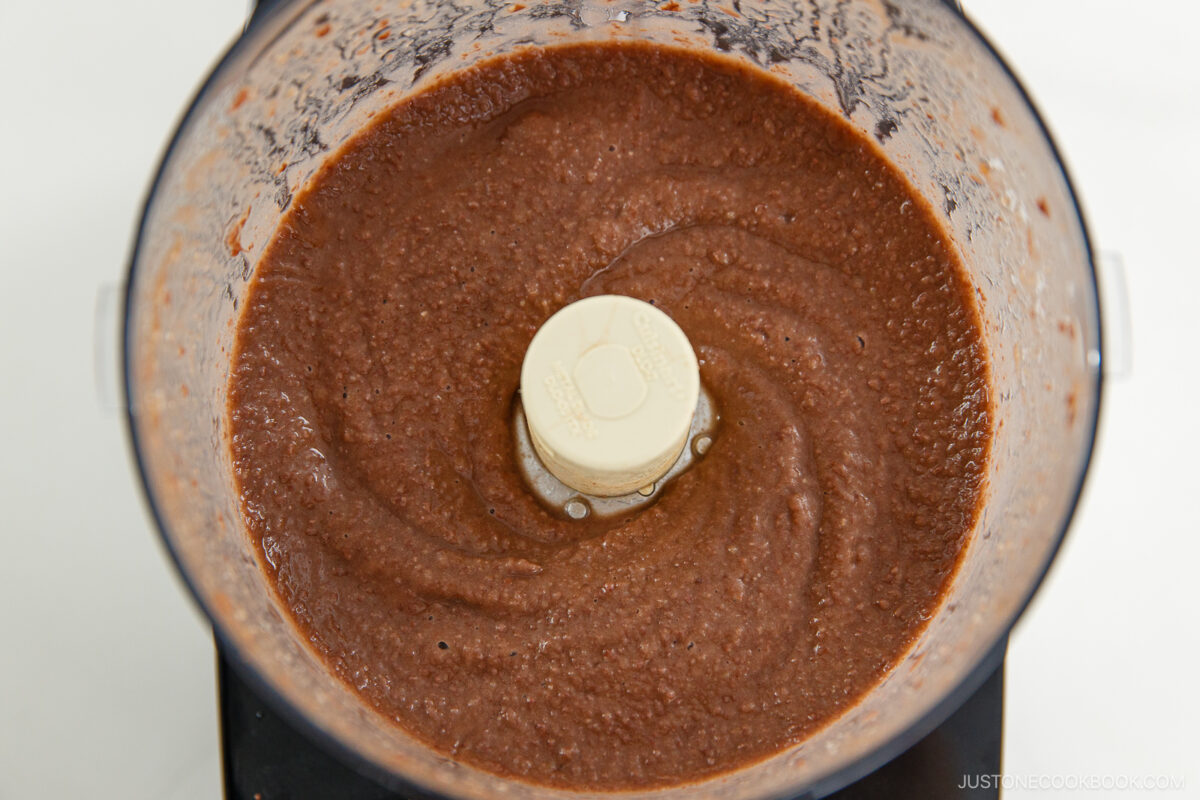
Reserve some of the cooking liquid. Then, drain the azuki beans in a sieve.
Transfer the beans to a food processor. Run the food processor until the beans become a fine paste. If necessary, add 1–2 Tbsp cooking liquid to help it purée smoothly.
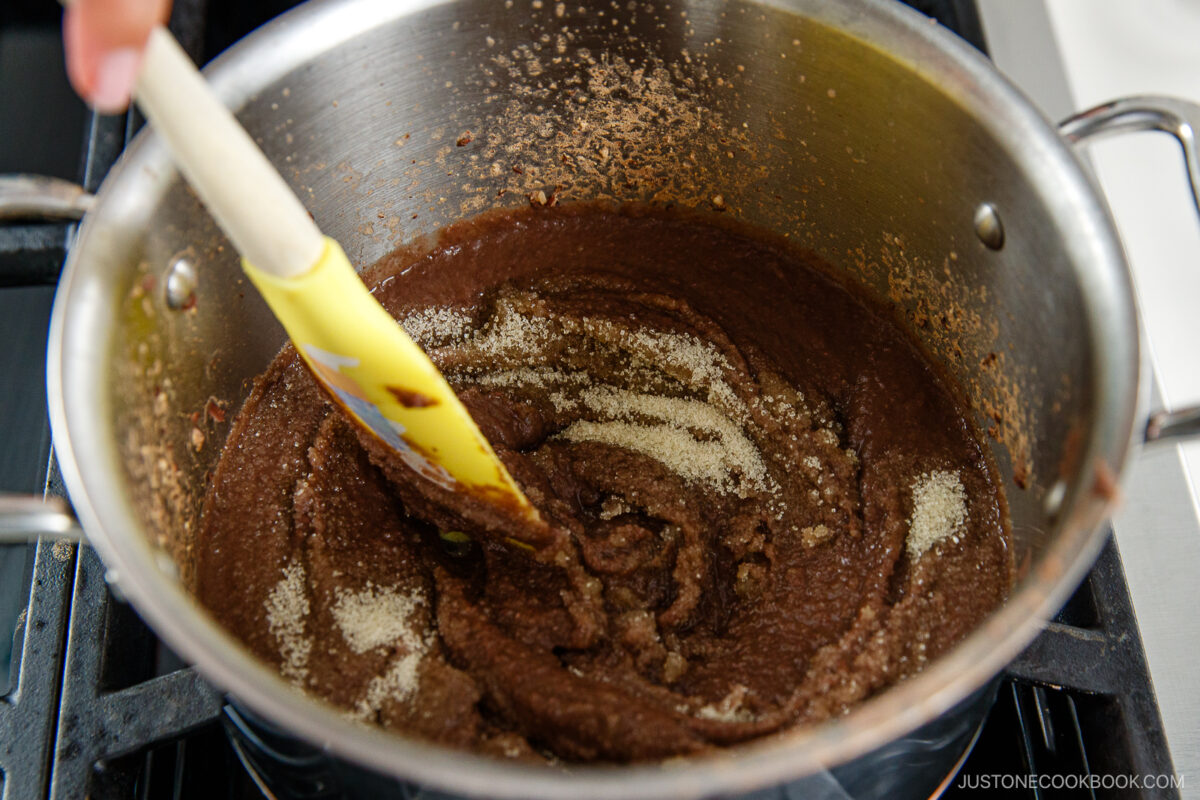
Transfer the fine paste back into the same cooking pot. Turn the heat to medium low and add half of the ¾ cup sugar.
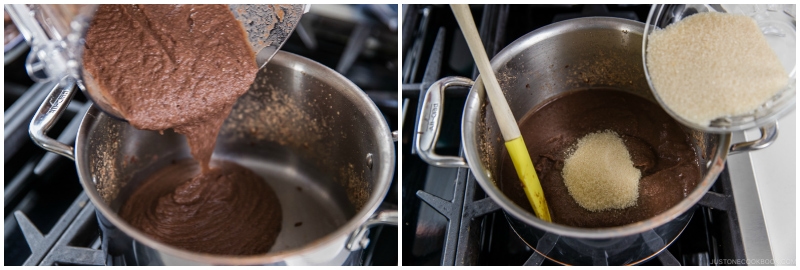
Mix well. Once the sugar has dissolved, add the rest of the sugar.

Let the moisture evaporate, stirring constantly. Add ½ tsp Diamond Crystal kosher salt and continue to stir.
When you can draw a line on the bottom of the pot with your spatula, turn off the heat. Don‘t worry if the anko is still loose; it will continue to thicken as it cools. Transfer the anko to a flat baking sheet and cool completely. The koshian is now ready to use in Japanese sweets like Strawberry Mochi (Ichigo Daifuku), Sakura Mochi, Manju, and Mizu Yokan.
To Store
Transfer the anko to an airtight container, cool, and store in the refrigerator for up to 3–4 days or in the freezer for up to 2 months. You can also divide and wrap 100 g portions in plastic film and store in a freezer bag. When you’re ready to use it, defrost it in the refrigerator overnight. Tip: Compared to store-bought red bean paste, homemade anko uses less sugar and therefore doesn‘t keep as long.
Serving: 1 Tbsp · Calories: 45 kcal · Carbohydrates: 10 g · Protein: 1 g · Fat: 1 g · Saturated Fat: 1 g · Sodium: 19 mg · Potassium: 84 mg · Fiber: 1 g · Sugar: 6 g · Vitamin A: 1 IU · Calcium: 4 mg · Iron: 1 mg
Author: Namiko Hirasawa Chen
Course: Condiments, Dessert, How to
Cuisine: Japanese
Keyword: bean paste, sweet red bean
©JustOneCookbook.com Content and photographs are copyright protected. Sharing of this recipe is both encouraged and appreciated. Copying and/or pasting full recipes to any website or social media is strictly prohibited. Please view my photo use policy here.
If you made this recipe, snap a pic and hashtag it #justonecookbook! We love to see your creations on Instagram @justonecookbook!
Editor’s Note: This post was originally published on March 12, 2012. It was updated with new images and a minor recipe instruction tweak on March 10, 2020. It was republished on June 18, 2025, with refreshed content and improvements.


 English (US) ·