 2 weeks ago
14
2 weeks ago
14
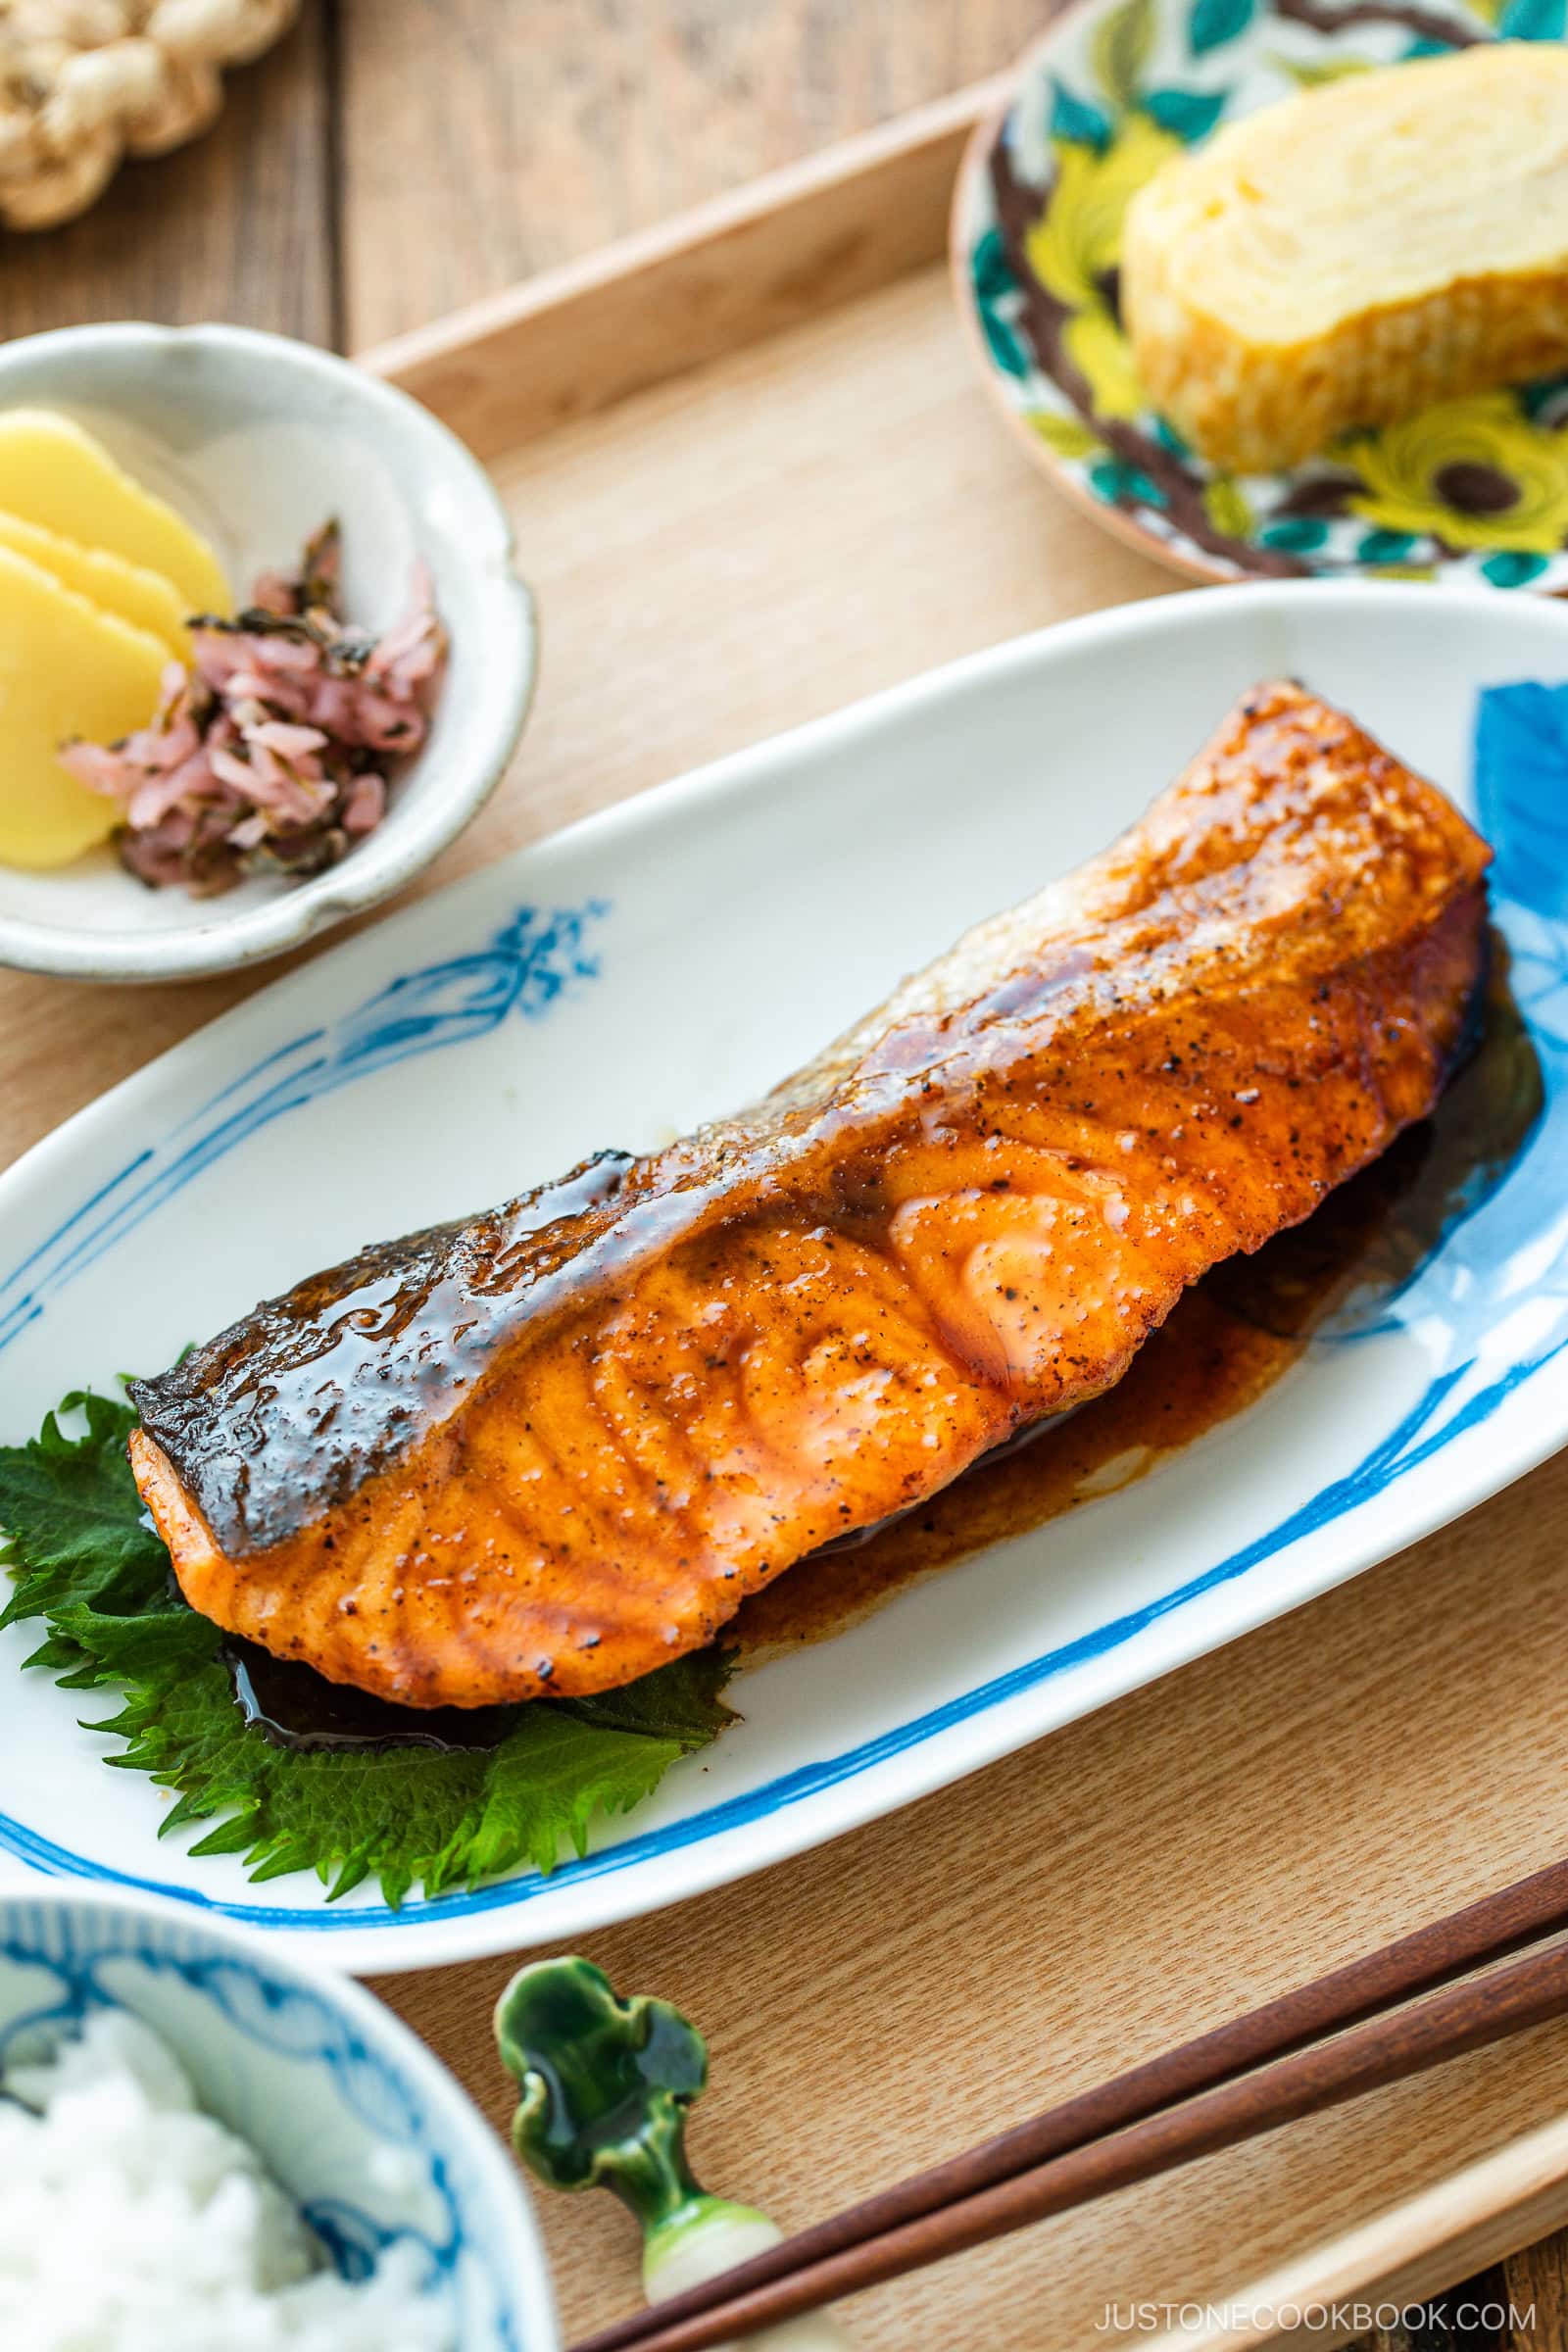
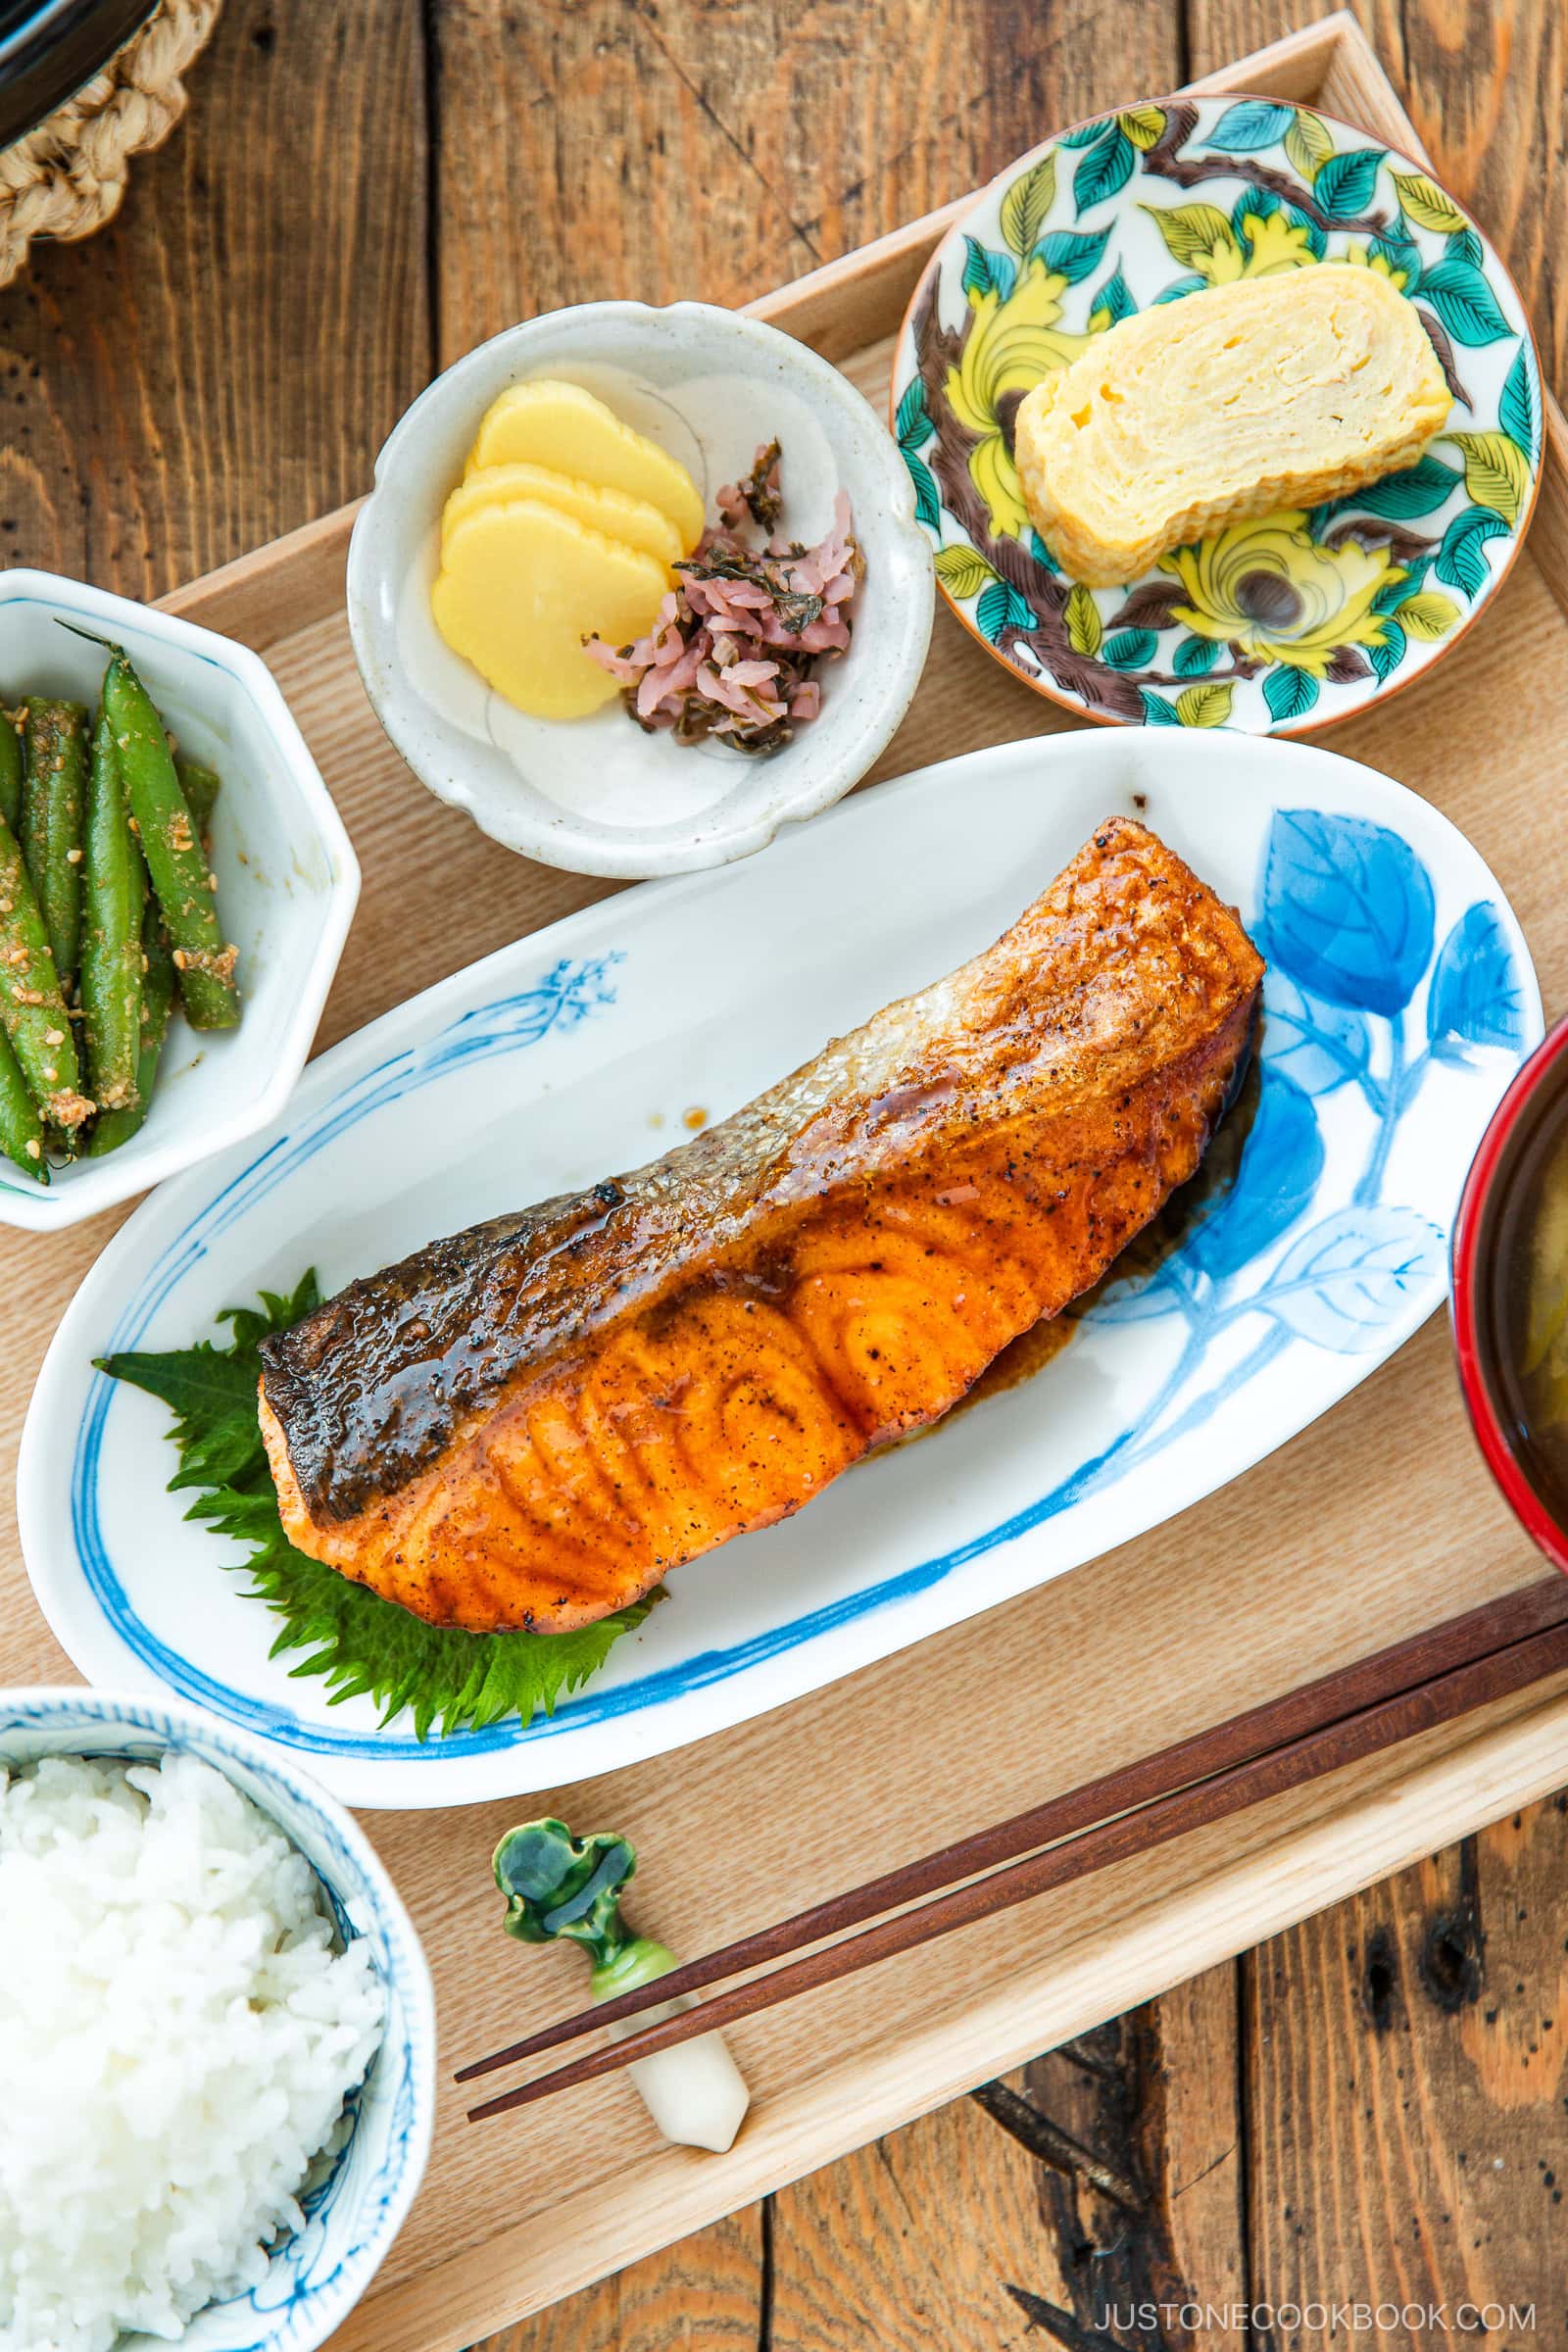
Ready in 15 minutes, my easy and mouthwatering Teriyaki Salmon recipe makes a light and savory meal on any weeknight. I’ll show you how to pan-grill the tender salmon fillets and make a homemade teriyaki sauce in the traditional Japanese method.

I grew up eating a variety of fish in Japan, and salmon was a favorite in our household. Today, I’ll share an authentic and easy Teriyaki Salmon recipe, just like we make at home. You’ll learn the secret to keeping the salmon juicy yet crispy and how to make a perfectly balanced sauce with just 4 ingredients!
Craving more salmon dishes? Try my Miso Salmon, Japanese Salted Salmon, and Salmon in Foil recipes next!
What is Teriyaki?
Teriyaki (照り焼き) in Japanese actually describes a cooking method that first appeared in Japan in the 1600s. Teri (照り) means luster, and yaki (焼き) means grilled, broiled, or pan-fried. It essentially refers to any food cooked this way that’s brushed with a shiny glaze called tare (タレ). Outside Japan, both the cooking style and sauce are commonly called teriyaki.
Salmon, chicken, yellowtail (hamachi), pork, and tofu are the most popular ingredients to cook teriyaki-style in Japan. Home cooks pan-fry them instead of cooking in an oven.
Why I Love This Recipe
- It’s easy and no fuss! Pan-grill the fillets until golden brown outside and juicy inside, then finish it off with a sweet-savory homemade glaze. I love the simplicity of this delicious, one-pan dish.
- Ready in just 15 minutes – Japanese-style salmon filets are thinly sliced, about 1 inch (2.5 cm) thick. The thin pieces cook fast in a frying pan. Read more in Nami’s Recipe Tips.
- Makes a simple, traditional sauce with 4 ingredients – Most Japanese recipes use only soy sauce, sake, mirin, and sugar (optional) for the teriyaki sauce. For the best taste, we typically prepare the sauce from scratch.
- No marinade needed – The glaze that’s reduced in the pan is all you need for the perfect seasoning. It allows the delicate, original flavor of the salmon to shine through without overwhelming it.
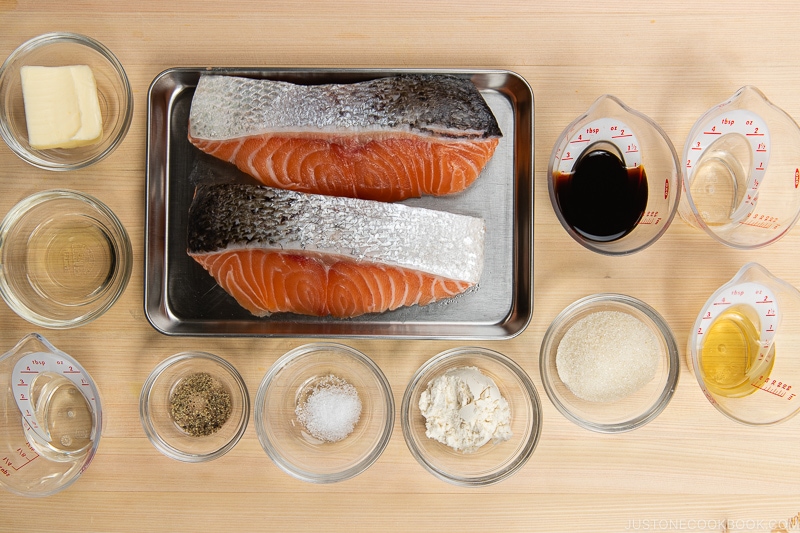
Ingredients for Teriyaki Salmon
- Skin-on salmon fillets – ¾ inch (2 cm) thick
- Salt and freshly ground black pepper
- All-purpose flour – for coating the salmon
- Cooking oil
- Unsalted butter
- Sake – for steaming
- Homemade teriyaki sauce:
- Sake (Chinese rice wine, dry sherry, or water)
- Mirin
- Soy sauce
- Sugar
Find the printable recipe with measurements below.
Substitutions
- All-purpose flour: Use cornstarch or potato starch for gluten-free.
- Sake and mirin: If you can’t find mirin, substitute 1 Tbsp sake (or water) + 1 tsp sugar for every 1 Tbsp mirin. The flavor won’t be the same, but it’s close.
- Soy sauce: Use gluten-free soy sauce or tamari if needed.
How to Make Teriyaki Salmon
Preparation
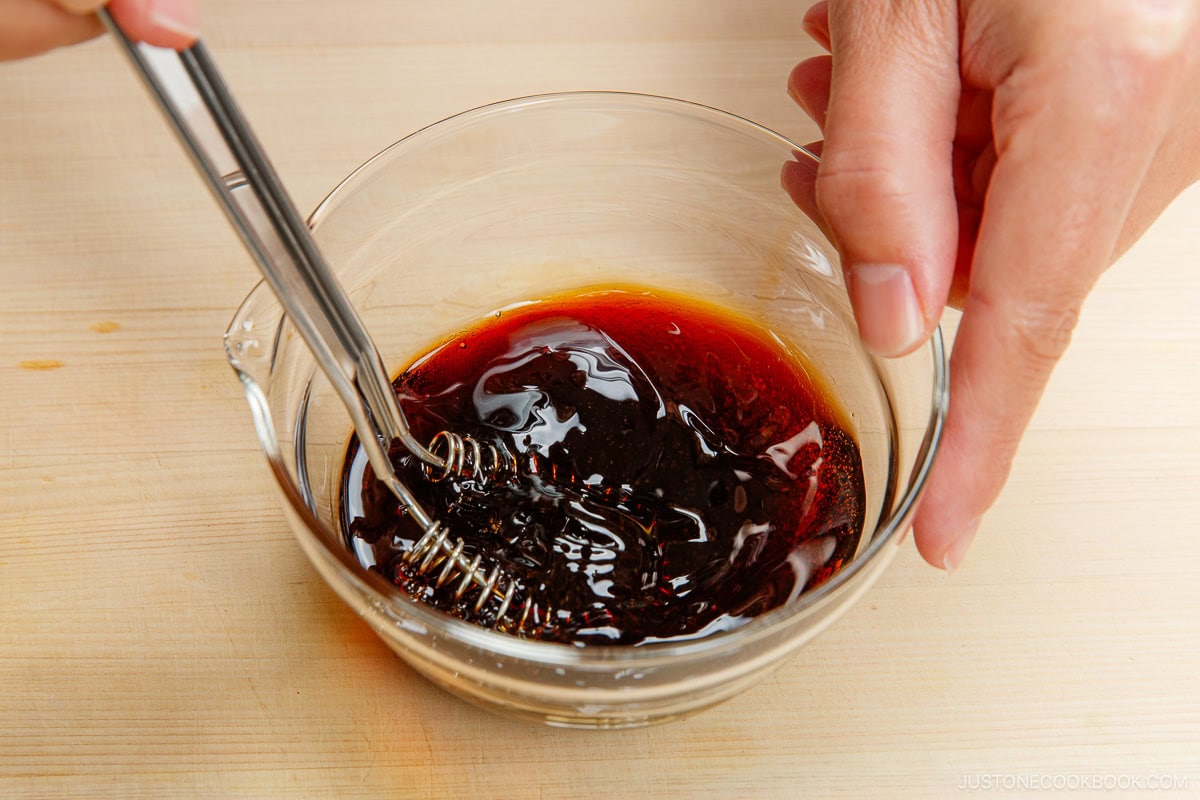
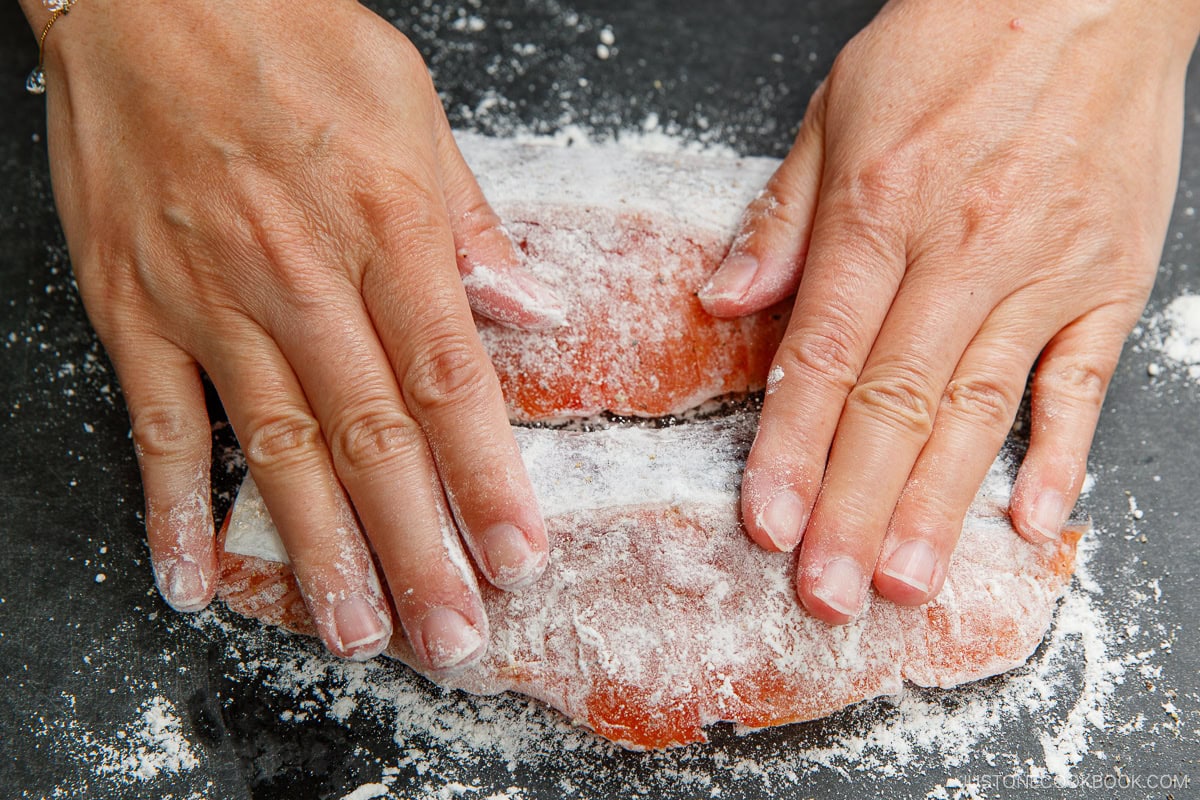
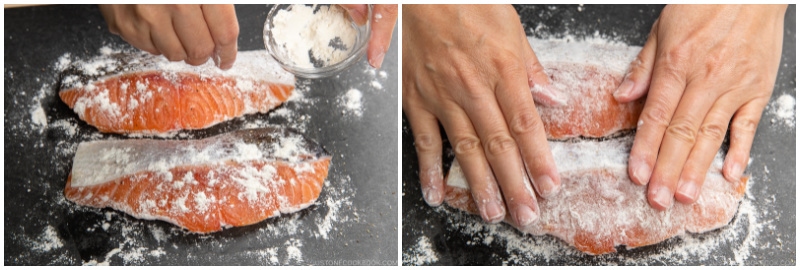
Step 1 – Prepare the teriyaki sauce and the salmon. Combine the sauce ingredients and whisk well. Season the salmon with kosher salt and ground black pepper on both sides. Sprinkle and press both sides with all-purpose flour and coat evenly.
Cooking
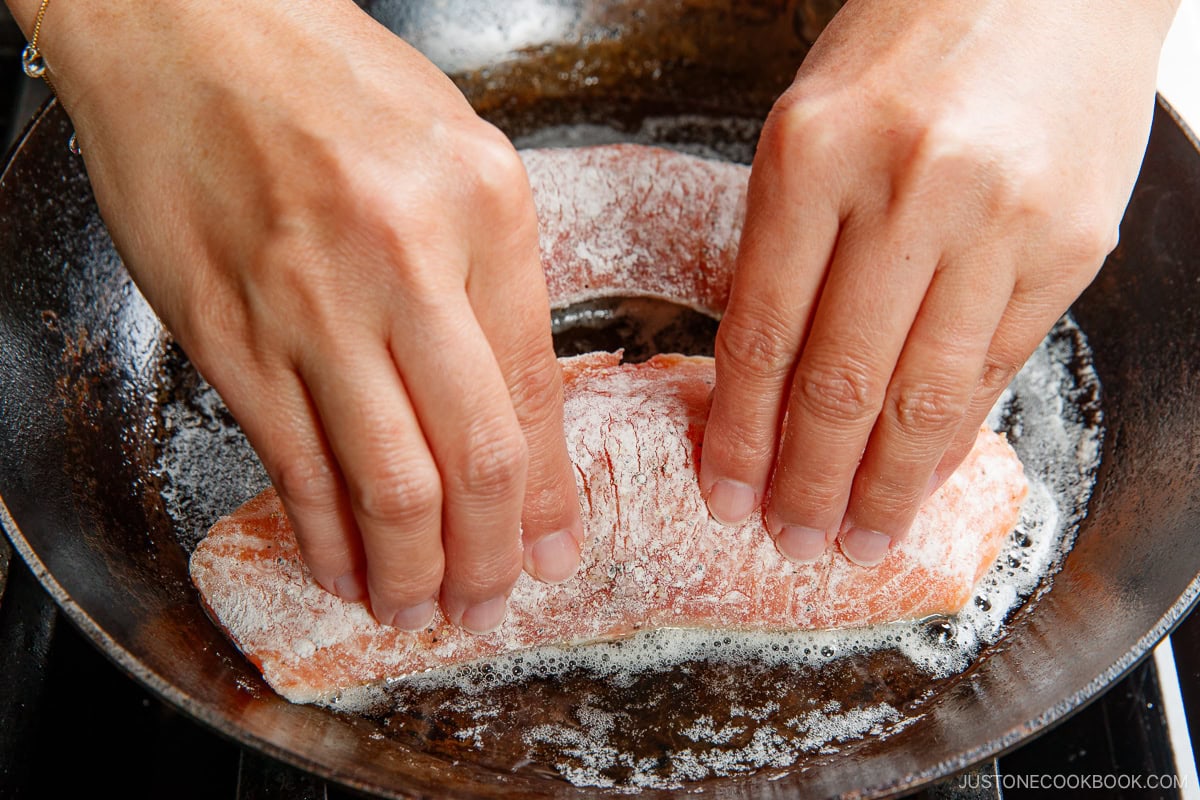
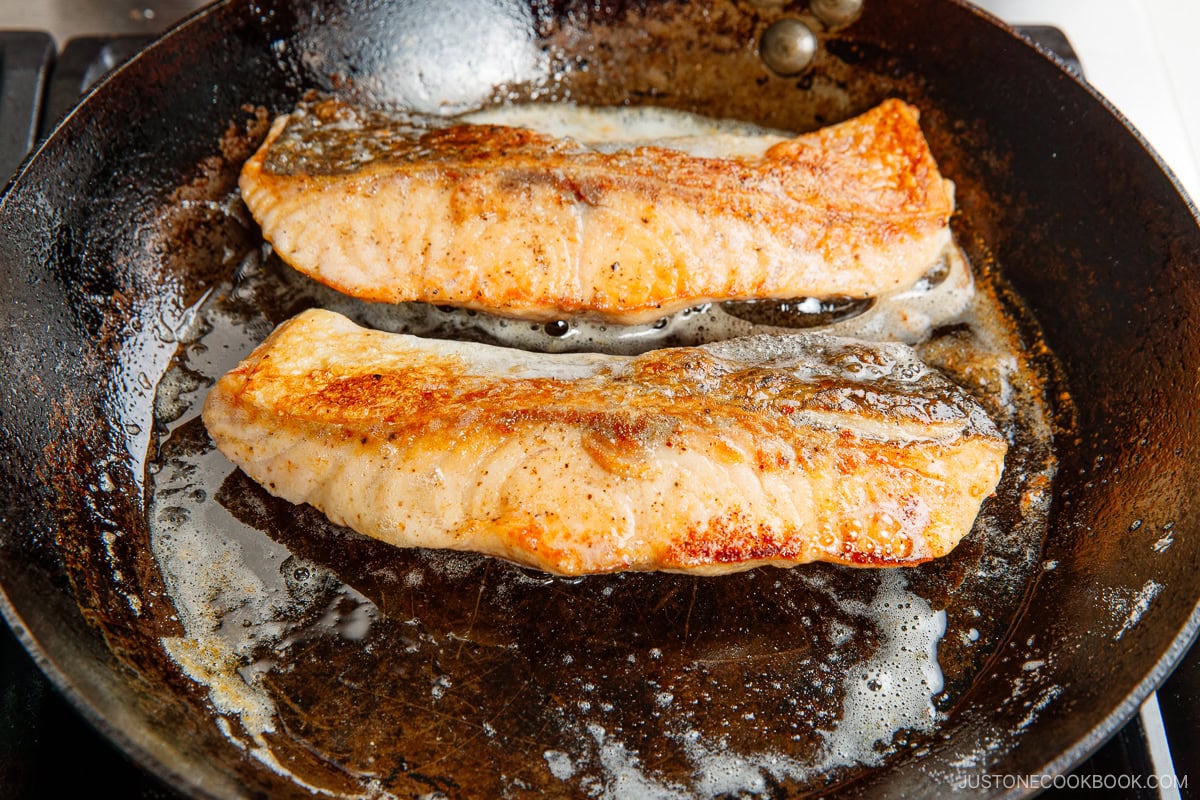
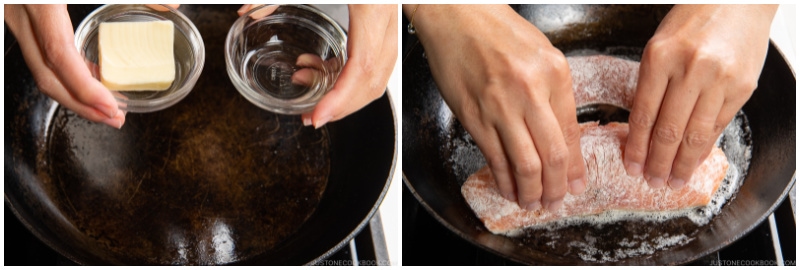
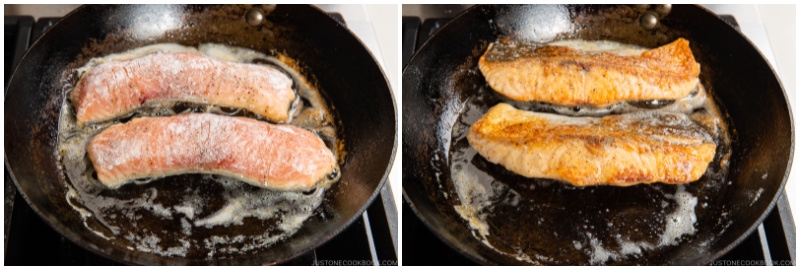
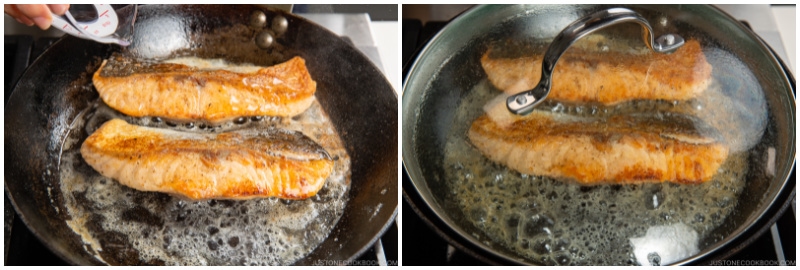
Step 2 – Cook the salmon. Heat a frying pan over medium heat, then add oil and butter. Press the salmon skin against the hot pan‘s surface for 15 seconds to sear before laying the fillets skin side down. Cook until the bottom is golden brown, and then flip them over.
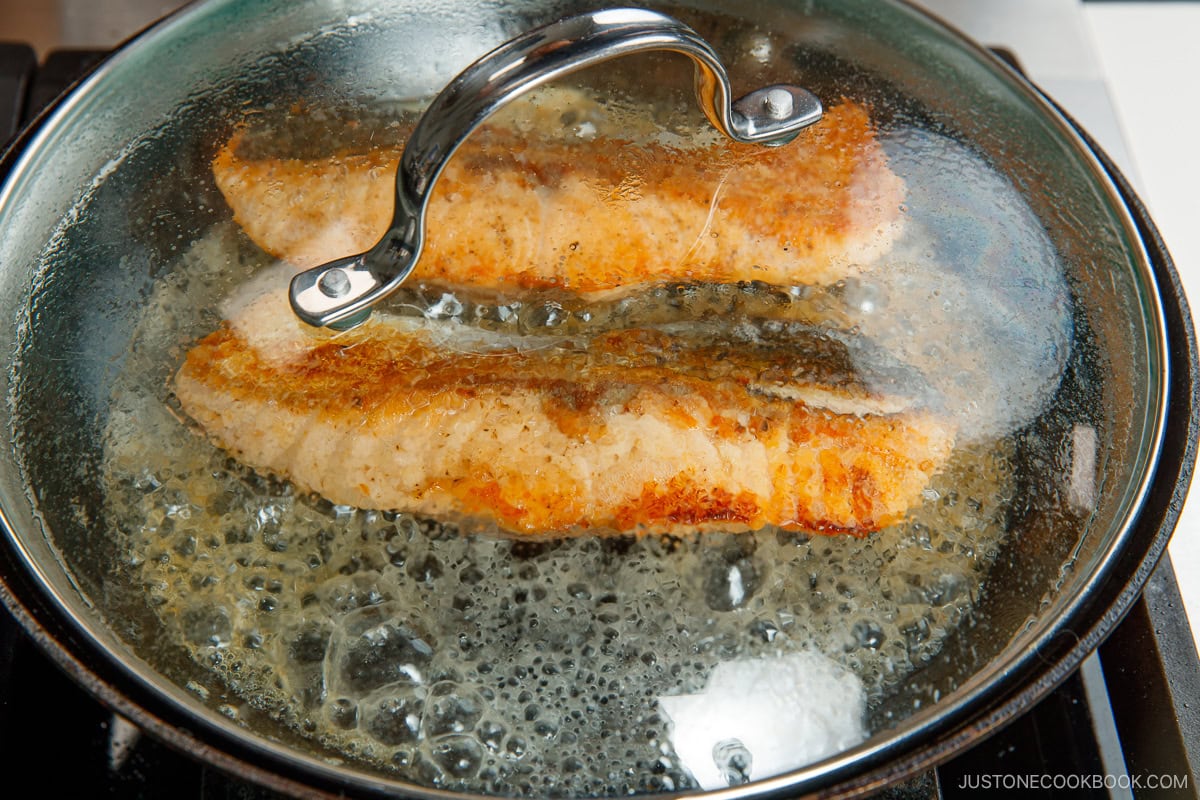
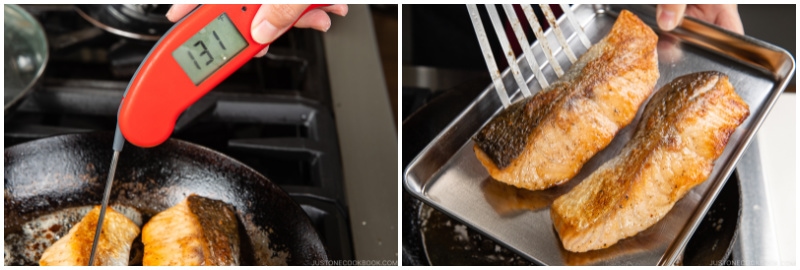
Step 3 – Add the sake and steam. Cover the pan with a lid and reduce the heat to low. Steam for 3–5 minutes or until the internal temperature registers 125–130°F (52–54ºC) at the thickest part. Transfer to a plate.

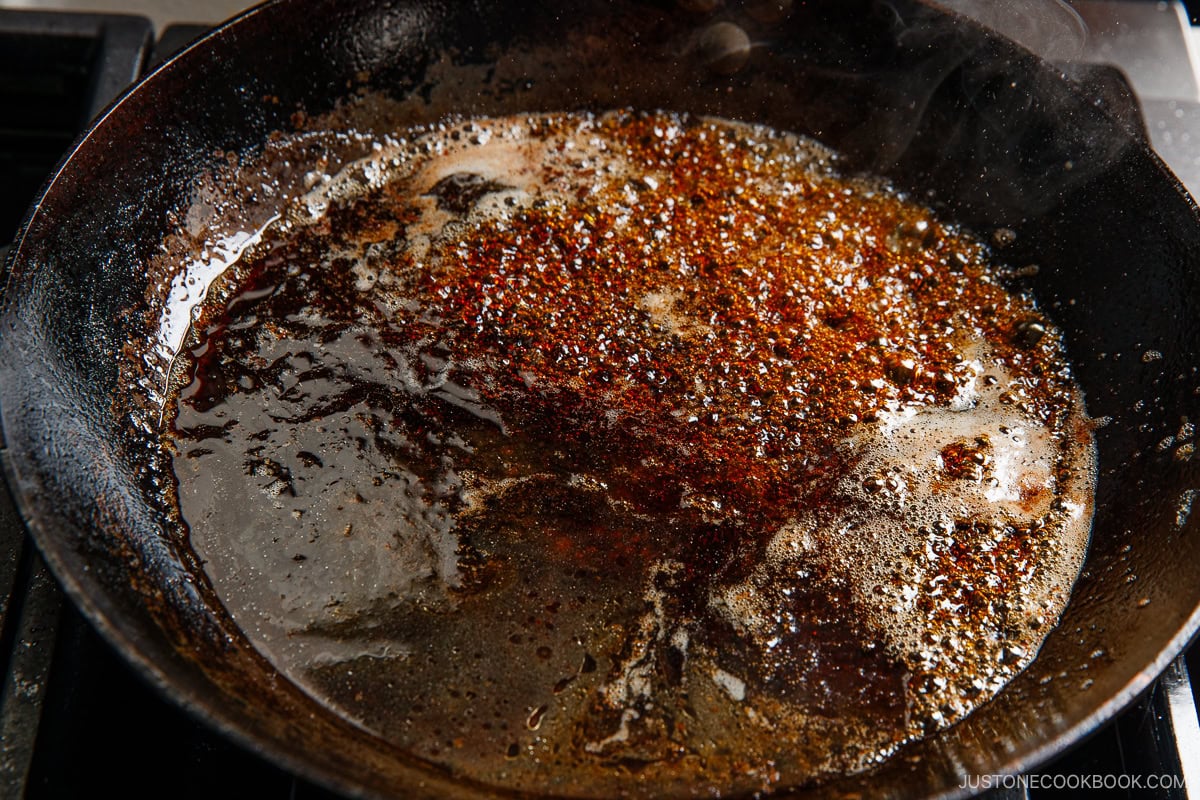
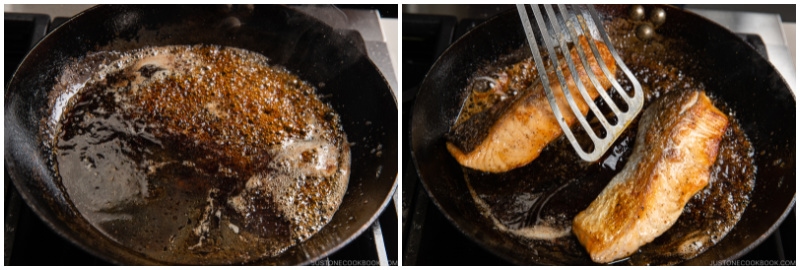
Step 4 – Add the teriyaki sauce to the pan and coat the salmon. When the sauce starts to boil, add the salmon back to the pan and glaze with the sauce. Turn off the heat once reduced and thickened.

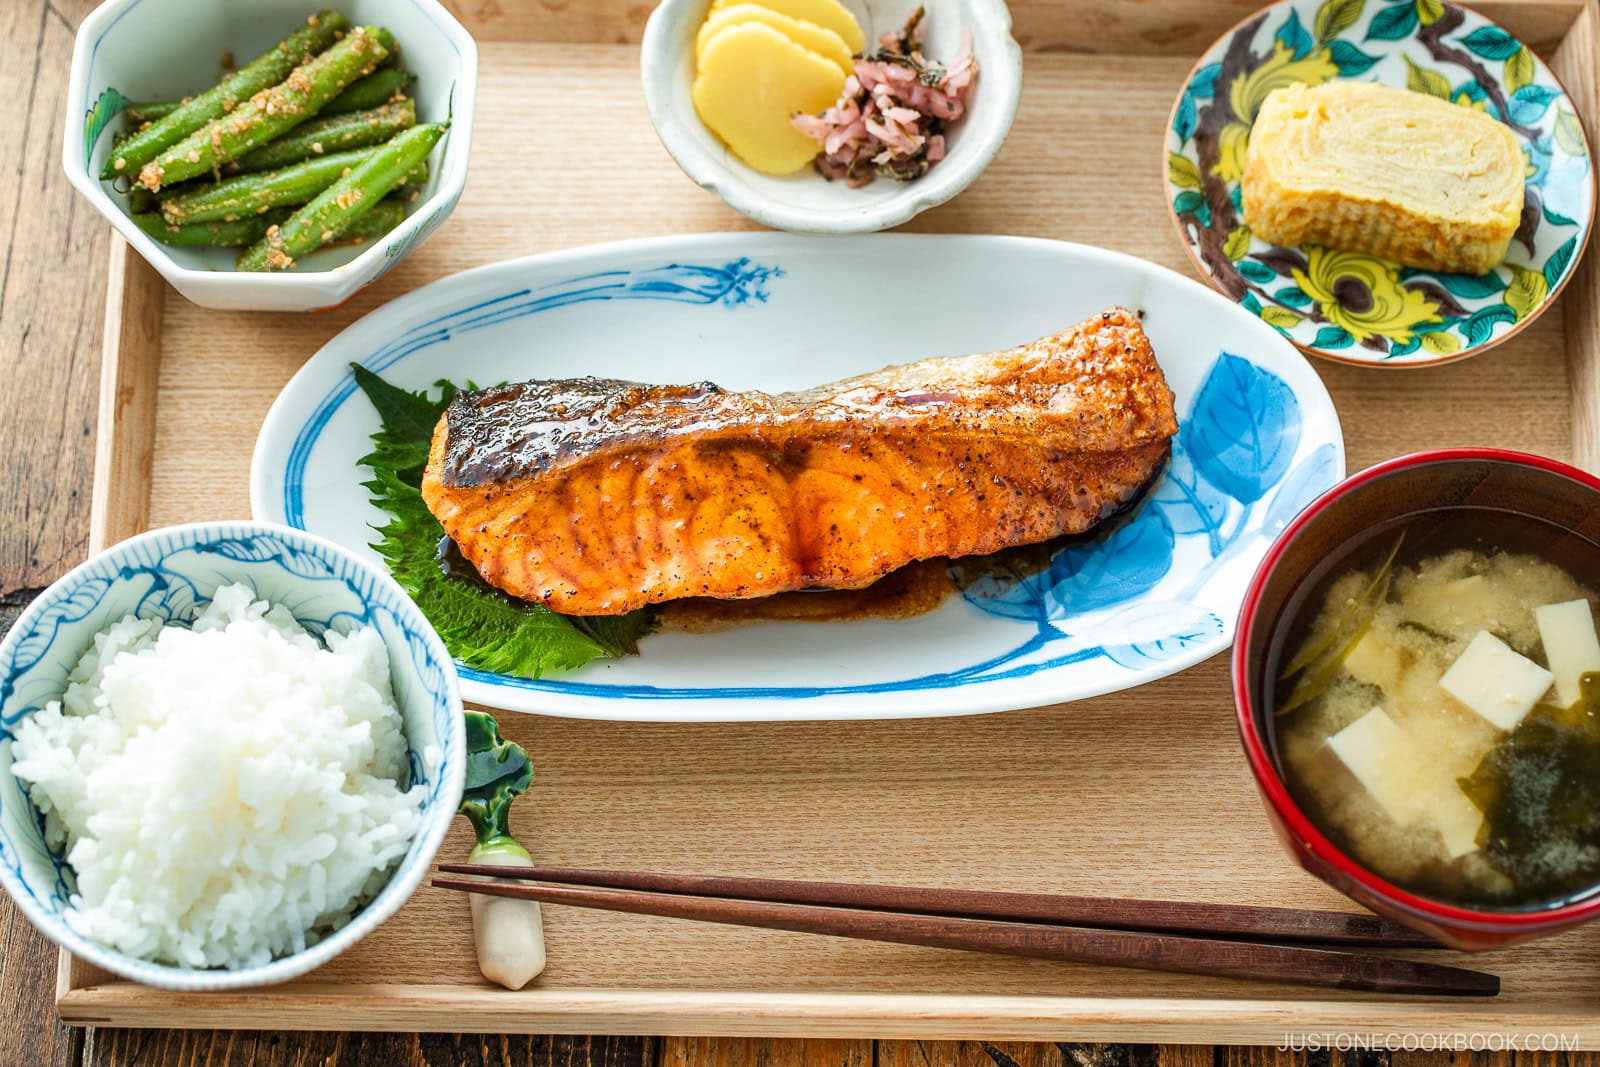
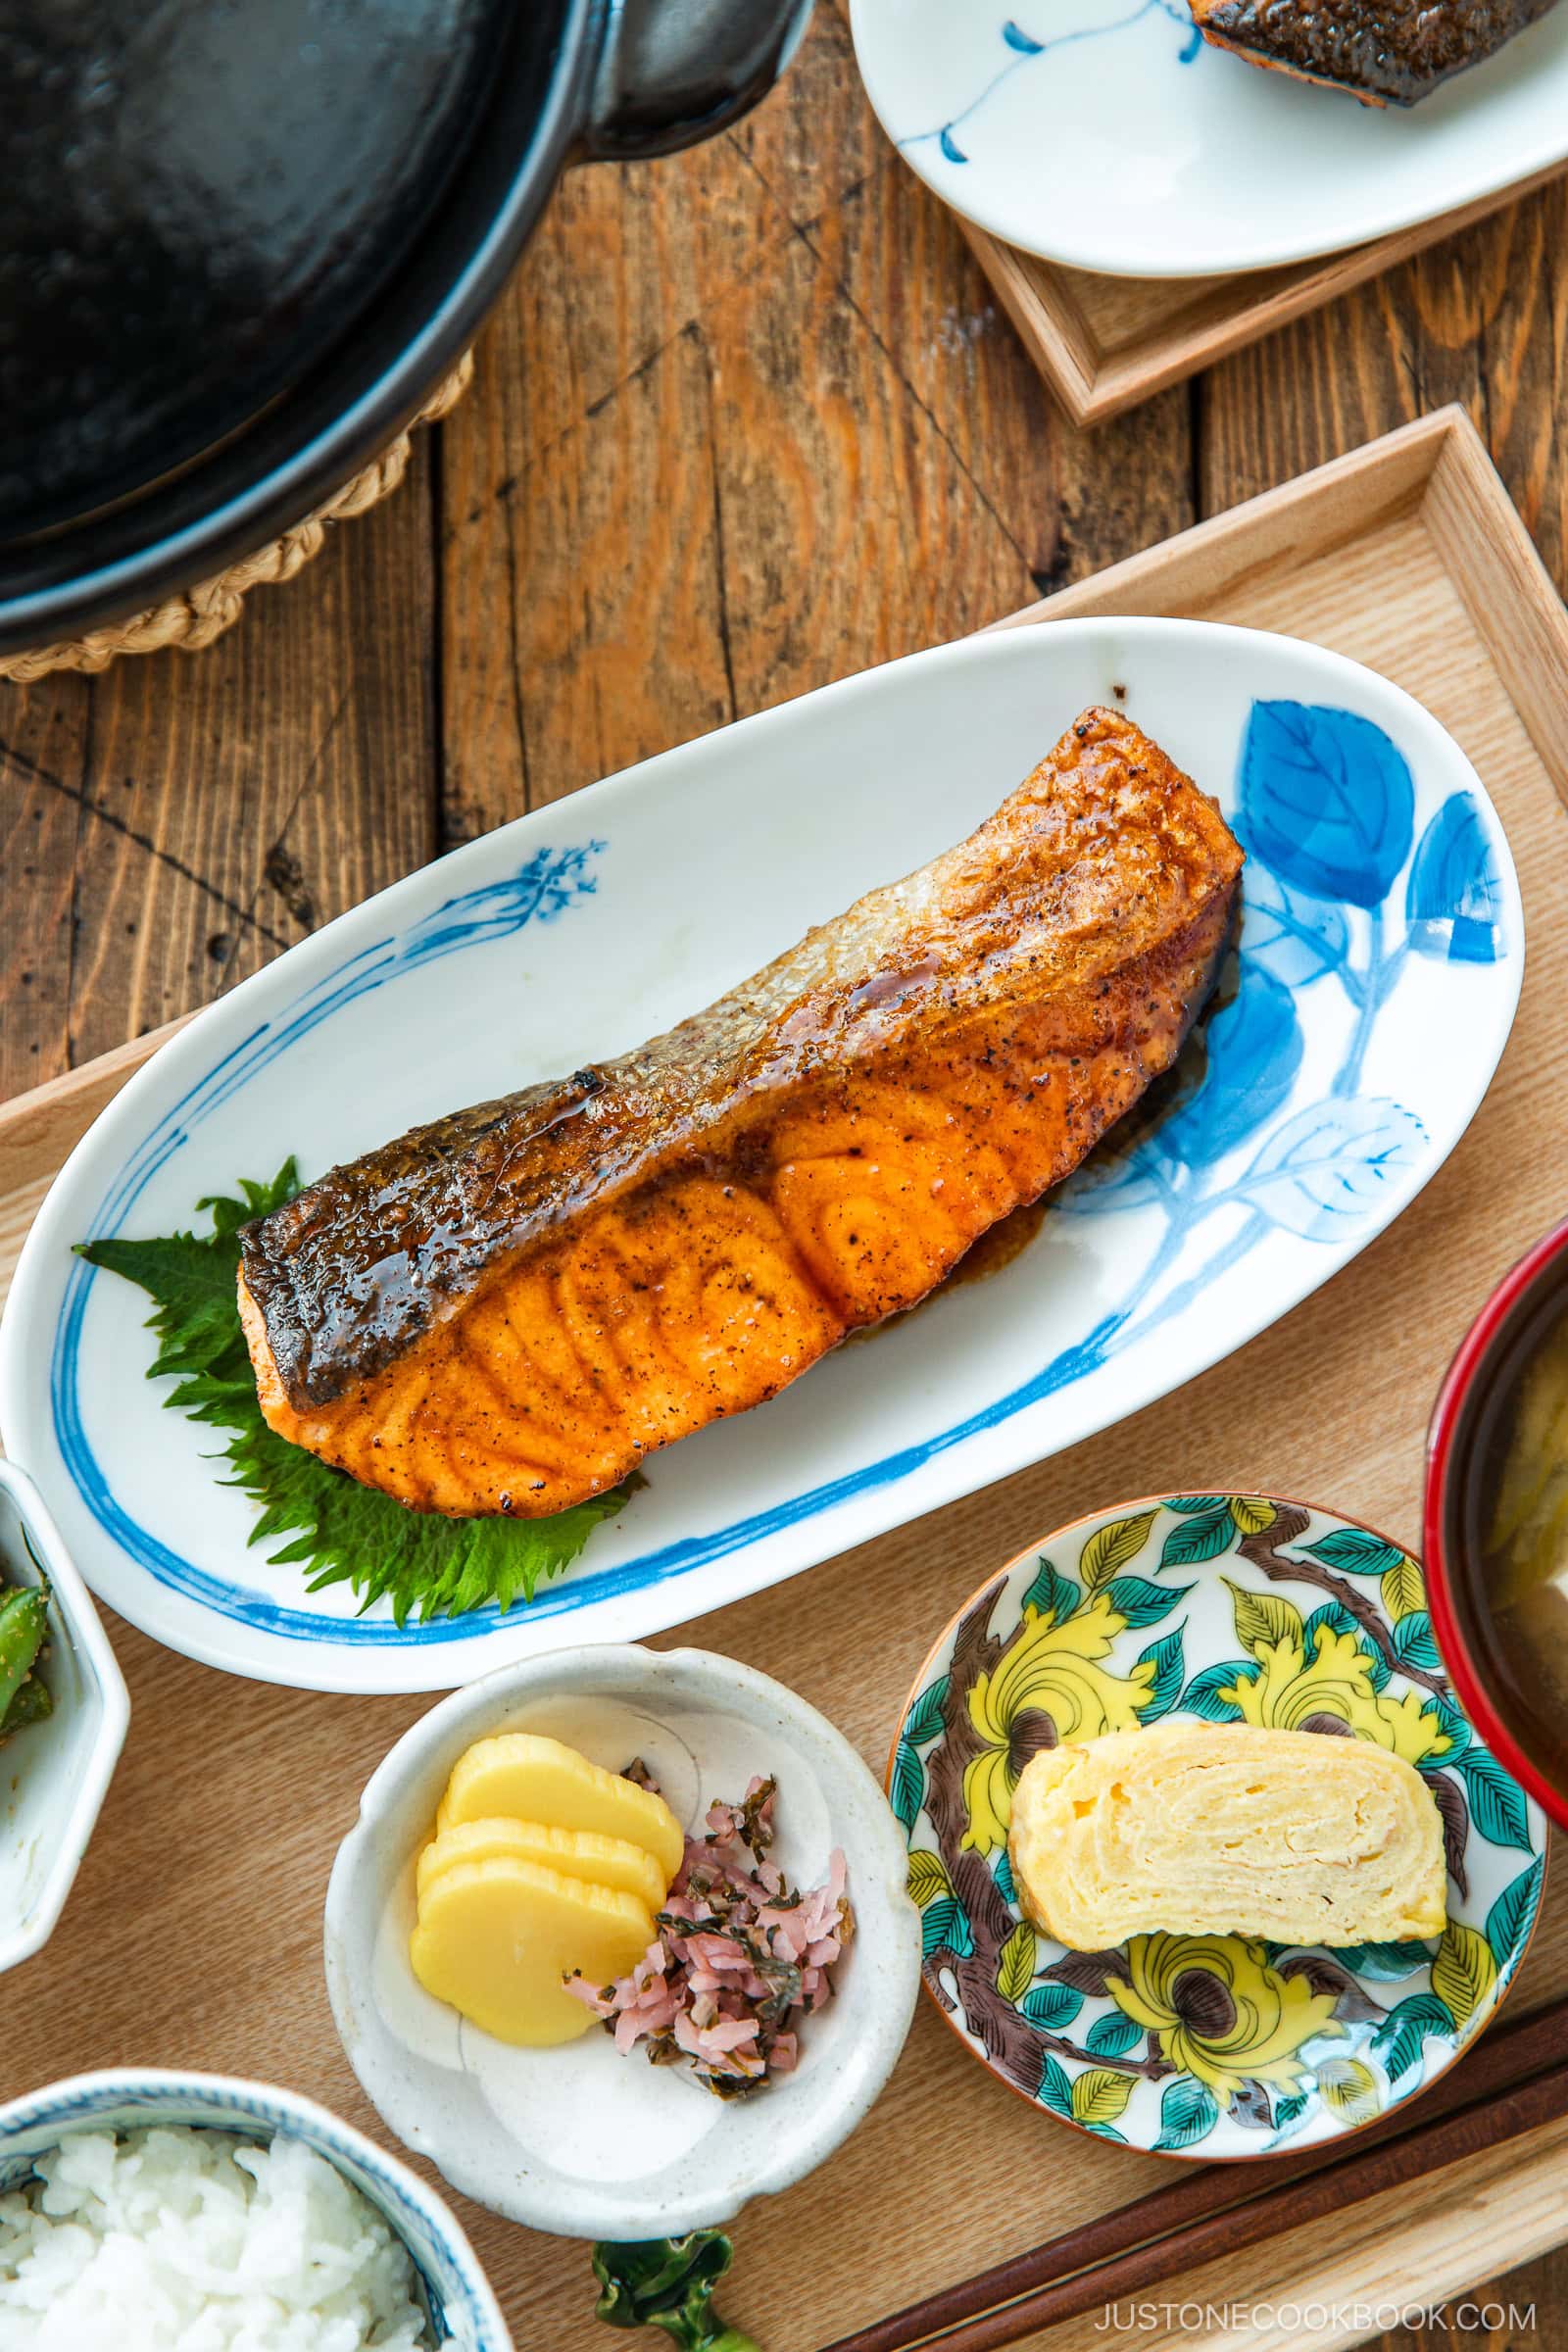
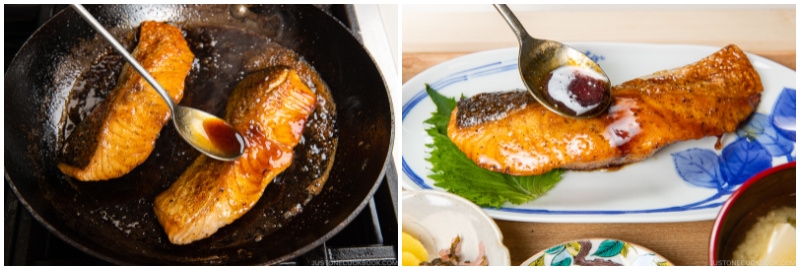
Step 5 – Transfer to a plate and drizzle the sauce. Serve the teriyaki salmon as a main dish to your meal.
Nami’s Recipe Tips
- Use thin, Japanese-style salmon fillets – Use skin-on fillets sliced thin and diagonally, about ½ to ¾ inch (1.3-2 cm) thick. This helps prevent overcooking, keeps the salmon juicy, and lets it absorb the seasoning faster. In the US, you can find them sold at Japanese grocery stores. If you buy a whole side of salmon, check out my tutorial on How to Cut Salmon into Japanese-style Fillets.
- Coat the salmon evenly with flour. This is the secret to juicy salmon! The flour creates a protective layer that locks in the umami and juices while helping the sauce to thicken and absorb better. For a gluten-free option, use cornstarch or potato starch.
- Sear the salmon skin first before laying it down. The skin is so delicious when it’s crispy. Hold the fillet and press the skin against the hot pan for 15 seconds.
- Place the presentation side (skin side) down into the pan first. The side that hits the pan while it is clean gets the best browning.
- Check the internal temperature with a digital thermometer. Use an instant-read thermometer and cook to an internal temperature of 125–130°F (52–54ºC) at the thickest part. This takes out the guesswork so the salmon cooks perfectly every time.
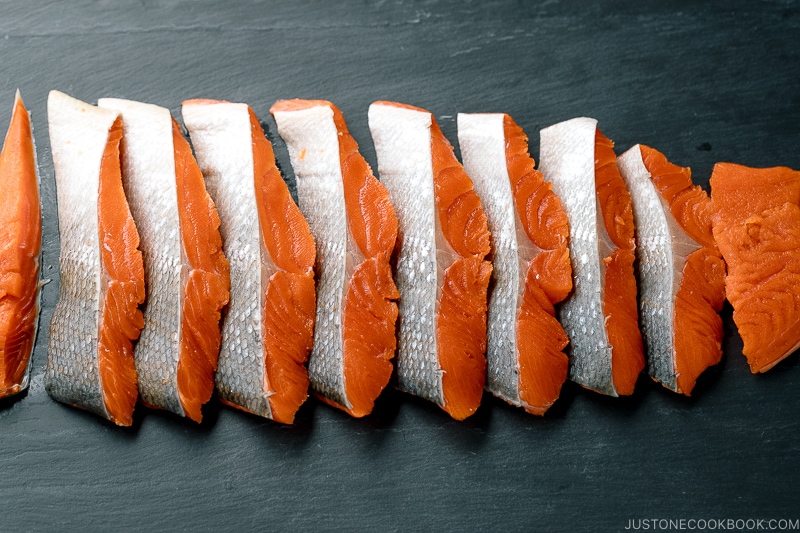 Bonus Tip: See how I cut a large Costco salmon into small, Japanese-style fillets.
Variations and Customizations
- Play with the sauce ratios. In Japanese cooking, it’s common to adjust the teriyaki seasoning ratio. Feel free to tweak the seasonings to suit your taste! For example, you could use less soy sauce or low sodium soy sauce and reduce the amount of sugar accordingly by a teaspoon or so.
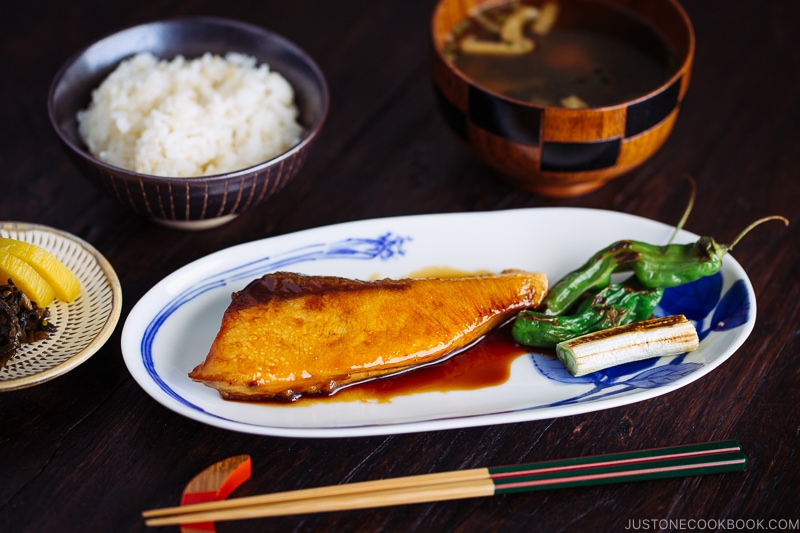
- Try a different fish. You can use this same cooking technique to make Yellowtail Teriyaki, a classic Japanese grilled fish recipe.
- Make it vegan/vegetarian. Crispy outside, soft inside—my Teriyaki Tofu offers a delicious textural contrast. Top this easy, plant-based tofu steak with a sweet-savory teriyaki glaze.
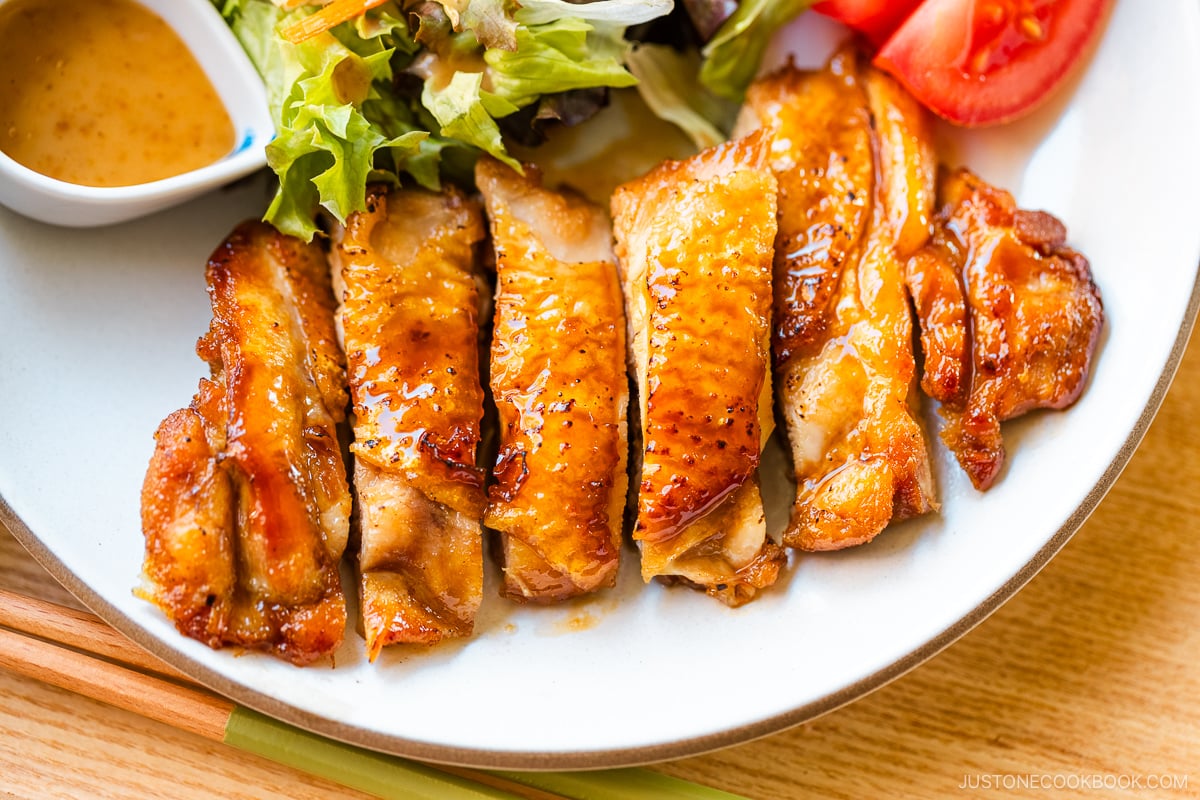
- Try it with chicken. You could skip the salmon and go straight to my Chicken Teriyaki and Teriyaki Chicken Meatballs recipes.
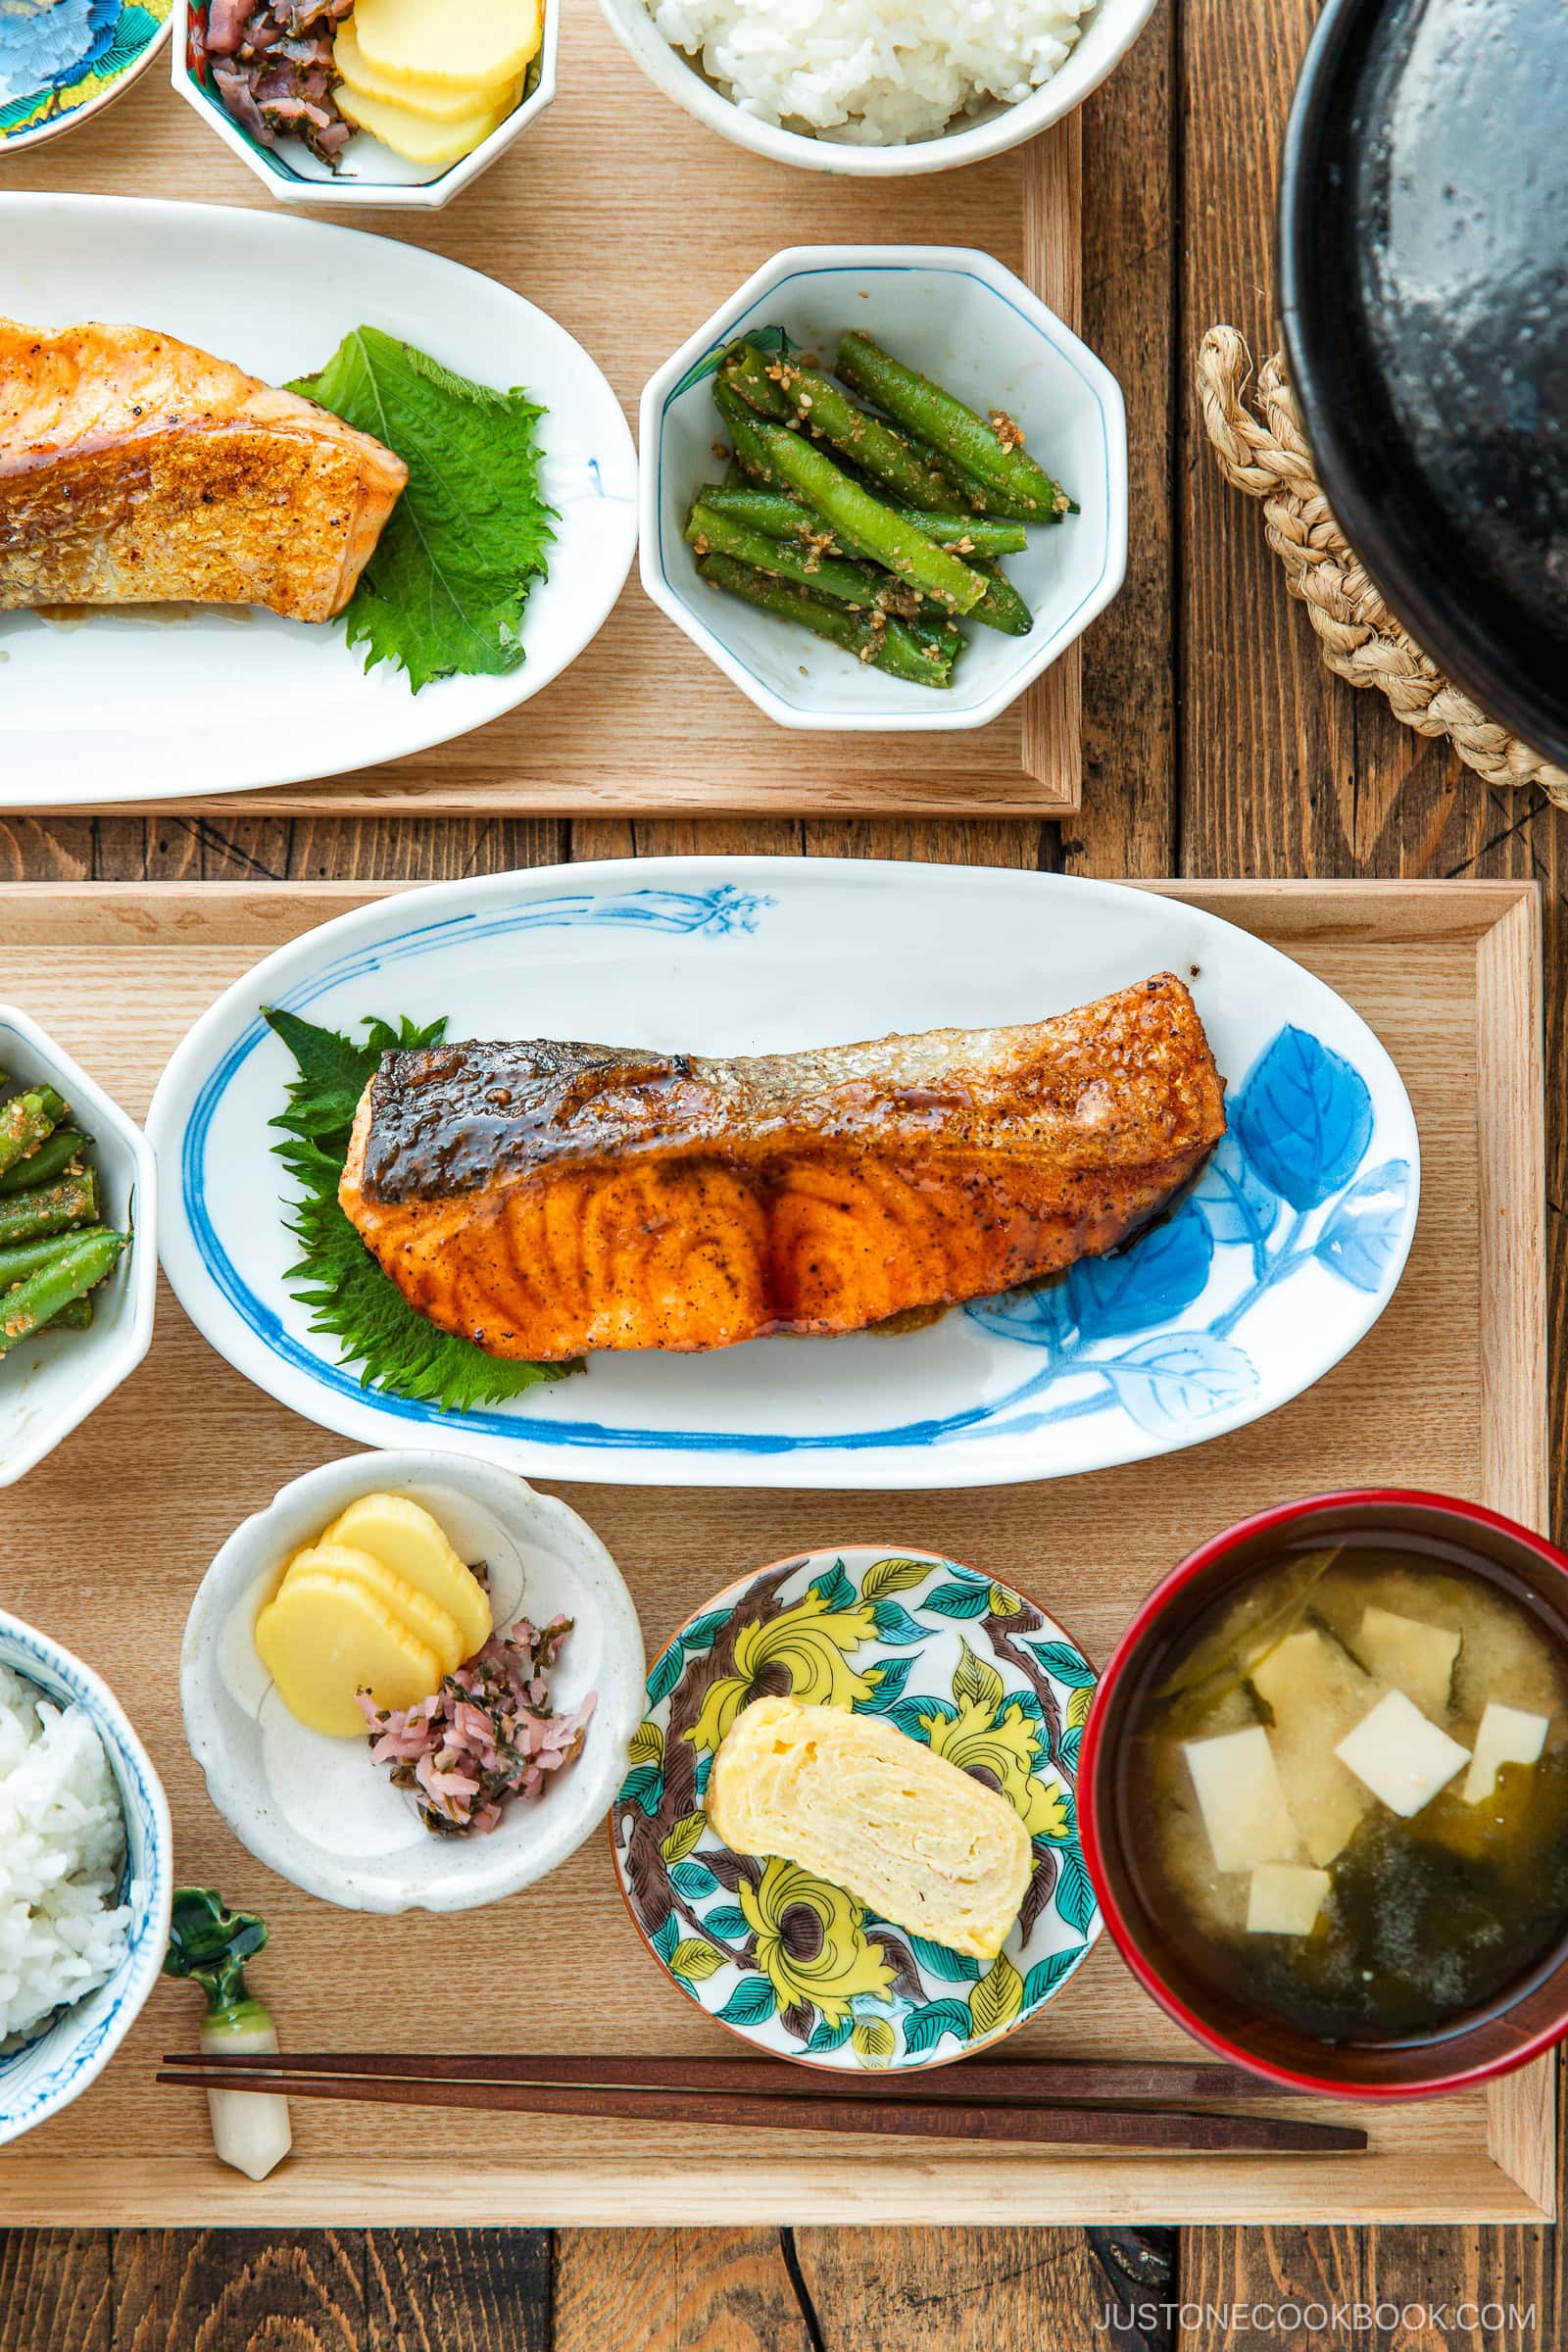
What to Serve with Teriyaki Salmon
Teriyaki salmon pairs perfectly well with many different side dishes. For a healthy Japanese-style weeknight dinner, I like to serve it with a vegetable side dish, soup, and steamed rice. Here are some suggestions I think you’d like:
- With a vegetable side – This dish goes well with refreshing veggies like Green Bean Gomaae (Sesame Dressing) or pan-seared asparagus.
- With a salad – Japanese Potato Salad is always a good choice.
- With soup – You can’t go wrong serving classic Homemade Miso Soup.
- With a Japanese rolled omelette – A slice or two of Tamagoyaki rounds out the meal!
Storage Tips
Did you know that you can do a lot with leftover teriyaki salmon? I love it in Teriyaki Salmon Bento, on a rice bowl, on Ochazuke (Green Tea Over Rice), or with noodles. It’s also great in Teriyaki Salmon Onigirazu (Rice Sandwich).
To store: You can keep the leftovers in an airtight container and store in the refrigerator for up to 3 days and in the freezer for 2 weeks.
Frequently Asked Questions
Why don’t you add rice vinegar, hoisin sauce, or sesame oil like other teriyaki sauce recipes?
Many non-Japanese recipes include ingredients like rice vinegar, honey, brown sugar, sesame oil, hoisin sauce, or garlic. While these can be flavorful, they’re not part of traditional Japanese teriyaki sauce.
For extra depth, I sometimes add grated ginger or onion, but never rice vinegar, sesame oil, or hoisin sauce. Some use a cornstarch slurry to thicken the sauce, but it’s unnecessary—simmering naturally reduces and thickens it, and the flour (or starch) on the fish helps as well.
Can I bake the salmon instead?
Follow the baking method from my Miso Salmon recipe. Make the teriyaki sauce separately and brush it on the salmon multiple times while baking for 10–15 minutes.
Why did my salmon overcook?
Japanese-style salmon fillets are thinner than typical US cuts, so they cook faster. For perfect results, use an instant-read thermometer and cook to 125–130°F (52–54ºC) at the thickest part.
Can I reduce the amount of sugar?
Yes, you can adjust the sugar to your taste. I recommend keeping some sweetness to balance the soy sauce’s saltiness. You can also use honey or maple syrup, but be careful—they burn easily.
Prep Time: 5 minutes
Cook Time: 10 minutes
Total Time: 15 minutes
For the Teriyaki Sauce
For the Salmon
- ▢ 2 skin-on salmon fillets (¾ lb, 340 g; ¾ inch (2 cm) thick)
- ▢ ¼ tsp Diamond Crystal kosher salt
- ▢ ⅛ tsp freshly ground black pepper
- ▢ 1 Tbsp all-purpose flour (plain flour) (use cornstarch or potato starch for gluten-free)
- ▢ ½ Tbsp neutral oil (for cooking)
- ▢ 1 Tbsp unsalted butter (for cooking)
- ▢ 1 Tbsp sake (for steaming; you can substitute Chinese rice wine, dry sherry, or water)
Japanese Ingredient Substitution: If you want substitutes for Japanese condiments and ingredients, click here.
Gather all the ingredients.
To Make the Teriyaki Sauce
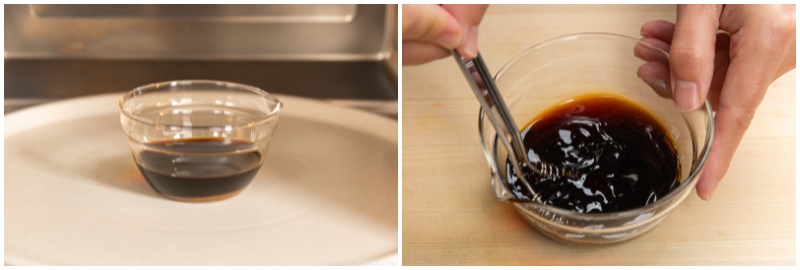
In a microwave-safe bowl, combine the ingredients for the teriyaki sauce: 1 Tbsp sake, 1 Tbsp mirin, 2 Tbsp soy sauce, and 1 Tbsp sugar. Mix well to dissolve the sugar.
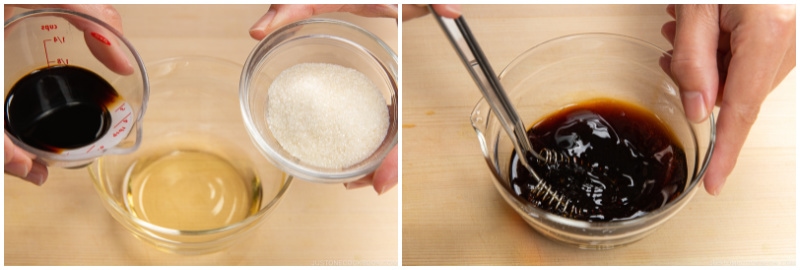
To help dissolve the sugar, you can microwave the mixture for 30 seconds.
To Prepare the Salmon
Rinse 2 skin-on salmon fillets and pat dry. Season one side with some of the ¼ tsp Diamond Crystal kosher salt and ⅛ tsp freshly ground black pepper. Tip: The salmon skin will hold the flesh together while cooking.
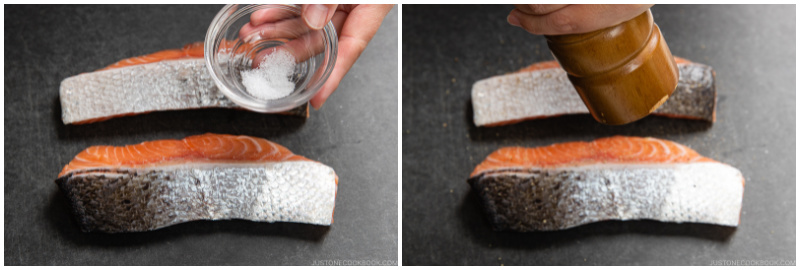
Flip over and season the other side with the remaining salt and black pepper.
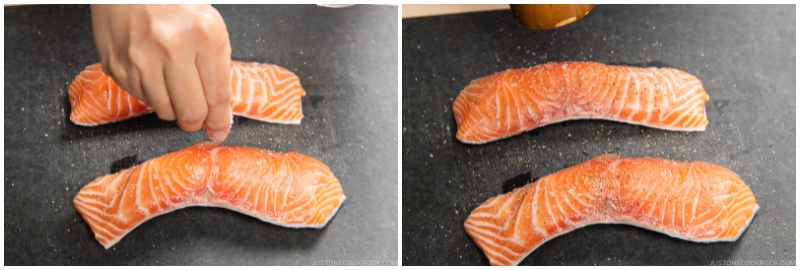
Sprinkle half of the 1 Tbsp all-purpose flour (plain flour) on one side of the salmon and coat evenly. Tip: Coating the salmon with flour helps retain its umami flavor and juiciness. It also helps absorb the sauce and thickens it.
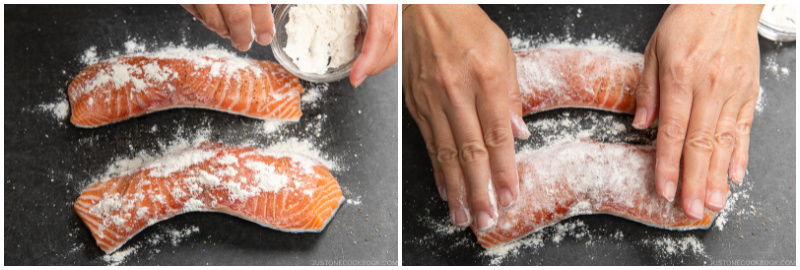
Flip over and sprinkle the rest of the flour on the other side. Gently press it to adhere, then remove the excess flour.
To Cook the Salmon
Heat a frying pan over medium heat. When hot, add ½ Tbsp neutral oil and 1 Tbsp unsalted butter. Do not burn the butter. If the pan gets too hot, reduce the heat or move the pan off the heat temporarily. Next, sear the salmon skin: One fillet at a time, press the skin against the hot pan‘s surface for 15 seconds before laying the fillet skin side down in the pan. Repeat with the other fillet. Tip: The presentation side (the skin side) should go into the pan first because you will get the best browning on the first side that hits the clean pan.
Cook the salmon for 3 minutes until the bottom is golden brown, and then flip.
To the pan, add 1 Tbsp sake—1 Tbsp for thin fillets and no more than 2 Tbsp for thicker fillets. Cover the pan with a lid and reduce the stove‘s heat to low. Steam the salmon for about 3–5 minutes, depending on the fillet thickness. If the sake has evaporated but the salmon isn‘t cooked through yet, add another tablespoon of sake and continue steaming.
Cook the salmon until it registers an internal temperature of 125–130°F (52–54ºC) at the thickest part of the fillet (I use a Thermapen instant-read thermometer). Then, transfer the salmon to a tray or plate. These fillets were about ¾–1 inch (2–2.5 cm) thick and took roughly 4 minutes to cook. Tip: The USDA recommends cooking fish to an internal temperature of 145°F (63ºC); however, the residual heat will continue to cook the salmon, so you must remove the fillets at 125–130°F (52–54ºC) to avoid overcooking.
Add the teriyaki sauce ingredients to the pan and increase the heat a bit. When the sauce starts to boil, add the salmon back to the pan.
Spoon the sauce over the salmon. When the sauce thickens, turn off the heat. Transfer the salmon to a plate and drizzle the sauce on top.
To Store
You can keep the leftovers in an airtight container and store in the refrigerator for up to 3 days and in the freezer for 2 weeks.
Calories: 274 kcal · Carbohydrates: 9 g · Protein: 24 g · Fat: 13 g · Saturated Fat: 5 g · Polyunsaturated Fat: 3 g · Monounsaturated Fat: 4 g · Trans Fat: 1 g · Cholesterol: 77 mg · Sodium: 723 mg · Potassium: 565 mg · Fiber: 1 g · Sugar: 6 g · Vitamin A: 221 IU · Calcium: 17 mg · Iron: 1 mg
Author: Namiko Hirasawa Chen
Course: Main Course
Cuisine: Japanese
Keyword: salmon, teriyaki
©JustOneCookbook.com Content and photographs are copyright protected. Sharing of this recipe is both encouraged and appreciated. Copying and/or pasting full recipes to any website or social media is strictly prohibited. Please view my photo use policy here.
If you made this recipe, snap a pic and hashtag it #justonecookbook! We love to see your creations on Instagram @justonecookbook!
Editor’s Note: This post was originally published on April 25, 2013. It was updated with new step-by-step images and the final images in March 2022, with a new video on October 13, 2023, and republished with more helpful content on February 6, 2025.


 English (US) ·